Category Archives: Farmed

Have a Cool, Cool Summer

Chilled Cucumber and Fennel Soup. A recipe for summer without the tyranny of measurements.
Chilled Out Soup Eaten Al Fresco

Things are hotting up globally. Most of the Northern Hemisphere is experiencing unprecedented heatwaves, and things weren’t much different for the Southern Hemisphere back in their summer. On days like these, no one wants to introduce more heat into the home by turning on the hob. On the hottest days, it’s even too hot to light the barbecue, or grill, if you prefer.

This recipe has been inspired by both the summer heat, and a recent trip to Madrid, where we had Gazpacho or Salmorejo with almost every meal. I also really like a good Ajo Blanco, but sadly this isn’t the Big Guy’s favourite, so we have this less often.

It’s also the height of the growing season, and my garden is straining with all of the cucumbers that one single vine is currently churning out. There is nothing better, or more tasty than a freshly picked cucumber that has been gently warmed by the sun. I need something to do with them that isn’t slicing them for sandwiches or chopping them into a salad. Of course, I’m romanticising this simple fruit. If the only cucumbers you can get hold of come straight from the chiller cabinet in the supermarket, that will also be perfectly acceptable.

Today, I’m bringing you a light and refreshing no-cook cold soup. This recipe is also a bit of a freecipe, since it will be delicious no matter how much of each ingredient you have. Hot days are not meant for the constraints of weights and measures.

I also want you to feel free to change up the ingredients to suit what you have, and what you like. I guess the main elements of cucumber, yoghurt and herbs are required, but use whatever yoghurt you like – dairy or plant-based. I suspect it will be rather good with a tangy yoghurt made from goat milk, if that’s your thing. If you don’t like fennel, leave it out. If you have mint and basil instead of the herbs listed here, also fine. The chilling time can be substituted by a 10-minute blast in the freezer, by adding ice cubes to the soup, or a combination of both. It’s hot; just do what you like.

Freecipe: Chilled Cucumber and Fennel Soup

Serves: The amount I use here serves 4 as a light lunch or 6 as a starter. If you use fewer ingredients, your servings may vary
Prep Time: 10 minutes, plus as much chilling time as you have

Ingredients

A couple of large (English) cucumbers
Half a bulb fennel, core removed
A small bunch of herbs. I used parsley, dill, and tarragon. Any herbs of your choice will be good here
A small shallot, or about a quarter of an onion, or some spring onions
A garlic clove
Citrus juice to taste. I used the juice of half a lemon. Limes or finger limes would also work well. I suspect yuzu might be interesting. Experiment with whatever citrus in whatever proportions you have
Sunflower seeds or soaked cashews (optional). I chose not to use them in the version photographed here
Natural yoghurt, quark or fromage frais of your choice. Plant-based or the dairy version is up to you. Whichever you use, use the thickest version available, such as Greek-style yoghurt.
A good glug of the tastiest extra virgin olive oil that you have. I used about 5 tbsp for this amount of vegetables.
Salt & pepper to taste.

Method

Slice each cucumber in half lengthways. Remove the seeds by pressing a teaspoon into the pulp and running it down the length of each cucumber half. I set the pulp aside, and ate it with a spoon, having first sprinkled over a little salt, whilst waiting for the soup to chill.

Chop the cucumber, fennel, herbs, shallot and garlic as roughly as your best blender will allow. I have a high-speed blender, but you can also use a stick blender. If using a stick, you’ll probably need to chop the veggies a bit finer to start with.

I personally loathe raw alliums in my food, so I took some of the sulphur compounds away by pouring hot water from a fairly recently boiled kettle over the chopped shallot and garlic. I find this is less important if I were to use spring onions, and honestly, shallots are also much less pungent than their oniony cousins. Skip this step altogether if the raw onion thing doesn’t bother you.

Pulse blend everything you’ve just chopped, the citrus juice and the olive oil to break it down a bit before you add the yoghurt. Once the chopped stuff is broken down, add as much yoghurt or alternative as you want and blend it until smooth. Obviously, the cucumber will provide a lot of water. If you want a thicker soup, add more yoghurt.

For extra protein, and a thicker consistency you can also add neutral-flavoured nuts or seeds, such as soaked cashews or sunflower seeds. If you decide to use these, add them at the same time as the veggies and pulse alongside the rest.

Once everything is smooth, season well with salt and pepper. If you want to be fancy, use white pepper, so you don’t have black specks in your finished soup. Otherwise freshly ground black pepper will be just fine. Remember that the colder the soup is upon serving, the more seasoning you will need.

Chill for as much time as you have. Overnight is best to allow the flavour to develop, but if you haven’t been that organised, as I wasn’t today when I made the soup, make it when you decide you want it; it will be fine. Today I gave it four hours in the fridge. If you only decide that all you want to eat for the meal that’s pending right now is this soup, then give it a quick blast in your freezer, and/or lob a few ice cubes in at either the blending stage or into the finished dish, depending on whether or not your blender can cruch ice. You will need to compensate for the additional liquid with more herbs, citrus and yoghurt.

Serving Suggestion

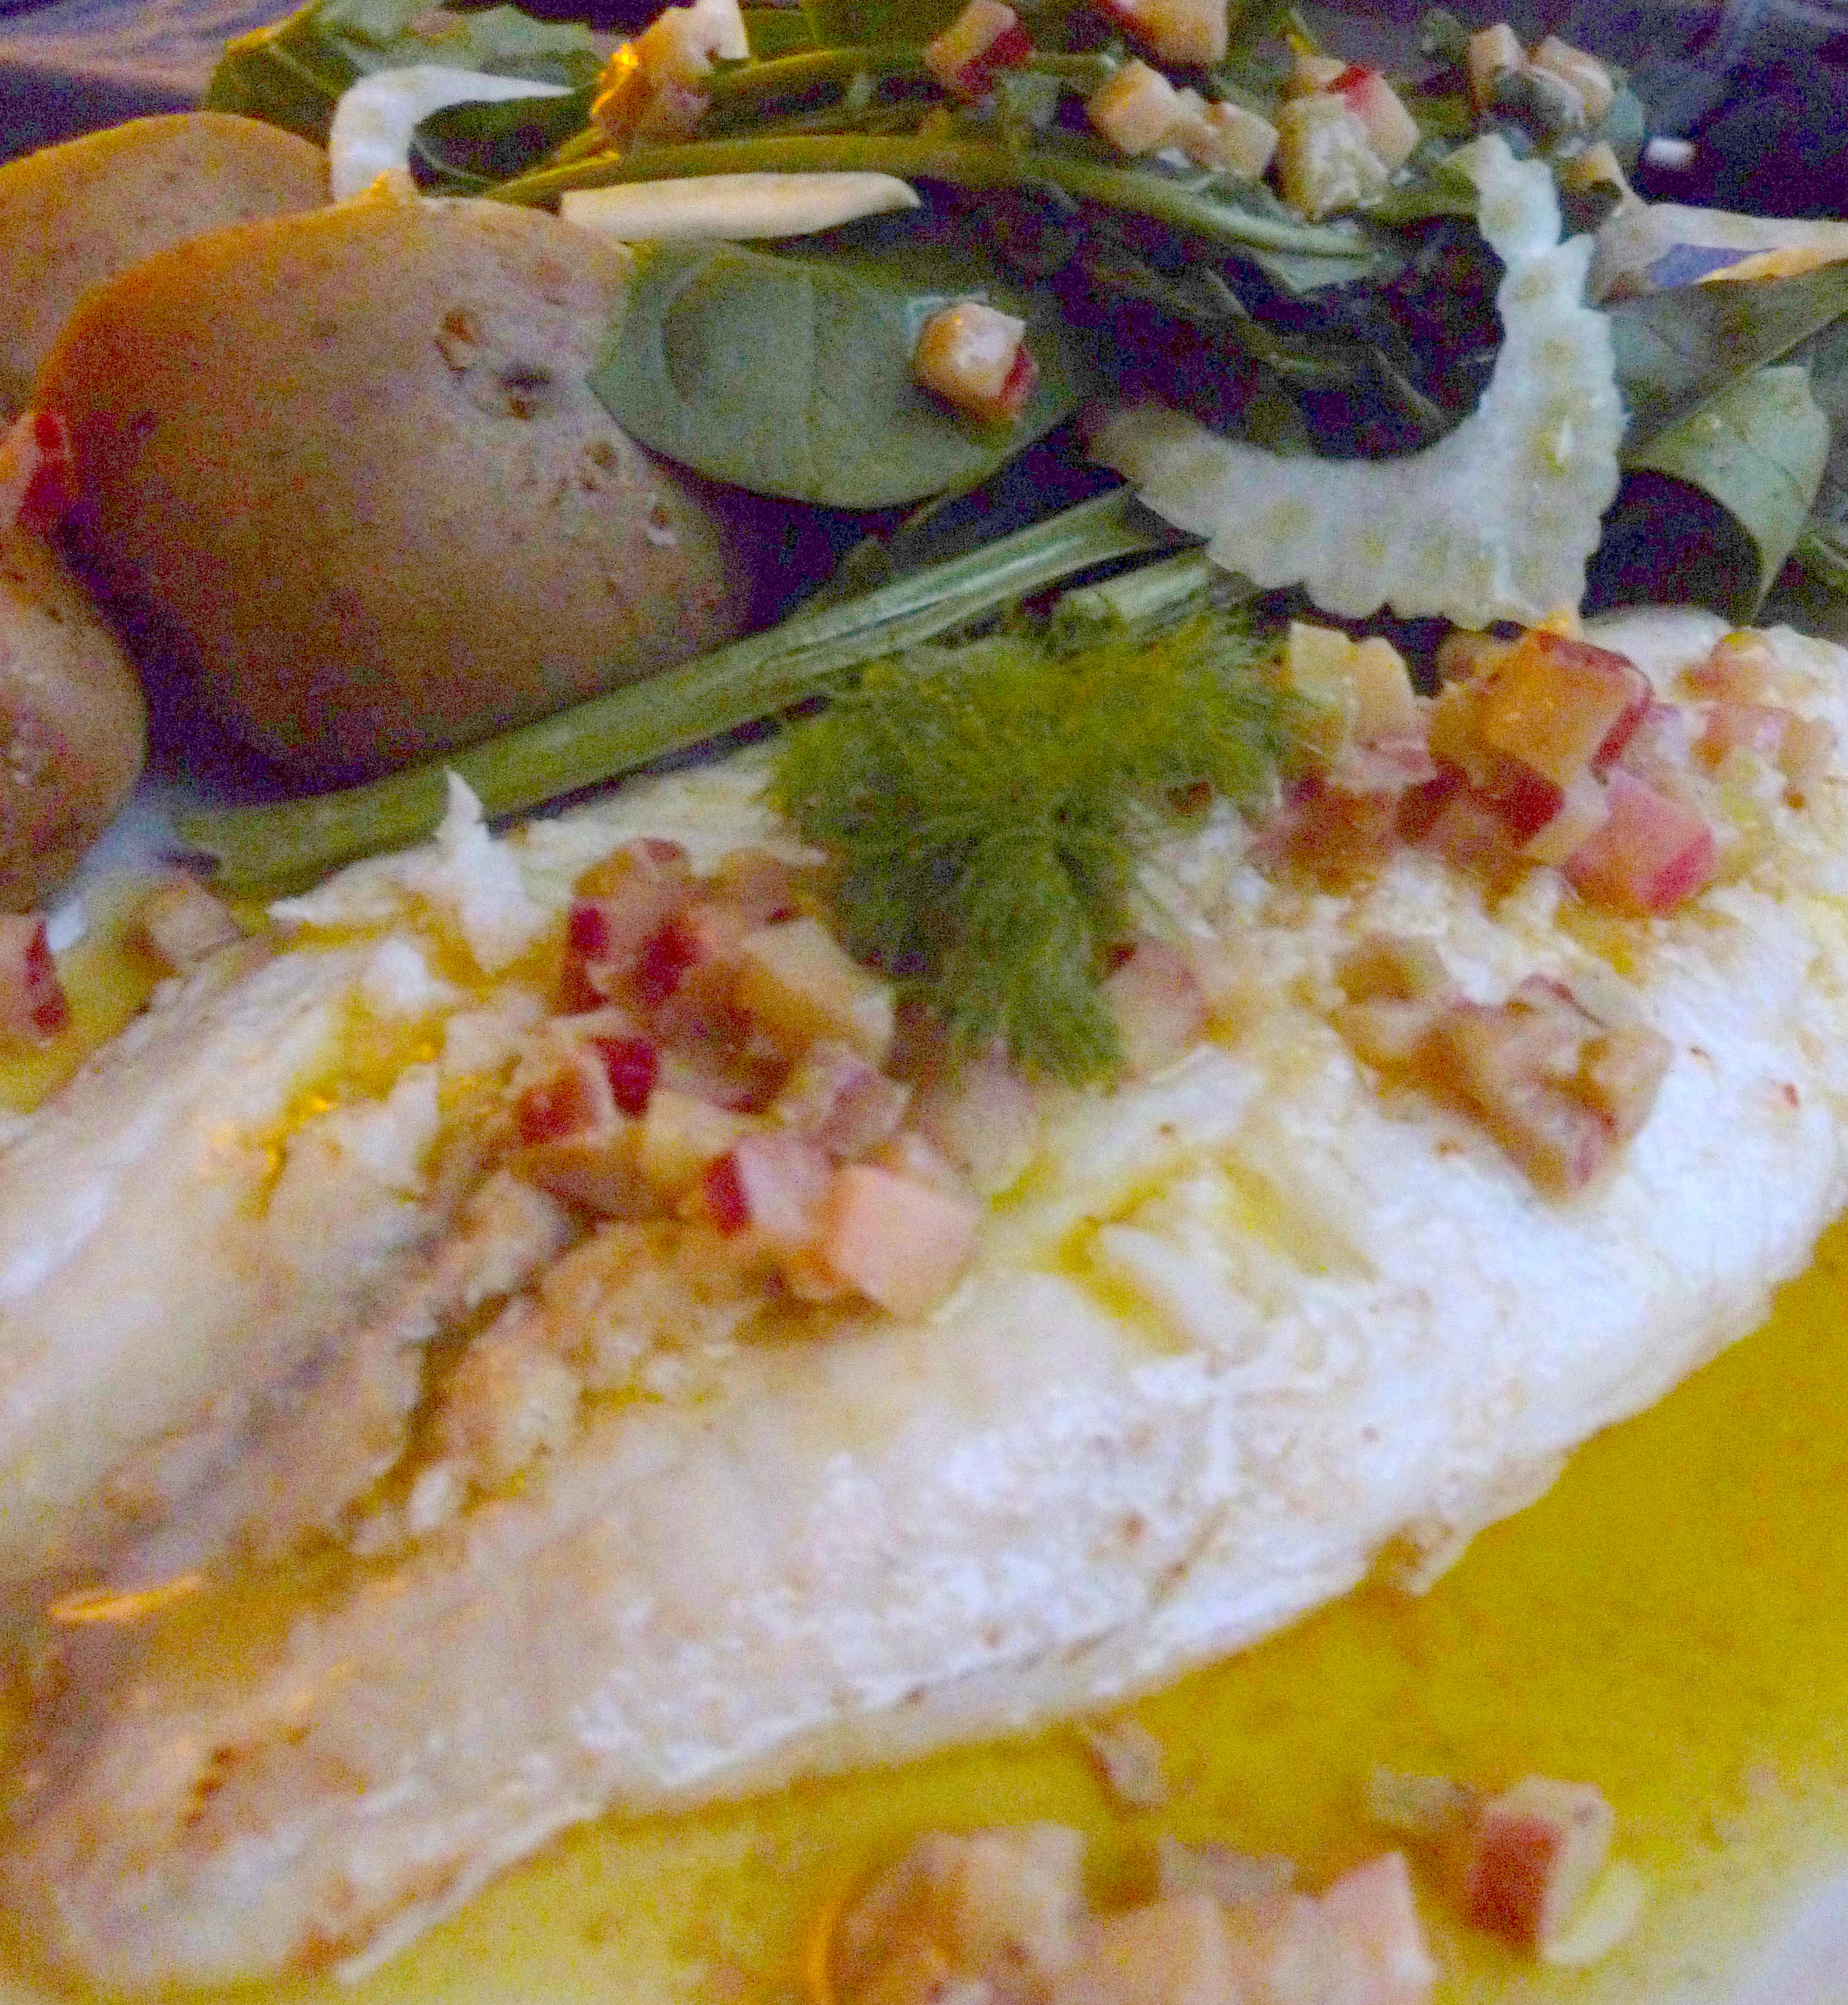
How you serve this soup depends entirely on your context. For me today, it was a quick and cooling lunch when I was too warm to do much. I had it with some lovely crusty bread, some extra finely chopped cucumber and fennel and a few fronds of dill.

I always recommend an extra drizzle of the extra virgin olive oil that you used before. You could top it with another dollop of yoghurt, croutons baked with the same herbs that you used in the soup, and many other things. If serving for a particularly posh occasion, some edible flowers will be a pretty addition. Maybe you want to add a little chopped boiled egg. The beauty of a freecipe is that you can also garnish with whatever you feel is appropriate.

The only compulsory serving suggestion is that this dish is best served on a sunny day, having had the freedom of not needing to turn on any equipment that will add to the heat of the moment.

Storage

This cucumber and fennel soup will store well in the fridge for 3-4 days, so you can make it in advance if you keep an eye on the weather forecast.

Leave a comment

Filed under Farmed

A Summer Soup for Winter, Mostly From a Cupboard

Winter Vegetable Soupe au Pistou

A Staples Stand-By

The Big Guy has been worrying about our plants. More specifically, he has been fretting over a rather leggy basil plant, that really was on its last legs. After the third day of him agonising, I decided that we should use up the whole plant. Whilst mulling over winter uses of basil, I kept coming back to the thought of soupe au pistou; the Provençal summer soup.

Try as I might, I kept returning to the pistou, which is like pesto, but without the pine nuts. In fact, I couldn’t really think of anything else, so I gave in. Instead of courgettes and peas, it had to be about what I had knocking about. Between the fridge and the garden, I knew that I could come up with the goods.

Despite the name, the original recipe is more like a summer vegetable stew;  thick with beans, squash, tomatoes and alliums, as well as vermicelli. I could easily substitute most of these for suitable winter vegetables, so I went on a domestic forage.  As well as the basil, I grew thyme, garlic, carrots and cavalo nero (amongst other things), so these were definitely going in. The fridge yielded half a butternut squash, some aging tomatoes and a leek. If I didn’t have fresh tomatoes, I would have substituted these for half a tin of chopped tomatoes. That’s the brilliant thing about store cupboard soups – you use what you have.

I was also excited to experiment with cooking dried beans in my new pressure cooker. I’m dying to test the assertion that you can cook dried beans without a pre-soak, which will be amazing for someone who can forget to do the little things, like me. However, when I went to look, the cupboard was bare of dried beans, apart from some kidney beans I have, which wouldn’t have tasted right in this soup. I am still reluctant to forego the pre-soak for these beans, due to the toxins they contain. With a sigh, I added dried beans to my shopping list and went for tinned instead. I generally prefer dried beans for taste and texture, but I always have a tin or two on stand-by, because I am also a realist about my lack of foresight. Since this was a root-around, use-up, make-d0 type of soup, I wasn’t going to go shopping for beans, so I made use of what I had.

The classic soupe au pistou always contains starch. I used vermicelli, because I had some. Other pasta shapes (especially the small ones, such as ditolini, risoni, or stellini) are fine – or you could break up spaghetti into small bits and use those. You could add rice to this soup, in case you don’t have any pasta, or you can’t eat wheat. If you use rice you’ll need to add it much earlier than I suggest adding the pasta, or use pre-cooked rice.

This soup may be a winter version of a summer classic, but the intense smell as you mash the pistou is like a shot of glorious summer in a winter kitchen.

Since this is a winter warmer, and definitely comforting, I’m entering it into this month’s Cheese Please, over at Fromage Homage. There are some really great recipes there this month, so do come over and have a look.

Cheese Please blog badge

Recipe: Soupe au Pistou du Placard

Ingredients

For the Pistou:

1 fat garlic clove

A good pinch of salt

30 g basil leaves

About 60 ml extra virgin olive oil

About 40 g parmesan cheese, finely grated (or mature vegetarian cheddar, since parmesan is not vegetarian)

1 tomato, peeled and de-seeded (optional)

For the soup:

1 leek, washed and sliced

2 carrots, diced

1 bay leaf

1 tbsp olive oil

3 cloves garlic, minced

1 tsp fresh thyme leaves, or ½ tsp dried thyme

1.5 l vegetable stock

400 g butternut squash, or pumpkin, diced

100 g cavalo nero

400 g can of cannellini beans, drained and rinsed

2 medium tomatoes, diced; or half a tin of chopped tomatoes

100 g vermicelli noodles, rice or any other small pasta shape

Method

Make the pistou. I like to use a pestle and mortar, but you can also use a small food processor. If you are using the food processor, either mince the garlic first with a chef’s knife and the salt, or grate it on a microplaner before adding it to the processor.

Whichever method you are using to make the pistou, add and blend the ingredients in this order: garlic and salt, basil, some of the oil and cheese. Be sparing with the both the oil and the cheese. You must taste as you add these, because all basil will vary. You want  fairly thick pesto, but it still needs to be flavoursome. Once the pistou is to your liking, stop adding things.

Make a concasse of the tomato and stir it through the pistou. Traditionally soupe au pistou has tomato flesh gently crushed into the pistou with a pestle and mortar, which you can also do if you prefer. If you are using tinned tomatoes, omit the tomato from the pistou, or you risk diluting it too much.

Prepare all of the vegetables for the soup. I decided to cook the cavalo nero stalks separate to the leafy greens. So, I stripped the greens from the stalks, and sliced both. Slice the stalks into 1cm chunks, like the rest of the vegetables. Slice the greens thinly, and keep them separate.

Sweat  the leek, carrot and the bay leaf in the olive oil in a deep pan, until the leek turns a vibrant green. Add the garlic and thyme and sweat off for another minute or so.

Add the stock, and simmer for a few minutes, or none at all, if you prefer your carrots crunchy. Taste for seasoning and add salt and pepper as necessary.

Add the pumpkin and cook until you can just pierce it with the point of your knife. The time required will depend on the size of your dice. It took me about 5 minutes, based on 1cm dice.

Chuck in the beans, chopped tomatoes, and cavalo nero stalks, and allow them to simmer for five minutes, before adding the vermicelli and the greens.

Allow the soupe to cook until the pasta is al dente. Check for seasoning, and serve in deep bowls, topped with a large dollop of the pistou.

16 Comments

Filed under Farmed

Asian Flavoured Beans: Not Just For The French


Asian Flavoured Beans

Beans and Buns – Getting Out Of A Glut Rut

Defrosting the freezer is often a boring, and much put-off task (although you should do it fairly regularly, to keep it running efficiently). I was forced into doing mine today. It was getting difficult to open the top drawer, and it had been jamming accusingly every time I went in there. There was definitely a sulky kind of Huh! noise when I tried to shove it back in. So I finally gave in to the nagging.

You may be wondering why I am boring you with all of this domestic drudgery (you never see Nigel Slater having to give that fridge with the camera in the back a good clean do you?).  Well, I found some hom bao lurking in there, and knew I had found lunch. These little buns freeze so well, and they really keep. Well worth making a batch when next the baking bug hits you, and freezing those that you can’t manage on the day.

As I wanted lunch to contain at least one of my five a day, I also wanted a suitable vegetable side dish. A quick ferret around in the fridge revealed a lot of unsuitable veg, and many of my home-grown runner beans, which are still coming thick and fast at the moment. I didn’t really fancy a stir fry of carrots, tomatoes and lettuce, so beans it was.

It’s funny how you can get a bit stuck into one or two ways to cook a particular vegetable. For me, runner beans are always about my ever-popular green bean chutney, or gently steamed and served with butter and black pepper. If I have to combine them with something, I go down the Lebanese route, and stew them in a garlicky tomato sauce (also very highly recommended). Something that I have never previously done with them is combine them with Asian flavours.

There are many Asian dishes that have beans in them, although they more commonly use french or yard-long beans. There is no reason that runners cannot shine just as well, especially if they are garden fresh. I wanted to stick with a vaguely Chinese style for these, since they were to accompany the Hom Bao.

This dish would also be great with a tablespoon of toasted sesame seeds sprinkled over the top at the end. As it was a cleaning-out-the-cupboards kind of meal, and I didn’t have any sesame seeds, I just left them out. You can choose which one you prefer.

I was very happy with these beans, which took on the salt and spice brilliantly. It just goes to show that a lot of new possibilities can open up for you if you go a very small way outside your usual recipes. I’m very happy to have another way to use a seasonal glut of runner beans (although it really is never a problem, I love them).

Do you have a favourite runner bean recipe? I’d love to hear about it in the comments.

Recipe: Chinese-Style Runner Beans

Ingredients

About 400 g runner beans

1 tbsp sunflower oil

2 garlic cloves, crushed to a paste

½ cm fresh ginger, finely grated

2 tbsp soy sauce

½ tsp sesame oil

Method:

String the beans (or grow a stringless variety, and save yourself a bit of time). Slice them diagonally into 1 cm thick slices. Add to boiling water on the stove, and cook over a medium heat until the water comes back to the boil again. Do not salt the water,  it will make the beans grey and there will be plenty of salt from the soy in the finished dish.

Once the beans have come back up to the boil, drain them and set aside.

Heat the sunflower oil in a frying pan or wok. Add the garlic and the ginger and cook until the fragrance of the ginger hits you. Add the beans and the soy sauce, and cook until the soy has thickened slightly.

Remove from the heat, and stir through the sesame oil and the seeds, if you are using them. Serve immediately.

5 Comments

Filed under Farmed

Dressing Up Your Dinner With Rhubarb

Tilapia Fillet and Rhubarb Vinaigrette

Best Dressed Fish This Season

Following on from my inspiration to pair rhubarb with fennel, I have been doing a few more experiments with rhubarb. I have lifted today’s idea almost wholesale from the Mister Kitchen rhubarb tasting menu. They served a sea bass with spinach and a rhubarb vinaigrette. It was great. Of course, I had to come home and fiddle about with it.

Rhubarb is most frequently eaten as dessert, and I am certainly partial to desserts and cakes with it in. People forget that it is actually a vegetable. It is seldom seen in savoury dishes, although I do know that a few bloggers have been experimenting with salads and as savoury compotes lately, so maybe there is a resurgence of rhubarb as a side dish in the offing. Who knows?

I certainly have a few more ideas that I want to try before my plant goes over this year, or I rest it in preparation for winter. Of course, once I am happy with each of the dishes, I will be sharing them here with you.

The version that I ate at Mr Kitchen had a mild olive oil, finely diced rhubarb and kalamata olives, with the stones pushed out, and the flesh torn into chunks. It was rustic and very simple. And it was delicious with the fish and the greens.

I spent quite a while messing about with various things, including shallots, herbs, black pepper, chillies, and so on. I have come to the conclusion that simple really is best. Shallots and rhubarb are both very astringent, so makes for a very sharp dressing, although that might be because I also acidulated the shallots in lemon juice first to take the rawness out of them. This combination as really an ingredient too far for me, so I ditched the shallots in favour of paring everything down

Raw rhubarb is crunchy and subtle. If you decide to follow my lead and make up a vinaigrette yourself, make sure whatever you use does not over power it. I stuck with very simple flavours for this vinaigrette – in fact it is a classic French dressing, with the addition of rhubarb. It works quite well with a pinch of chilli flakes, and with tarragon or chervil, instead of the mustard. I personally think that it is better with the more grassy olive oils, not the really punchy ones, but you may disagree.

Simple and in Season Blog Badge


Since there is nothing simpler than a vinaigrette, and rhubarb is at the peak of the season, I thought that I’d be a bot cheeky and have two entries to this month’s Simple and in Season, hosted by Ren Behan.

I do recommend that you give a rhubarb dressing a go. This one was lovely with salad and great with fish (I served it with tilapia fillet). I bet it would also be perfect with pork or chicken too.

What classic dressings do you know that might benefit from a little rhubarb?

Recipe: Rhubarb Vinaigrette

Ingredients

About 1/2 stalk very finely diced raw rhubarb

2-3 tbsp Grassy extra virgin olive oil

1 tsp Dijon mustard

Zest of half a lemon, pared

Lemon juice to taste

Method

Once the rhubarb is prepared, Whisk together the mustard, zest and olive oil.

I used lemon with this dressing, because I wanted it to go with fish. You could also team the dressing with orange. Grapefruit works as well, although you will need much less than half the grapefruit zest. Which one you choose is entirely up to you, and you can change it to match your dish.

Add the rhubarb, and season. You will need to taste it at this stage. I found that adding a little lemon juice really lifted this into a great dressing, but the amount that you will need will depend on which citrus you are using, and how sharp your rhubarb is; which will vary with age, size and how long ago it was harvested.

Serve immediately if you can, on fish, a salad, or anything you like really. It does keep for a couple of days in the fridge, but it is better fresh, because the rhubarb will lose its crunch. So simple, there’s no excuse not to give this a go!

6 Comments

Filed under Farmed

Of Seeds, Stories,Swapping, and Soup

Zaad Ruilen

On Your Marks, Get Set, Swap

(c) A. Doherty 2012

Well, what a week it’s been. I have been busy with a lot of networking, about which I hope to be able to bring you more later. Today, I am on my way to the Food Guerrilla event in Rotterdam, which I

The week started (or last week ended, depending on your viewpoint) with the Seedy Penpals, Cityplot and Mediamatic Zaadruilen (Seed exchange) on Sunday. The day started out bright and crisp, a great day for a seed swap. We headed over to the Mediamatic Fabriek with bags full of seeds, and the hope that there would be enough variety to share.

Unfortunately for us, the heavens opened just before 2.00, when the swap was due to start. Although I was inside, and couldn’t see out, I knew from the sound that it was raining cats, dogs, and probably a few farm animals as well. I am sure that this put many people off, as the mediamatic events are usually very well attended. Nevertheless, quite a few intrepid people did make it, and brought a lot of seed to boot. It was great to make connections wit more people who want to grow and share seed, and to find out about all the initiatives that there are in town, or that people want to get off the ground.

ASEED were also there. They brought seeds, and they also gave a workshop on seed saving, and the importance of maintaining plant varieties that are being lost as we see more and more of our plants (particularly food) being grown from fewer varieties that are bred to look good or last well on our supermarket shelves, or be resistant to pesticides etc.

This issue is becoming increasingly more important as we see more and more laws passed globally that try to restrict the distribution of seeds, and concentrate it in the hands of a few companies, instead of using traditional methods of saving a portion of the harvest to grow the following year. This weekend in Vienna,  a group of NGOs are getting together to discuss proposed legislation in the EU that would become even more restrictive on the sharing and saving of seeds, and the issue of owning “intellectual property” of seed varieties and genetic strains. I think that it is important to push back about this, for many reasons, and look forward to being able to do a small part in the push to amend this legislation, and make it possible to continue to grow, save and share my own seed.

People came with their own seeds, some that they had bought, but many that they had saved themselves. I took a lot of seeds, but my favourite was the runner beans that I have grown from seeds that my Dad gave me. I love to share that story, and many people were interested, and took some for themselves. I also learned a few of the stories that other people told along with their seeds too.

Making the Rangoli

Seeds of Something Beautiful

As we were doing the event along with Mediamatic, we also included an artistic element. We made a beautiful rangoli from pulses. A rangoli are colourful Indian artworks usually made from seeds, coloured flour, rice or sand traditionally made by Hindu women to use as decorations at festivals. I also learned that the form has been used to plot out a farm and the rotation system, so that you had a visual representation of what should be planted where, that is easy to follow, even if you may not read. I think that is a lovely idea.

Rangoli made with pulses

Edible Art

Since they were edibles, we thought that we would share them with the people who came to swap seeds, so we made a Souper Seed Mix. We gave packages with beans or lentils, that we used in the rangoli, plus a spice mix. Obviously, there was no way that I was going to waste all that good seed. I figured that people could then choose to plant them, or eat them.

I tested this recipie first, using home grown Harlequin potatoes, but you could use any firm-fleshed potato. It turned out that the potato was the only seed of all of the ingredients that I used that did not appear at the swap, but I expect that this was more due to the time of year.

So, here is my Rangoli Soup. A few people from the swap have already tried this, and the reports have been good so far. It seems it id good, with or without the art!

Rangoli Soup

Seeds to Form a Souper Mix

Recipe: Rangoli Soup

Ingredients:

100 g dried beans, split peas or lentils

1 tsp cumin seeds

1 tsp coriander seeds

½ tsp mustard seed

½ tsp nigella seed

1 tsp turmeric

1 tbsp tomato puree

Pinch chilli powder

1 clove garlic, grated

3cm piece root ginger, grated

1 tbsp vegetable oil

1 onion, chopped

2 bay leaves

2 sticks celery, diced

350 g potatoes, diced

2 carrots, sliced

250 g pumpkin, diced

300 ml vegetable stock

1 tin crushed tomatoes

Salt and pepper

Chopped parsley or coriander

Method:

Soak the beans in cold water overnight. If you have lentils or split peas, you skip the soaking stage. In fresh, cold water, bring the beans up to the boil and then simmer until tender. This may take between 40 minutes and an hour, depending on the type of bean. Once they are cooked, drain the water off, and set aside.

In a dry pan, toast the spice seed mix, until they brown, and the mustard seeds start to pop. Grind them to a powder.

Make a paste with the seed powder, turmeric, chilli powder, garlic, ginger and tomato purée.

Gently fry the onion,celery and bay leaves in the oil, until they are translucent.

Add the paste and cook for 2 minutes, stirring well so that the spices don’t burn.

Add the carrot, potato, pumpkin, the cooked beans,  stock and tomatoes, and cook until the vegetables are tender – about 10 minutes.

Add salt and pepper to taste.

Serve with some chopped coriander or parsley sprinkled over the top.

6 Comments

Filed under Farmed

Seeds Just Got Real!

I am very happy to announce that Seedy Penpals is going to be live at the Mediamatic Ruilen (exchange) exhibition.

This Sunday, 4th November, I shall be there in partnership with the wonderful Cityplot crew, with a load of edible and beautiful seeds that you can grow to eat, admire, save and share.

Doors open at 2.00 pm, and you can come and swap seeds of any kind, share growing tips, and tell us your growing stories, seed folklore or something lovely about your plot, whether it is a balcony, moestuin, or a field!

Why Swap Seed?

  • We all buy fewer packets of seeds, but can grow more varieties of plants
  • Less seed is wasted if you cannot plant it all in time
  • Sharing seeds allows us to preserve more varieties, especially heritage types. Recent developments in the Dutch and international seed business have led to a concentrated market and, with it, a diminished variety of available seeds.
  • We can help create wildlife habitats at home, allowing us to benefit from the beauty of flora and fauna sharing our spaces, and allowing these plants and animals to continue to thrive.
  • Fresh food and flowers will last longer for you.

What to Exchange?

  • Seeds will be exchanged on a “bring some, take some” basis. You will need to label your seeds with the common name (e.g. runner beans, or aster) and the variety if you know it (e.g. “Scarlet Emperor” or “Ostrich Plume”). It is also important to mark whether the seeds are Open Pollinated or F1 hybrids, so that others will know if they can save the seeds and get a true plant next time. If you are unsure, then we will be there to help, just bring along the original seed packet if you can
  • You can exchange flowers or edibles, and even tubers, bulbs and plug plants if you have any (although we know it is a bit late in the year for many plugs)
  • You are also encouraged to share growing tips about the seeds – do they like shade, or full sun; do they like a lot of water, or will the Amsterdam sky provide you with all they need; when to plant them?
  • We also have the facility to share stories about your growing space, folklore about your seeds, photos of your plants (if you can bring them digitally, or e-mail them to me), so you can bring them along, or write them down on the day if you like. We will also accept stories and photos in exchange for seed, if you don’t have any spare seed.
  • We will be creating a beautiful Rangoli with a few of each ruilers’ seeds throughout the day.
  • There will also be a Souper Seed Mix available for you to take away. You get to choose if you would prefer to grow these, or cook with them

More Information

The seed swap will take place on November 4, from 14.00 to 17.00 in Mediamatic Fabriek, VOC-kade 10. You can trade free entrance for a chore like an hour of barkeeping or half an hour of vacuum cleaning. Otherwise it’s € 5,- for a membership including free entrance for a month. Children half price.

The Mediamatic Fabriek is behind the Parool building in Amsterdam Oostelijke Eilanden.

The seed swap is part of Ruilen, an exhibition, events and online marketplace from October 20 till January 6. Open from Wednesday through Sunday, from 13.00 to 18.00.

6 Comments

Filed under Farmed

Seedy Cuttings And A Bonus Box

Well, another month has flown by, and it is the time that we should be giving you the opportunity to link up any blog updates that you may have. If you have a post that you would like to add to the mix, then please do feel free to use the linky below.

I have been watching the hashtag #SeedyPenpals on Twitter, and have enjoyed reading some of the tweets that you have sent to and fro about your plants and seeds etc. I thought that I would do a little bit of a round up of some of the things that I have seen around (seeing as this is a not-at-all-hastily-put-together post. Honest). I will also do a bit of blog hop of my own to see what else I can pick up, and I’ll add any #SeedyPenpals tweets here while I look for a better way to capture them.

For me, the most joy from Seedy Penpals has not been the setting up of the scheme, or the swap, discovering new seeds, or even planting them. Although these things have all been a lot of fun, and have brought me a lot of joy. Still, the thing that I have enjoyed most is all of the little things that neither Carl nor I foresaw when we set up the scheme.

On Twitter I saw that a couple of people who just missed out on the first round had organised themselves into their own private swap. I love this, I am glad that neither of them had to miss out on the fun, and I hope that they will both join all of us in the early spring. I’m also pleased that people think it’s a good enough idea to do their own.

Lovely stash of seeds has arrived from @papaver in our own mini version of #seedypenpals – looking forward to poring over them tonight

@janeperrone @papaver Brilliant, I love that you have made a mini version. You’d be welcome in the other version too 🙂 http://wp.me/P1AKrO-kJ

I have seen Carl share loads of things with other Seedy Penpals, including keffir as well as other boxes of goodies, and the usual help and advice. Of course, I am sure that he would have done this anyway; he is a very generous man who is always willing to help out. But I probably wouldn’t have seen them share, or know that people have been busy sending him things too.

And this is the thing, I have seen some old friends sharing, and I have watched new friendships blossom. And this is where the most joy has come for me. Watching these interactions, and seeing the friendships grow, even if the seeds haven’t all been planted. You are a pretty generous lot in the main, and I love to see it.

This is not to say that the seeds have not been growing. Mine have sprung to life, I’m just hoping that the frost doesn’t get them before I get home. Michelle at Veg Plotting has also updated me to say that the fennel that she was sent have done well. Although she planted them a little late to produce big fat bulbs, she has been enjoying the herby fronds in her salads. She has them under cover for the winter now, so I hope there is still quite a bit of mileage in them yet. Have you seen any progress? Let us know in the comments.

From Twitter:

Carla has already enjoyed some of her leaves

@Saralimback hello.the very baby leaves of the ruby chard are utterly delish with mixed leaves .#SeedyPenPals#thoughtYouMayLikeToKnow

Lorraine even had time to plant beans, and is cropping them now, as well as fitting in a little baking.

Outdoor work done,#SeedyPenpals beans picked for tea, now time to make my first ever bread from scratch. Have been inspired by#GBBO .

@5olly Those beans were delicious. Still more growing, not a bad haul from 6 seeds.. #SeedyPenpals

I’ll add more if you have tweeted them.

I have to admit that I am not at home at the moment, and that I don’t have the promised photos of the amaranths that I planted from my first Seedy Packet. But, my penpal Charlotte and I have also kept in touch, and this month we sent each other a food packet too.

Food Parcel

A Box of Tricks

Mine was garden inspired, and I sent her foodstuff that I had grown, made or foraged, as well as a few Dutch goodies, and some hibiscus tea (which I didn’t grow).

Semolina and Jelly Desserts

Unusual afters

All I can say about my parcel is wow; if Charlotte managed to pack this much into such a small box, then I’d love to see her skills at Tetris!

Indian Goods

Interesting Indian Food

I got loads of her favourite things, like the semolina/ jelly style desserts, the butter chicken, the sardine paste and the Reese’s pieces. She also sent me some things from her travels – the curry leaf powder, popadoms, the savoury oatmeal (yes, savoury, I am fascinated), chilli popcorn (unpopped) and a small bottle of biryani. It is fragrant with cloves, and has really got me thinking what I can use it with. It scented the box beautifully.

Portuguese Packages

Portuguese Packages

As well as the sardine pate, I got some interesting seasoning. Charlotte says it makes any savoury dish amazing, so I am looking forward to experimenting.

Chinese Foods

A Taste of the Orient

There were some East Asian delights too. A really interesting pumpkin miso, tea and pickled vegetables. I love me a good pickle, so these will be the inspiration for a good meal later in the week.

Popadoms

This Should Have Been With The Other Indian Goods

Harissa Paste

Fire in a Tube

I got a tube of a nice fiery Harrissa. I love this stuff, and will be adding it to soups, stews and many random things in the near future.

Sweet Treats

Sweet Treats

There was also some more nougat and exquisite Turkish delight. Unfortunately I scoffed most of it forgot to take photos of that, but it has inspired me to have a go at my own. I often have egg whites knocking about, due to my custard habit, and I can feel experiments in foraged fruits coming on too.

Mint and Jasmine Toothpaste

Floral Fresh

To make sure all the treats didn’t send me to the dentist, she also included this gorgeous toothpaste. Mint and Jasmine. Brilliant, definitely a change.

Thank you Charlotte, I have been so inspired by your box, and I have never tried ay of the items in it, so I’m looking forward to trying them all out.

And thanks also to all you Seedy Penpals, for bringing me such joy – especially in ways that I wasn’t expecting.


3 Comments

Filed under Farmed

Green Bean Chutney: A Taste of My Childhood

Runner Beans, Unknown var

From One Generation to the Next

Every year I grow runner beans in my garden. I don’t know what variety they are, they were originally given to me by my father from seed that he saved from his garden. I have never bought runner beans, and subsequent generations of dad’s seeds have grown successfully across four different gardens/climates and in two different countries.

We always had runner beans, fresh from the garden, throughout the summer and early autumn months. I used to take them for granted, since they always came, no matter what the weather or growing conditions that year.

After I moved out of home, I only really got runner beans if I was visiting my parents. Back then, I tended to shop in supermarkets, and runner beans were not a popular supermarket choice, maybe because it is hard to get them to be completely uniform, like the Stepford style apples and tomatoes that they prefer to sell.

When I first started to get a veg box, I got some runners, to my delight. Just like Mum used to, I settled in to string and slice them. I was jolted by a powerful memory of Mum doing this, often in front of Last of the Summer Wine on a Sunday evening.

When large amounts of beans were being prepared, I always got a bit excited, because I knew that the next day she would make Green Bean Chutney.

Just as my Dad always grew our vegetables, Mum always made a lot of our food from scratch. Chutneys, pickles and jams were no exception. In fact, I didn’t have factory produced jam until I left home; and frankly, I found it wanting.

I have always loved Green Bean Chutney. I used to have it every day at school, and all of the other kids would say stuff like “eurgh, that’s gross” and “Why do you always have that yellow stuff in your sandwiches?”. I would smile at them, safe in the knowledge that they didn’t know what they were missing, and if they didn’t want to try any, then Mum would be less tempted to give some away.

Jars of Green Bean Chutney

Sandwich Filler

Now I am older, I make Green Bean Chutney for myself. The Big Guy is a total convert as well.

As you may have seen, I am a bit of a preserving addict, so I am always giving them as gifts to friends and relatives. Despite the fact that we grow extra runner beans, so that we can make this chutney, the Big Guy still severely rations the Green Bean, in order to keep more for himself.

If I am honest, I am a little loathe to give it away, too!

So, I thought that I would share the recipe for Green Bean Chutney with you, in the hope that you can make it for yourselves, and I get to keep all of the jars that I make!

So, here is my Mum’s Green Bean Chutney. She gave it to me, but I am not really sure where she got it from originally. Maybe she can let you know, by leaving her first ever blog comment – over to you Mum?

You can  also use French Beans in this recipe, or a mixture of both French and Runners. Next year, thanks to my Seedy Penpal, Charlotte, I am going to grow a few yard long beans too, so I shall be experimenting with those as well.

My bean harvest was a little late getting going this year, but hopefully you will still be able to find some beans to try it yourself.

Do  you have any food that evokes such strong childhood memories? I’d love to hear about them.

Green Bean Chutney, Cheese and Crackers

Super Match

Recipe: Green Bean Chutney

Ingredients

I have converted this recipe from imperial to metric

3-4 jam jars

700 g runner beans (or French or other green beans, or a mixture)

1 kg  onions

Cold water to cover

1 dstsp salt

350 g demerara sugar

600 ml malt vinegar (I can;t get malt vinegar over here, so I use 500 ml white wine vinegar and 100 ml balsamic)

1 dstsp turmeric

1 dstsp powdered English mustard

1 tbsp cornflour

Method

Sterilise the jam jars in a dishwasher, or wash them in hot water, dry them and leave them in a low oven while you make the chutney. Either way, they will need to be hot when you put the chutney in it.

String and slice the beans (or use a stringless variety), making sure that they are roughly the same size – this is especially important if you use a mix of bean varieties.

Peel and thinly slice the onions. Add them to a preserving pan (or a heavy-bottomed stainless steel pan) with the beans, cover them in water, and add the salt. Cook for about 10 minutes, or until tender.

Strain the water, and return the vegetables to the pan. Add half of the vinegar and the sugar. Cook for a further 10 minutes.

Mix together the cornflour, spices and the rest of the vinegar, and mix to make sure there are no lumps. Pour this into the pan, with the vegetables.

Bring the chutney back up to the boil, and hold it there for a few minutes, until the mixture thickens. You need some liquid though, because this will stop it drying out in the jars.

Fill the hot jars with the chutney. Then distribute the liquid between the jars, so that they are full to about 3 mm from the top.

Put a wax disc, wax side down, over the chutney, and seal it with cellophane. Don’t use a lid, the vinegar will corrode the metal, and may leave you exposed to some nasty microbial activity.

Don’t discard any excess liquid, it is great in salad dressings.

You need to leave the chutney for a week to allow it to meld and mellow.

This is a brilliant accompaniment to cheese, cold meats, salads, and is a particular marvel with jacket potatoes, and bubble and squeak.

UPDATE: In a very timely way, I found out that Susan at A Little Bit of Heaven on A Plate is running a Home Made and Well Preserved competition. So I thought that I would share my lovely childhood chutney there too, and maybe win some spices (fingers crossed).

37 Comments

Filed under Farmed

Red Lettuce Day

Thai Chicken, Mango and Noodle Salad

A spicy salad with a difference

Once a week, I volunteer at an Urbania Hoeve permaculture garden. It is great fun, and I am learning a lot. Another bonus is that I have been able to experience a number of different vegetables, as well as save the seeds from them to try them in my own garden.

As you can see from the salad photo, I have used nasturtium (leaves and flowers) in this salad. This is not new to me, I’ve been eating nasturtium for as long as I have been growing them.

Despite having called this post Red Lettuce Day, the two plants that I would like to talk about aren’t actually lettuces, but they are red, and plants that were new to me this year.

The first is Perilla, or Shiso (Perilla frutescens). Although I wasn’t aware of it, I have been looking for this plant since I went to Japan for work, and wanted to have a go at growing the fragrant leaf that you find in many of their broths and ramen. They translate it as morning glory, which I was very disappointed to find isn’t edible, after I had found and started to grow it.  Following a bit of a twitter storm earlier in the year, I found and grew the green version of this, and have been eating the red version from the permaculture garden.

I really love perilla in salads. It has a distinctive perfumed flavour, with a slight aniseed kick. It is a pretty strong herb, so you don’t need a lot of this to provide you with a lot of flavour. It is also good in broths and gravies, and is used a lot in pickles in Japanese cookery.

Orache (Atriplex hortensis) also comes in red and green varieties. You may be able to find the green version in the wild over here. In other temperate zones, it is possible to find it, but it is more likely to be a garden escapee. Like most wild greens, orache tastes very irony. It can be used anywhere that you would use spinach, raw or cooked. I have some seed saved, so I hope that I can grow some here too next year.

Both seem relatively easy to grow, but they need sun, so I can only grow them in a small part of my shady garden. I don’t mind, I’m looking to use them as part of a large mix in the suitable beds anyway, and I think they’ll be fine. I hope that more people will give them a go, I can recommend them.

This is an entry for the 52 Week Salad Challenge, where there has already been much discussion about red and green lettuces, and their attractiveness to slugs. I am not sure if these plants are particularly attractive to slugs in any case, but they are certainly both very tasty in my opinion!

I made up a Thai chicken and mango salad with my haul from the permaculture garden, and I used fresh coconut, which has just hit the markets around here.  I give the recipe below, but this is really easy to tweak if you don’t have your own permaculture garden to play in, or if you want a veggie version or whatever.

For example, you can substitute Thai (AKA holy basil) or even ordinary basil for the perilla; you can swap out the orache for spinach;  you can use cooked chicken without the marinade; or you can even leave it out if you would like. If you don’t have fresh coconut, use coconut flakes. It’s pretty versatile. The key components are really the dressing and the mango, with some contrasting salad flavours and crunch. Whatever salad leaves you choose will need to be robust enough to stand their own against the other strong flavours.

As always, this recipe serves 2 people, but is easily scalable.

Do you have any leaves you think would be good in this salad?

Recipe: Thai Chicken and Mango Salad

Ingredients

If using uncooked chicken:

4 chicken thighs, boned

3 tbsp oyster sauce

2 cloves garlic, crushed to a fine paste

5 cm knob of fresh ginger

½ tbsp light soft brown sugar (lichtbastaard suiker)

pinch chilli powder

If using cooked chicken: 

200 g cooked chicken, cut into bite sized chunks

For the salad:

200 g rice vermicelli noodles

150 g fresh or flaked coconut, cut in thin strips

50 g raw cashews, roughly chopped

1 mango (it can be green or ripe), diced

1 red pepper, diced

½ cucumber. diced

2 spring onions, finely sliced

200 g beansprouts, or other sprouted seeds

10-15 red perilla leaves

Bunch of red orache leaves

Bunch of nasturtium leaves

For the dressing:

3 tbsp fish sauce (optional)

1 tbsp soy sauce

Juice and zest of 1 lime

½ fresh red chilli, deseeded and finely diced, or a pinch of dried chilli flakes

Small amount of brown sugar to taste

Nasturtium flower to garnish (optional)

Method

If you are using uncooked chicken, cut down the thighs so that they are one flat piece. Mix together the marinade ingredients and coat the chicken pieces on all sides.

Roast off in a moderate oven (about 180°C) until the chicken is just cooked. Baste it with the marinade at points throughout the cooking time. Remove from the oven, and set aside

Cook the noodles according to the packet instructions, drain, and plunge into cold water, to stop them overcooking. Drain again.

Mix up the dressing, and add to the noodles.

Dry fry the coconut, until brown and toasted. Remove from the pan, then toast the nuts in the same way.

Toss together all the salad ingredients, except the leaves, and add to the noodles. Mix well.

If you are using the marinated chicken, cut it up into bite sized dice.

Toss the chicken and the leaves through the salad. Top each one with a nasturtium flower, and serve immediately.

This makes a filling and unusually tasty salad. Perfect as an evening meal.

4 Comments

Filed under Farmed

Seedy Cuttings and Other Updates

Seedy Penpals Blog Badge

The last Friday in the month is here and now is the opportunity to update you all on progress in the Seedy Packet Patch, but I have also been doing a lot of other stuff with seeds this month that I thought that I would share.

This month has been busy for me. I’ve planted some of the amaranths and some radishes that I got as part of my first Seedy Packet. Unfortunately, I only managed to get these in this week, and there has been very little sign of sprouting so far. I will spare you a picture of bare earth, but there will be green and lovely photos next time, I promise.

We’d love to hear about any updates that you have too, so please share any posts in the linky below, in the comments, or contact me or Carl for a guest post, like Gillian did to share her Seedy Packet

News of Seedy Penpals has been spreading. I think I have probably mentioned this a lot, but I am really enjoying seeing the wider effects swapping seeds online can have. I have seen new friendships form, and other links being made. Loads of people have said very kind things about the scheme. Thanks for being wonderful penpals, for the duration of the first swap, and beyond. I hope that the community will continue to grow and support each other.

Thanks to Michelle at Veg plotting, I reached out to a gardener, who also runs a postal seed exchange; Patrick at Bifurcated Carrots. He was very generous with some tips on the practicalities of seed exchange in an international setting, and he wrote up a lovely post about Seedy Penpals. On top of that, he is practically a neighbour, so I hope to meet him very soon, and discuss all things seedy (not a euphemism, honestly)!

Last week, I found out about Cityplot. I got in touch with them (there seems to be a general theme of Seedy Penpal stuff making me braver. I’ve been reaching out in more directions than a party of octopuses on a fairground ride), and funnily enough, Ann got back to me straight away to say that she had heard of me and Seedy Penpals through Bifurcated Carrots, and she’d intended to get in touch. I love the serendipity of things like this.

I booked myself on the Cityplot Seed Saving course, run in conjunction with Urban Herbology, and from the conversation  I had with Ann, things seem to have snowballed (in the very best way).  Last Friday, I found myself meeting up with Jennie and a bunch of other enthusiastic people, and heading off to a little patch of wilderness on a burdock seed forage in preparation for the workshop on Sunday.

Burdock Plant in Autumn

Urban Warrior

Harvesting seed from a very irritating plant, covered in bandanas and swimming goggles is a very quick way to unify a group of strangers, let me tell you.

Burdock burrs, ready for picking

Prickly Customers

We all donned gloves to harvest the driest of the burrs from the plants in the patch, before having to wear more protection whilst we shook , stamped on and rubbed the burrs to encourage them to release their seedy treasures. Our unconventional attire seemed to get a lot of interest from passing dog walkers and cyclists. Some of them came and asked us why we were all covering our faces; they went off happy that we were doing no harm, and were just protecting ourselves from the prickles that cover the burrs. We did have to explain ourselves to some parks police, and the actual  police did a slow drive by a couple of times. Nothing that a friendly explanation couldn’t quickly clear up, but left us amused.

Collected Burdock Seed

The Seeds of Our Labour

It was all worth it, and we had collected and winnowed enough seeds for the workshop, plus we all got extra to take home with us. It is edible, but quite bitter. I am experimenting with bread, and I am also sprouting some, so I hope that will appear on a salad post sometime soon.

On Sunday I headed to the seed saving workshop, where there were a lot of new faces, most of whom were fairly recent gardeners, but with some more experienced people. We learned about seed harvesting for both domestic and wild seeds, discussed open pollinating, and the importance of  seed saving and sharing. It was a good mix of theory and practical work, as we headed out to the kitchen garden of the restaurant, which is maintained by Cityplot, to look at different seed type and how to save them. There were plenty of envelopes and seeds to take for all. It was really fun, and was accessible to all abilities.

I guess you are wondering what we did with all that burdock seed? Well, we made a tincture and have instructions of how to mix it, and filter it to make it usable  Everyone who attended the workshop went away clutching their tinctures, which are powerful skin and liver cleansers and a warming tonic for people who feel the cold. This was entirely new to me. I love to forage for food. I am greedy. The herbal and health side of things is not really my speciality at all. It was great to meet with new people and acquire new knowledge.

Cityplot hold a number of other workshops including vermiculture, and growing exotics. Urban Herbology run a number of similar workshops and foraging walks. If you are in Amsterdam, I really recommend them, you’ll have a lot of fun, and learn useful skills.

Also through meeting Ann, I learned that a local arts group, Mediamatic, are having a “Sharing Exhibition” and were looking for examples of sharing. I went along to tell them about Seedy Penpals. One thing led to another here, and Cityplot, and I are looking at ways we can do a seed swap as part of this art project. So, Seedy Penpals could be going from virtual to physical for a couple of months in Amsterdam.

Don’t forget that you can join Seedy Penpals anytime, and that the next swap will be taking place in February. See here for more information, and to sign up. I’d also love to read about any progress your seeds have made, so let me know more.

Disclosure: I was not paid to promote either City Plot or Urban Herbology, and neither was I asked to write about them. I paid for the course, and mention them here because it was something that I enjoyed, and is relevant to seed sharing. I think that others may enjoy their courses and get a lot from them too.

However, I have met like-minded people, and we are looking at ways to collaborate in the future on foraging and cooking, as well as the art project.  I hope that they will become friends too.


9 Comments

Filed under Farmed