Tag Archives: Taste Not Waste

WNWNW: The Imperiousness of the Imperial, or How Weights and Volumes Encourage Food Waste

Gluten Free Yoghurt Baked Cheesecake

How Do You Get Your Colleagues to Eat Food Waste? Make it Look Like Cake!

(c R. Devit 2014) 

I know that last week, I promised you a recipe, as penance for my confession that I had binned. And to some extent, you will get a guideline to produce a dish but it’s not going to be a traditional recipe. This is something that I’ve been thinking about quite a lot. I often forget to measure amounts when I cook. It took real discipline to get into the habit when I started to publish recipes here. A formula for cookery is a good place to start if you are new to a particular cuisine, technique, or even to the kitchen. But, I find that sticking rigidly to recipes can be limiting when you want to try something new, and especially when using up the contents of your fridge.

Since I decided to launch WNWNW (AKA Waste Not Want Not Wednesday), I have also been trying to reconcile the fact that bunging a bit of this and that into something doesn’t really lend itself to recipe writing in its most common form, but is the best way to use up what you have. In a very timely way, Annie, at Kitchen Counter Culture, posted about how recipes are the antithesis of food waste, since they require exact amounts. She wants to empower people to approach cookery in a freer way. I think this is what cookery really is all about. Let joy (and cooking) be unconfined!

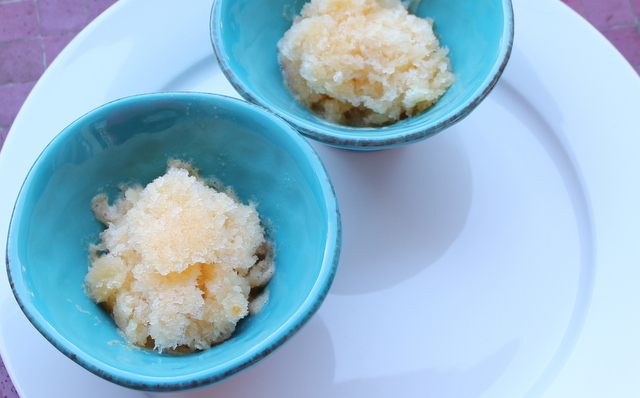
I have always been a visual cook – I start with a picture in my head, and the closer I can get to the picture, the better it works out. Then I rely on taste, and usually don’t measure anything. Cooking with the senses, rather than being bound by weights and measures. I have the confidence to do this, partly because I know what stuff goes together, but mostly through experience. The Big Guy too has learned that mushrooms, bacon, tomato, anchovies and capers should not all  appear in the same pasta sauce, but not before we had to munch our way through his salty, tangy, tomato sour creation (of course, we weren’t going to throw it away!). I hope that this series will encourage people to just try stuff. I learned that dill and mandarin are the perfect foil quite by accident, and I’m sure many of us have similarly brilliant discoveries through a make-do-and-mend way with recipes, and a suck-it-and-see attitude to trying new combinations.

So, for WNWNW, there will be no recipes with amounts and measures. Instead, I’d like to present something a lot more freehand, into which I have bunged a bit of this and a bit of that. A “freecipe”, if you will, that liberates us to chuck stuff in, and gives us permission to omit ingredients that we don’t like, or have. I’ll give a few alternative ingredients, and if you try it or similar, please also feel free to let me know what you used or substituted as well. After all, the best way to use up what you have it to use a basic technique, and ad lib a bit. Or a lot. Depending on what you find in the back of your fridge.

This week; an easy freecipe, made from a mountain of yoghurt from work that was past its sell by date, I am happy to chance it, but my more cautious colleagues would probably have thrown it out. I got around this by making it look like something else entirely. And a bonus is that this recipe is gluten-free. The only thing that I had to buy was the rice flour, but you can just as well use plain. And you can top it with any thing you like, or not at all.

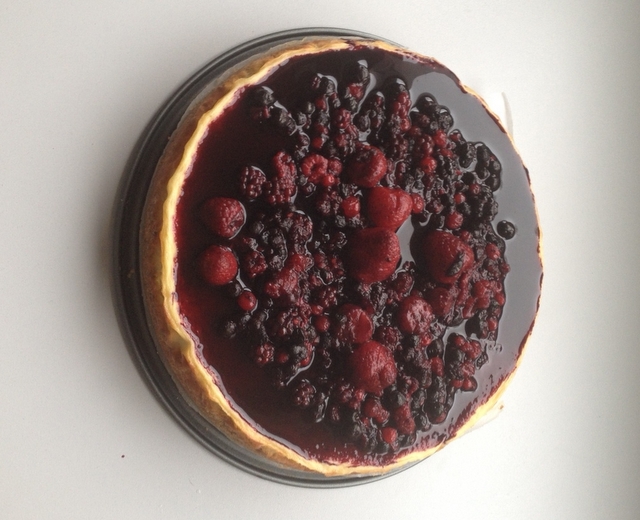
Freecipe: Baked Gluten Free Yoghurt Cheesecake

For the Base:

Some nuts (I used almost half a 250 g packet of almonds. pretty much any unsalted nut will be fine)

Some cold butter (about a quarter of a pat), cubed

Some rice flour (a little less in volume than the nuts, other flours if you prefer)

Couple of tbsp demerara sugar (or granulated white)

For the cheesecake:

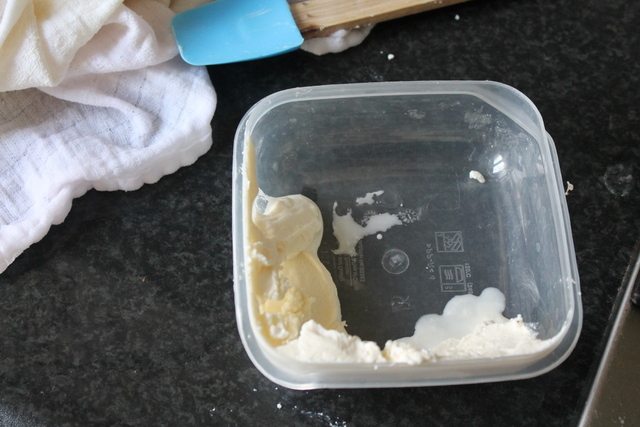
Some yoghurt (I used most of a 500 ml tub of plain greek yoghurt. I expect that flavoured yoghurt will also work)

Some cream cheese (also most of a tub. Most recipes say to use much more, but the eggs will set it anyway)

Some eggs (I decided upon 3, but adjust to make a thick custardy texture, depending on how much cream cheese and how thick your yoghurt is)

Some Rice Flour (a couple of tbsp, also to add to the consistency, but not so much that it tastes of flour. Again, the choice of flour is yours)

Some sugar (depending what additions you are using and if they are sweet, taste the mix)

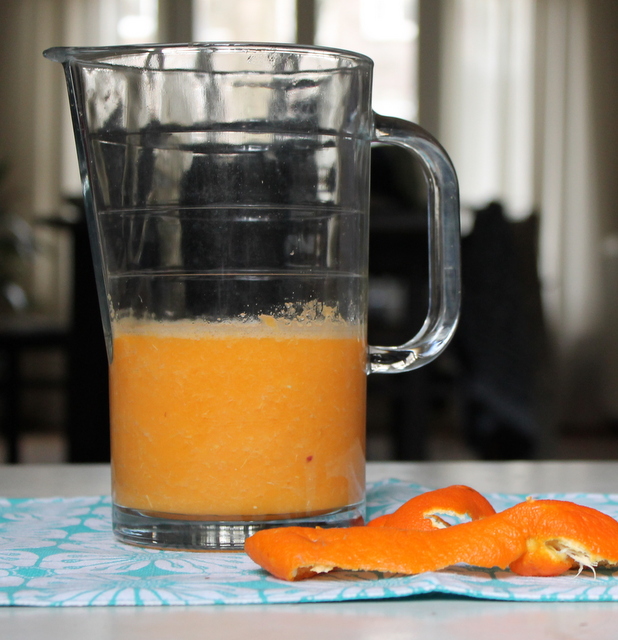
Other additions: citrus zest (I always have some in the freezer), citrus juice, cocoa powder (cut back on the flour), dried fruit, fresh berries, chocolate chips, rum soaked raisins, cold espresso, earl grey tea, flavours you like.

Toppings to choose from: frozen berries, chocolate curls, fresh fruit, coffee beans, candied citrus, candied flowers, whatever you fancy

Method: 

Preheat oven to 180°C. Line a springform cake tin with baking paper (or use a loose bottomed one, but also line the outside with tin foil to prevent leaks)

Whizz up the nuts in a food processor, until they are as fine as you like them.

Rub the rice flour and the butter in, until you have a rough breadcrumb texture. Add a little more butter or rice flour until you get it right. Stir in the nuts and the sugar.

Pour the base into the tin, and press with the back of a spoon to compact it and to cover all of the tin. Go up the sides, if you like.

Bake the base for about 15 minutes, or until it is a golden brown colour. Exact times will depend on the nuts you use. Set aside to cool.

To make the cheesecake mix together the yoghurt, cream cheese, eggs, rice flour and sugar. Beat to a smooth batter, about the consistency of thick custard. Add any of the flavourings and mix well.

Pour the cheesecake onto the base and put into the oven for 35-40 mins, or until there is still a slight wobble to the cheesecake. Allow to cool.

Top it with anything you like. Or leave it plain!


Advertisement

7 Comments

Filed under Food Waste

Waste Not Want Not Wednesdays: Bless Me Bloggers, For I Have Binned!

Kitchen Waste Compost

Gardener’s Delight

It’s confession time. I am a bit obsessed with food waste. I like to think that I am a low waste kind of girl, and can usually find some way of using up leftovers. I like to see leftovers as ingredients for another meal. I love thinking up and reading about ways to use up veg peel (in a nice stock), or butter papers (I use them to grease pans or as cartouches), or stalks from the broccoli (a lovely pesto). Kitchen scraps that are not suitable for stock feed two hungry guinea pigs, or become compost sooner or later. Gardeners, much like the Wombles, make good use of the things they find, and I like to extend this ethos to my kitchen.

However, despite having worked in reduction programmes for many years (in both carbon dioxide and food waste), and proselytising that you cannot manage what you don’t measure, I have been a little reluctant to actually measure my own waste, and have fallen into the trap of believing myself to be much more virtuous than I actually am. It’s a common problem, so I know I am not alone, but now it is come clean about my own waste.

Guinea Pigs help reduce food waste

Waste Disposal Units

Inspired by a free online course about the global food system, I am keeping a food waste diary. This has reignited my passion for sharing, So, I’m firing up the blog again, and am sharing this with you all, in a new initiative: Waste Not Want Not Wednesday. Welcome to the very first post in this series. I hope to post something most Wednesdays.

I hope that this will make me even better at reducing my food waste, and that we can share great tips for using up every last scrap. I will certainly be coming up with some novel recipes, and I would love to join up with some of the really active communities that aim to reduce food waste. One of my favourites is the No Food Waste Challenge, run by Elizabeth’s Kitchen Diary. I have reached out to Elizabeth before, and she was very helpful, so I hope to rejoin in with the round-up. I will also be doing some confessionals over on Facebook and sharing tips on Twitter, using the hashtag #FoodWasteWeds. I hope that you will join in and comment along.

A clean and ordered fridge

Cleanliness is Next to Waste-freeness

To start my food waste diary, I decided that I had to start listing all of the things in my fridge, so that I know what I have to use ASAP. Most professional kitchens and many domestic ones draw up meal plans with military precision as a way of reducing waste. I am a bit reluctant, as I am a fickle foodie, and what I decide upon one day, I may not fancy when the time comes to cook it. Instead, I have listed all of the contents in an app called Google Keep, which the Big Guy and I have been using as a virtual shopping list for ages. Now I always have access to what’s in my fridge, so I can always think up a recipe using what I have. It will probably also save me money too!

And while I am in a confessional frame of mind, I thought I should go for full disclosure. In preparation for the food waste diary, I had a really good clean out of the fridge, and really rooted out the things that are lurking in jars or the things that each person in the household had assumed the other had frozen long ago. So, I confess, here are the things that were lurking that were really a long way past their best.

  • One portion puy lentil salad
  • 3 Bloody Mary tomatoes
  • 1/2 jar black olives
  • Some crumble mix
  • 2 tbsp wild garlic pesto
  • Some japonica jam
  • 1 jar sun dried tomatoes in oil
  • Failed pectin experiment
  • Little bit of bolognese sauce
  • Small amount of yoghurt

As a penance, I will come up with a great food waste recipe for you next week.

So come on, make me feel better. What of your food was gone over but not forgotten this week?

2 Comments

Filed under Food Waste

Land of Milk and Ginger

Lacto-fermented Ginger Ale

Like Lemonade, but With Ginger

Well, I was intending to make three flavours of lacto-fermented lemonade and wittily call this post Lemonade, Three Wheys, but I’m afraid I’ve rather run out of steam and time. So, today you get the latest recipe in my cheesemaking adventures, but it is only one flavour of lemonade – ginger (perhaps confusingly).

If you Google milk and ginger the most common result is a ginger milk pudding, which is a rather soothing-sounding Chinese dish, apparently. Obviously, I did this, and had a look at some of the pictures. It reminded me a bit of junket, which I had to make for some historical food thing for brownies once. I am not a fan of junket. But then again, my junket did not have ginger in it. I am quite fond of ginger, so I may end up giving this a go.

I really wanted to have a go at lacto fermenting ginger beer, but that requires a starter or ginger beer plant, which I didn’t have time for. So, that is the reason that I am going to call this Gingerade. And let me tell you it is no worse for that!

This method is one of two ways to naturally carbonate drinks, without the need for a Soda Stream. The other way is to add yeast. It is also a really healthy drink – the whey has loads of probiotics, which you have to pay a good deal for if you buy those fancy yoghurts. Any bloating that you may, or may not relieve is entirely your own business.

I never really got fed the standard carbonated drinks when I was a child, so I never really developed the taste for them. I’d rather have water, or fruit juice than a fizzy drink (only if wine isn’t an option, obviously!), but I could definitely develop a taste for this. I tried it after three days, so it was lightly sparkling, which I liked a lot. You can get a fiercer bubble if you leave it in the warm for longer. I was happy, so put it in the fridge. It will continue to ferment in the fridge, but at a much lower rate.

I will definitely be trying to lacto-ferment ginger beer, and other lemonades, So I may be able to use my witty post title after all, and of course, I will be blogging the efforts. I’m also going to have a go at alcoholic ginger beers too, and why not – makes a change from Belgian beer for me, for sure!

I tried it today, in the my sunny spring garden, which is the perfect setting for this drink, in my opinion. Well, until I can have it with ice in the summer, of course!

Spice Trail Blog Badge

As well as this appearing as part of the Cheese, Please! Fresh Cheese Challenge (which really has been the gift that keeps on giving for me this month!) roundup, which I will be posting tomorrow, I’m going to have a second bite of the cherry at this month’s Spice Trail hosted by Vanesther of Bangers and Mash. Mostly because I really do love ginger, but also because I covet those beautiful little spice tins that are being offered as a prize this month. I can only hope, but this month there is a lot of stiff competition, with a lot of entries, many of which I have bookmarked for later.

Recipe: Lacto-Fermented Gingerade

Ingredients
30 g ginger
Juice of 2 lemons
150 g runny honey
1 tsp rock salt
4 tbsp fresh whey
2 l water

Method

Sterilise enough bottles to hold 2 l of gingerade. I used the sterilisers from my home-brew, which I find the easiest method for the types of bottles that I used. If you use wider necked bottles, then you can run them through  a hot dishwasher cycle, or wash them and put them in a low oven, as you might for making jam or lacto-fermented vegetables. At the same time, sterilise a funnel that fits into the top of the bottles that you are using.

Finely grate the ginger. I used a microplane, but if you don’t have one, use the finest side of a box grater. Mix the grated ginger with the rest of the ingredients in a large bowl, making sure that the honey and salt are really dissolved in the lemon juice before you add the water and the whey.

Before bottling, stir the gingerade well, so that you can be as sure as you can that there are bits of ginger and lemon pulp in each bottle. Fill each bottle with the gingerade. You will need to leave about 5 cm at the top.

Leave to start to ferment in your living room or kitchen. You may need to get it started by tipping the bottes over once to stir things up once or twice a day. Be careful, because once it starts to ferment, the pressure will build. After three days, test to see if the carbonation is to your liking. If it is, then store in the fridge. Remember that it will continue to ferment in the fridge, but at a much lower rate.

Serve on a sunny day. Maybe at a picnic (serving suggestion).

This recipe makes slightly more than 2 l of liquid. I used up the rest in a rather fantastic raspberry coulis, but you might just as well drink it, or add it to stewed apple or even rhubarb. Very good indeed.


18 Comments

Filed under Fermented

Under the Milky Whey

Fresh Whey and Vegetables

Chop A-Whey!

A quick look on Pinterest reveals that you can lacto-ferment pretty much anything – from garlic to hummus. I saw fruits, vegetables, herbs, spices, beers, mayonnaise, BBQ sauces and even mustard on there. Apparently it is amazing what won’t be improved by bunging in some whey.

As you know, I happen to have quite a lot of whey taking up all the space stored very carefully in my fridge.It is the yellowish liquid in the photo above, and it is the by-product of making your own cheese, or straining yoghurt.

Apart from the miracle of being the new superfood, due to all the probiotics; you can feed whey to animals, use it as a fertiliser, make various toiletries for skin benefits, and body builders dry it then consume it by the bucket load.

You can also soak beans, or grains in it before cooking, use it instead of the liquid in pancakes, cakes, and bread (or pizza dough). soups, and stock. You can even add it to shakes and use it as a cheese starter in some kind of lactose Inception.

Whatever you do with it, you should not pour it down the sink. Apparently, it can de-oxygenate water systems. So, for this reason, and the fact that I hate waste, I’m going to use mine. Don’t worry, it also freezes really well, so if you can’t get through it all, you can keep it for later.

You may have noticed that I enjoy a nice pickle, go crazy for chutney, and take pleasure in preserves. It is only natural, then,  that I should have a go at lacto-fermenting as a novel way of preserving food, and as a way to use up leftovers. I’ve had a good dig round the internet, including over at the lovely host of Cheese, Please!, who lacto-fermented cucumber and carrots to come up with the following recipes.

For the first, I wanted to be able to make a direct comparison with a pickle that I already know. I make pickled fennel a lot, based on the River Cottage Preserves book, so I used the same aromats and dill here.

The second lot are inspired by a friend of mine who makes amazing pickled cucumber from a mysterious Asian salt. I have no idea what this stuff is, but it is hot, sour and sweet at the same time. I have tried to recreate this with the whey – we’ll see where we get to.

Apparently, lacto-fermenting is pretty long-lasting, but depends on how strong the cell wall of the thing you are preserving is. You can expect the fennel to last between 4-6 months in cold storage, and the cucumber to last up to 3. The fermentation will continue, even in cold storage, so it is something to be aware of, and date the jars well before you store them in a cool, dry place.


Lacto fermented fennel and cucumber

Perfectly Preserved

Recipe: Lacto-Fermented Vegetables

Ingredients

For the Fennel:
1 tsp mixed peppercorns
1 tsp coriander seed
1 tsp fennel seed
1 bulb of fennel, cored and thinly sliced
Fronds of dill
100 ml whey
300 ml boiled water, allowed to cool
1 tbsp rock salt

For the Cucumber:
1 tsp mixed peppercorns per jar
1 tsp juniper berries per jar
1 large cucumber, in 3 cm slices on the diagonal
1 red chillies, sliced on the diagonal but seeds left in
Fronds of dill
200 ml whey
600 ml boiled water, allowed to cool
1 tbsp table salt
1 tbsp sugar

3 jam jars

Method

Sterilise your jars on a hot cycle in the dishwasher, or by washing in hot soapy water, drying and placing in a low oven for an hour.

Prepare the vegetables, and boil the water for your fermenting liquid.

To the sterile , still warm jars, add the relevant spices, then layer up the vegetables, making sure to get a layer of dill fronds in between them as you go. Pack them as tightly as you can.

Mix together the whey, water and salt, as well as the sugar for the lacto-fermented cucumber. Fill the now packed jars with the fermenting liquid, up to 3 mm from the top of the jar. Screw on the lids tightly and store in a cool dark place for between 3 days and the maximum time for the vegetables.

I intend to leave these for about a month, before I try them. When I do, I will be sure to let you know what I thought.

11 Comments

Filed under Fermented

Fresh Cheese – In the Gnudi

Ricotta Gnudi and Tomato Chilli Sauce

Naked Food

Following on from my cheese making efforts, I thought that I could have a go at making ricotta. Literally translated as “twice cooked”, ricotta is right up my alley, as a way to reduce waste, and maximise leftovers. So I set about gently heating the whey left from my mozzarella to 92ºC,  and left it to cool to about 60ºC, before straining it through a thick muslin. I was so dismayed to find that it yielded next to no additional curds – 35 g to be precise.

35 g Ricotta

Bitter curds

Convinced it was something I had done badly, I turned to Google for reassurance. Whilst the technique was sound, it appears that the whey is acid, which is not conducive to making ricotta, which needs a “sweet whey”, or one that is produced from bacterial coagulation, instead of one brought on by acid. I probably should have done a bit more homework on that before I started, it would have saved time and gas!

Not one to be put off by such things, I bottled up the whey for later use. And made more mozzarella with unpasteurised milk. Having nothing to lose, and because I wanted the whey from this batch, I decided to try and extract more curds in the only way I knew.This time, I also strained it through cheesecloth, although I found that I couldn’t squeeze this out, because the curds simply fell through it.

The difference was amazing, I got 200 g of fresh, soft curds! Whilst it is perfectly possible to make cheese with any kind of milk, I think using unpasteurised milk pays off, if you can get it. I may also have a go with milk powder just to see if this is a cheaper alternative. Plus I have a lot of rennet that I need to use up now.

I have always fancied having a go at ricotta gnudi – soft Italian pillows, not dissimilar to light gnocchi. Gnudi (pronounced nyoo-dee) are, as the name suggests, “naked” ravioli. That is; they are the ravioli filling, naked of its customary pasta. They are best served with the simplest of sauces. The Big Guy and I were both coming down with colds, and so I wanted some chilli spikes in this sauce. I wavered over chilli, garlic and olive oil; but in the end settled on a tomato sauce with chilli, in order to take it from a starter to more of a main course with the addition of a nice green salad.

As well as a delivering a lovely pasta dish, my inner four year old enjoys sniggering when I announce what is on the menu. Reports that such pronouncements were accompanied with an impromptu dance of joy are totally unfounded. Cheese Please blog badge As you have probably guessed by now, This is yet another entry for the Cheese, Please! fresh cheese challenge. I have enjoyed myself this month, and you know I hate waste, so I’m determined to use up every last bit of the milk.

Recipe: Ricotta Gnudi With Tomato and Chilli Sauce

Ingredients

For the Ricotta:
Whey from making any type of cheese, the best being sweet whey from bacterial coagulation, otherwise unpasteurised acid whey will be good.

For the Pasta Sauce:
1 tbsp oil
½ red onion, finely chopped
1 red chilli, finely chopped, removing the seeds are optional
1 clove garlic, crushed to a paste
250 g tomatoes, chopped
Salt and pepper

For The Gnudi:
200 g ricotta
Zest of one lemon
Good grind of black pepper
1 tsp thyme leaves
40 g parmesan, plus more for garnish
1 egg, lightly beaten
Approx 70 g plain flour
Large knob of butter, 1 tsp and the thyme stalks for cooking

Method

Heating whey to 92ºC to make ricotta

It’s Getting Hot in Here

Make ricotta by heating the whey gently to a temperature of 92ºC. You will need to watch it, especially as the temperature exceeds 85ºC, because you do not want this to boil over, unless you especially like cleaning. Allow the whey to cool again, to a minimum of 60ºC, but preferably lower.

Strain through a sieve lined with a cheesecloth into a container large enough to hold the whey. Keep this for more things later – such as some pizza dough, other bread, stock, soups, and something else I have up my sleeve for later this week.

What you have left is ricotta. You will need to use a spoon or a spatula to remove it from the cloth. If you have left it to dry long enough, you may have to crumble it off. This is great in sweet and savoury dishes – I’ve even found recipes for ice cream. What you do with it is up to you.

For the sauce, sweat the onion in the oil until translucent. Add  the chilli and the garlic to the pan, and allow to cook for a minute. Next, add the tomatoes, and cook them down on a low heat, stirring occasionally to prevent them sticking. When the sauce is thick and the gnudi are ready,  season to taste.

While the sauce is cooking, make the gnudi. Mix together the ricotta, zest, thyme, pepper, parmesan cheese and the egg. Gradually add the flour, and mix in until the mixture forms a ball. It may take a bit more or a bit less than 70 g flour.

Shape the gnudi with wet hands. A lot of people shape them into balls, but I liked to form more elliptical gnudi. Put them on baking paper, or another non-stick surface.

Get a deep pan full of boiling water with the salt, butter and thyme stalks in. It is important to have the pan at a rolling boil. Put the gnudi into the water and cook for about 5 minutes. When they are cooked, they will float. Drain with a slotted spoon, and add to the sauce. You may also need a tablespoon or two of the water that you cooked the gnudi in to loosen up the sauce.

Coat the gnudi with the sauce, then serve immediately with a sprinkling of extra parmesan cheese.

11 Comments

Filed under Feast

Simple, Cleansing Pork Pho

Pork Pho

A Fantasticaly Fresh TV Dinner

I have eaten rather well lately: at new lunch spots with my ladies; a rich lamb tagine, cooked for me by my friend from the Morning Claret; and a veritable feast of dim sum that I cooked up last Sunday, for the lunar new year. I had great fun doing it, but I did learn that it is probably OK to make some things in advance and heat them through on the day. There are so many intricate little dishes to make for a proper dim sum feast. I made char sui pork, with which I then made sticky rice and char sui bao (as well as chicken and mushroom hom bao). I made crispy seaweed (with curly kale), pak choi in garlic, and braised aubergine. I also made these excellent vegetarian shumai that Petra from Food Eat Love posted the other day. They were delicious, and gave me the courage to try other dumplings too. I’ve never quite understood how to tuck up the dumplings, but Petra’s clear instructions just clicked with me, and so I gave them a go. Unfortunately, I need a bit more practice before they look lovely, so there are no photos.

Encouraged by the success of the shumai, I decided to go all out, and have a go at xiao long bao, or the special pork dumplings, that are filled with mince and pork. Mine were loosely based on the Serious Eats Soup Dumplings. Nothing like a good bit of over-reaching to really show your skill. Or the limitations of it, in any case. More practice needed there, too, I think.

Don’t get me wrong, they were delicious, but not that soupy, as I managed to put slightly too much meat in the filling, and so the thin and delicate pastry broke. I’m not going to be put off, however. I was very pleased with them, and I will get better, I’m sure.

I made the Serious Eats stock for the bao, but I deviated a bit from the filling. For one thing, I don’t eat prawns, because I can’t really find any that could be said to be produced sustainably. Instead, I grated in ginger and garlic, and I put coriander through the pork mince.

After all that eating, today I was in search of something cleaner, and simpler. The Big Guy was out for dinner tonight with work, so as well as clean flavours, I wanted something simple, but that was comforting enough to settle in on the sofa with to catch up on some TV.

Having feasted so well at the weekend, I was not without leftovers, particularly the very good stock, and some of the xiao long bao filling. Despite needing the practice, I wasn’t in the mood for more dumplings, so I ventured further south for tonight’s dinner. Just like I deviated a bit from the Serious Eats filling, I have deviated a bit from a traditional Vietnamese Pho, but the resulting soup was just as fresh and comforting as I’d imagined it would be.

Cooking-with-Herbs-300x252

Since this dish contains herbs (and if I’d have had Vietnamese mint, I’d have added that too), and is Chinese/Vietnamese inspired, I have also decided that it is perfect for this month’s Cooking with Herbs, run by Karen at Lavender and Lovage. She is also hoping for recipes inspired by romance for this month, in light of it being Valentine’s day soon. I’m not so sure about all the romance, but I do know this soup is a great way to show yourself some love if you have over-indulged, or if you have a night to yourself.

Recipe: Pork Pho

The amounts given here are enough for one person.

Ingredients

For the Meatballs:

100 g minced pork

½ tsp soy sauce

1½ tsp rice wine

A pinch of sugar

A small clove of garlic, finely grated

A 1 cm piece of ginger, finely grated

Small bunch of coriander, finely chopped

For the Pho

400 ml good stock – I used chicken and pork from Serious Eats. Just chicken stock is also fine, but please don’t use stock cubes

½ tbsp fish sauce

½ carrot, cut into thin batons

1 garlic clove, thinly sliced

2 cm ginger, cut into thin batons

40 g rice noodles

2 spring onions, sliced on the diagonal

20 g mange tout, sliced on the diagonal

1 chilli, seeds in or out, whichever you prefer, sliced thinly on the diagonal

3-4 sprigs of coriander, leaves whole and the stalks finely chopped

Pinch of salt

Juice of about a quarter of a lime

Method

First, mix all of the meatball ingredients together, then roll them into small balls. You want them to be about marble size. Refrigerate for at least half an hour to help them to keep their shape.

Cook the stock with the fish sauce, garlic, ginger and carrots. Add the pork balls, cover and simmer gently for 10 minutes, until the meatballs are cooked through.

Meanwhile, cook the rice noodles. When cooked, drain, and add them and the vegetables to a deep bowl. Sprinkle  the herbs on the top.

Season the soup with salt, as required. Pour the soup over the noodles and the vegetables in the bowl, and squeeze in lime juice to taste.

Serve immediately, in front of the TV, and enjoy in peace.

9 Comments

Filed under Feast

A Summer Soup for Winter, Mostly From a Cupboard

Winter Vegetable Soupe au Pistou

A Staples Stand-By

The Big Guy has been worrying about our plants. More specifically, he has been fretting over a rather leggy basil plant, that really was on its last legs. After the third day of him agonising, I decided that we should use up the whole plant. Whilst mulling over winter uses of basil, I kept coming back to the thought of soupe au pistou; the Provençal summer soup.

Try as I might, I kept returning to the pistou, which is like pesto, but without the pine nuts. In fact, I couldn’t really think of anything else, so I gave in. Instead of courgettes and peas, it had to be about what I had knocking about. Between the fridge and the garden, I knew that I could come up with the goods.

Despite the name, the original recipe is more like a summer vegetable stew;  thick with beans, squash, tomatoes and alliums, as well as vermicelli. I could easily substitute most of these for suitable winter vegetables, so I went on a domestic forage.  As well as the basil, I grew thyme, garlic, carrots and cavalo nero (amongst other things), so these were definitely going in. The fridge yielded half a butternut squash, some aging tomatoes and a leek. If I didn’t have fresh tomatoes, I would have substituted these for half a tin of chopped tomatoes. That’s the brilliant thing about store cupboard soups – you use what you have.

I was also excited to experiment with cooking dried beans in my new pressure cooker. I’m dying to test the assertion that you can cook dried beans without a pre-soak, which will be amazing for someone who can forget to do the little things, like me. However, when I went to look, the cupboard was bare of dried beans, apart from some kidney beans I have, which wouldn’t have tasted right in this soup. I am still reluctant to forego the pre-soak for these beans, due to the toxins they contain. With a sigh, I added dried beans to my shopping list and went for tinned instead. I generally prefer dried beans for taste and texture, but I always have a tin or two on stand-by, because I am also a realist about my lack of foresight. Since this was a root-around, use-up, make-d0 type of soup, I wasn’t going to go shopping for beans, so I made use of what I had.

The classic soupe au pistou always contains starch. I used vermicelli, because I had some. Other pasta shapes (especially the small ones, such as ditolini, risoni, or stellini) are fine – or you could break up spaghetti into small bits and use those. You could add rice to this soup, in case you don’t have any pasta, or you can’t eat wheat. If you use rice you’ll need to add it much earlier than I suggest adding the pasta, or use pre-cooked rice.

This soup may be a winter version of a summer classic, but the intense smell as you mash the pistou is like a shot of glorious summer in a winter kitchen.

Since this is a winter warmer, and definitely comforting, I’m entering it into this month’s Cheese Please, over at Fromage Homage. There are some really great recipes there this month, so do come over and have a look.

Cheese Please blog badge

Recipe: Soupe au Pistou du Placard

Ingredients

For the Pistou:

1 fat garlic clove

A good pinch of salt

30 g basil leaves

About 60 ml extra virgin olive oil

About 40 g parmesan cheese, finely grated (or mature vegetarian cheddar, since parmesan is not vegetarian)

1 tomato, peeled and de-seeded (optional)

For the soup:

1 leek, washed and sliced

2 carrots, diced

1 bay leaf

1 tbsp olive oil

3 cloves garlic, minced

1 tsp fresh thyme leaves, or ½ tsp dried thyme

1.5 l vegetable stock

400 g butternut squash, or pumpkin, diced

100 g cavalo nero

400 g can of cannellini beans, drained and rinsed

2 medium tomatoes, diced; or half a tin of chopped tomatoes

100 g vermicelli noodles, rice or any other small pasta shape

Method

Make the pistou. I like to use a pestle and mortar, but you can also use a small food processor. If you are using the food processor, either mince the garlic first with a chef’s knife and the salt, or grate it on a microplaner before adding it to the processor.

Whichever method you are using to make the pistou, add and blend the ingredients in this order: garlic and salt, basil, some of the oil and cheese. Be sparing with the both the oil and the cheese. You must taste as you add these, because all basil will vary. You want  fairly thick pesto, but it still needs to be flavoursome. Once the pistou is to your liking, stop adding things.

Make a concasse of the tomato and stir it through the pistou. Traditionally soupe au pistou has tomato flesh gently crushed into the pistou with a pestle and mortar, which you can also do if you prefer. If you are using tinned tomatoes, omit the tomato from the pistou, or you risk diluting it too much.

Prepare all of the vegetables for the soup. I decided to cook the cavalo nero stalks separate to the leafy greens. So, I stripped the greens from the stalks, and sliced both. Slice the stalks into 1cm chunks, like the rest of the vegetables. Slice the greens thinly, and keep them separate.

Sweat  the leek, carrot and the bay leaf in the olive oil in a deep pan, until the leek turns a vibrant green. Add the garlic and thyme and sweat off for another minute or so.

Add the stock, and simmer for a few minutes, or none at all, if you prefer your carrots crunchy. Taste for seasoning and add salt and pepper as necessary.

Add the pumpkin and cook until you can just pierce it with the point of your knife. The time required will depend on the size of your dice. It took me about 5 minutes, based on 1cm dice.

Chuck in the beans, chopped tomatoes, and cavalo nero stalks, and allow them to simmer for five minutes, before adding the vermicelli and the greens.

Allow the soupe to cook until the pasta is al dente. Check for seasoning, and serve in deep bowls, topped with a large dollop of the pistou.

16 Comments

Filed under Farmed

From the Last Food of Christmas

Easy, handmade mandarin and dill sorbet

Edible Things Gave to Me
A Sorbet From the Mandarin Tree

I bet a few of you still have some things knocking about after the Christmas holidays. Especially mandarins.

As you may have noticed, last year was the year that I discovered the joys of combining desserts with herbs. People have been putting things like mint, basil and lemon balm in desserts forever. Last year, I mostly branched out into fennel, with my Rhubarb Foolish and Fennel and Strawberry Tarts. This year, I see no reason to stop experimenting.

I got inspiration for this dish from taking a quick break from the Christmas prep and sneaking off for five minutes with a mandarin. I must have still had some dill on my hands from the Gravad Lax. What I ended up with was inspiration. This is a great combination, as if they were made to go together. The dill is actually pretty subtle in this, it somehow seems to enhance the mandarin flavour, making it really sing on your tongue.

Easy way to juice mandarins

Top Tip!

Mandarins can be a little bit hard to juice by hand. Well, hard on the hands anyway, as I found out last year when making marmalade. Their skins are so soft and thin, that if you have any number to juice, it becomes uncomfortable very quickly.

If you have a fancy juicer, all well and good. If not, and you ever have to juice a few mandarins, this tip will save you from feeling that you have juiced more of your hand than you did the fruit. Peel them, then bung them in a jug and juice them with a stick blender. Pour the resulting juice through a square of muslin. You can either leave it to drip through for a few hours, if you want a very clear juice; or you can squeeze it through straight away if you don’t mind a cloudier juice.

Tips for using clumped sugar

Rock Sugar

In fact, I’m full of top tips today. When cleaning out the cupboards recently, I came across half a bag of badly-stored sugar, that had got a little damp at some point. As you know, I hate to waste food, so I kept this, knowing that I would find something that it would be suitable for. This recipe is just the thing, because it requires a simple syrup. I just put it in a ziplock bag, wrapped it in a couple of tea towels, and bashed out the lump with a hammer. It wasn’t fine sugar, but I could get the right amount out to melt gently into a syrup. Obviously, it would have been better not to abandon it to its fate in the first place, but I feel good that it didn’t go to waste.

And talking of not wasting food, this recipe also uses another the things that I always have knocking around in my fridge or in the freezer – egg whites. I absolutely love sweet and savoury egg-based sauces, and make all manner of custards, hollandaise and fresh mayonnaises on a regular basis. I am always in need of recipes for egg whites. If you have more suggestions, please do share.

As well as using up all the leftovers, this clean, bright and refreshing sorbet is the perfect antidote for the heavy and rich Christmas foods we have been eating recently. It is also a really easy recipe, to make, even if you don’t have a ice cream maker (which I don’t).

Cooking-with-Herbs-300x252

Coincidentally, this recipe really fits the brief for this month’s Cooking with Herbs, run by Karen at Lavender and Lovage, so I’ve entered it on her blog. There are always so many great recipes there, so hop over with me at the end of the month to have a look.

Recipe: Mandarin and Dill Sorbet

Ingredients

8 mandarins, preferably unwaxed

200 g granulated sugar

300 ml water (and maybe a little more)

about 25 g dill

1 egg white

Method

Wash and zest six of the mandarins, and juice all of them, using the handy method I outline above.

Put the zest, sugar, water and dill in a saucepan. On a gentle heat, melt the sugar, and then bring to a boil. Once it is boiling, cook the syrup for a further five minutes, then leave to cool for ten minutes.

Taste the syrup. At this point, you should be able to taste the dill quite well, but it does come after the less-subtle mandarin punch. If the dill is enough for you, set the syrup aside to go cold. If you are having trouble tasting the dill, add a few more sprigs to the syrup, before you set it aside.

Once the syrup is completely cold, strain it through a fine sieve, add the juice, and make it up to a total of 600 ml with cold water, if it falls short.

Pour the entire mix into a shallow container with a lid. An old ice cream tub is ideal. Freeze it for about 4 hours, until the sorbet is thick and syrupy.

Whisk the egg white to form soft peaks. Put the sorbet mixture into a mixing bowl, and whisk it thoroughly to break up the ice crystals.

Add a little of the sorbet to the egg white, and mix it in thoroughly. Fold the rest of the sorbet to into the egg white.

Return to the container and freeze again. Check it after a couple of hours to see if the egg white has separated a little. If it has, re-whisk it.

The sorbet will be ready after seven hours from when you added the egg white, but stores well for longer. Remove from the freezer 10 minutes before serving.

This should be easy enough to make in an ice cream maker, too. I guess you will need to churn it for a bit, then add the whisked egg white, then churn again. Just follow the manufacturer’s directions for the rest.

17 Comments

Filed under Feast

Pytt i Panna – Swedish Ways With Leftovers

Pytt I Panna

Leftover? Not Any More

Happy New Year to you all, I wish that you’ll get what you need this year.

I rang in the New Year with friends old and new, and some fantastic food made for me by my friend who writes the Morning Claret. As you might expect, this was accompanied by some excellent wines.

I usually start the year with a few resolutions. As the road to hell is paved with good intentions, and I didn’t have the best year in terms of regular blogging last year, I decided that this year, I would settle for simply committing to at least one blog post a week for the next 52 weeks. I already have a few that I want to share with you, and I have some great ideas for recipes that I am going to be testing for you in the near future.

If I get this done this year (with some much improved photography this year, thanks to my new camera the Big Guy bought me), then I will consider this a resolution well met. However, if you made any resolutions, I’d love to hear about some of yours.

Regular readers will know how much I love leftovers. To me they are ingredients to make delicious new dishes from. Pretty much everything can go to making new edible things. I use scraps in my stock, make trifle when life hands me leftover panetone, and even make ice cream from leftover mincemeat (which I think is an idea I got from Nigel Slater, so I won’t be blogging about that). If all other inspiration fails, there is always soup, which is often the best when you tinker about to use up the contents of your fridge.

There is always one dish that you can rely on to use up all the bits and bobs left over from a large meal. For Brits, it is Bubble and Squeak. The Chinese might fall back on a fried rice dish. If you are Swedish, you make Pytt i Panna – literally translated as “pieces in the pan”.

Since many of their meals rely on meat, vegetables and potatoes, this staple is as versatile as bubble and squeak. If you can fry it, it will go in. You can use up leftover cooked veg, or you can use up those sad old specimens that you’d intended to make something with, or the knobbly ones from the veg box that you have run out of inspiration for. You can also use a mix of both, if that is what you have. I would personally not recommend that you use tomatoes in this dish, but they would be rather good, well-grilled and served on the side.You should always have the onion for real pytt i panna, sweating it until it starts to colour, the caramelised bits are what makes this dish so good.

This time, I used up the last of the Christmas ham, made from a wild boar, again because that is what I had. I’ve also made this with beef, pork, leftover sausages, chicken, and a pretty excellent vegetarian version with a nut roast I’d made. I’m sure it would be equally good with turkey, and especially with goose, if that was your Christmas dinner of choice – especially cooked up with the rest of the bits and pieces in some of the lovely goose fat.

As you can probably tell from the description above, the following recipe does not need to be adhered to strictly, it is more of a guideline, based on what I had available on the day. The only two essential ingredients are the potato (sweet potato also works here, as would Jerusalem artichoke and celariac), and the onion, and you must allow both of them to colour, but apart from that just put pieces in a pan, as the name suggests.

This dish is lovely with a fried or poached egg on top. I had it with a side of slow-cooked red cabbage, which was also great.

I hope you made the most of your Christmas leftovers, let me know what you did in the comments.

Recipe: Pytt i Panna

Ingredients

5 medium potatoes or leftover boiled potatoes
About a quarter of a cauliflower that was past its best
2 onions, roughly chopped Leftover Christmas ham – I had about 150 g
1 tbsp cooking oil
Knob of butter
Salt and pepper to taste
A small bunch of dill that needed using up

Method

Dice everything into roughly 1 cm sized pieces. Break the cauliflower into small florets and dice the stalks.

If you are using raw potatoes, parboil them until they just allow a knife tip. Blanche the cauliflower in a separate bowl, and drain after 3-4 minutes.

In a large frying pan, cook the onions in the oil until they are starting to colour. Add the potatoes, again, cooking until they have some colour all over.

Add the knob of butter, ham and the cauliflower to the pan, then cook through. If the cauliflower also takes on a little colour,  so much the better.

Season well, and sprinkle with dill before serving.

5 Comments

Filed under Feast

A Picnic on Public Transport

Asparagus and Potato Tart

Tarted Up Leftovers

The Big Guy and I are seasoned travellers. If you live in a different country from either of your families, you have to get used to the rhythm of packing, transport, and departure times. Where we can, we take the train; it has a much better rhythm – with a continuity of movement, both in terms of the motion of the carriages, and because there is no hanging about in a departure lounge, or being forced through an array of harshly lit shops. The train gets you where you need to be without fuss; you have space to sit comfortably and to move around.

One of the things that we haven’t got the rhythm of is taking our own food. Although, I do know exactly where all the best places to buy food along the journey are. We have recently returned from one such trip abroad, although this time, we had a leg of the journey on a coach. It was OK, but I will be glad if they ever sort out the troubles on trains run by a certain rail company, which has been unable to run for far too long now.

We decided that we should be better prepared for this journey. Since our usual rhythm was interrupted, I could not guarantee getting to my favourite pit stops. I also had a few ingredients in the fridge that wouldn’t last until we returned. So, the obvious choice was to make something to take with us. A picnic, of sorts.

I had a little of the salad, some cream and some eggs that needed using up from the dinner I made for friends, and a few last sprigs of chervil. As so often happens, the day before I was leaving I woke up and knew that these would be perfect in a tart, with some goat’s cheese. We could have some for dinner that evening, and then we could take the rest as a picnic for the coach the next day.

Like many of the best laid plans, the idea for a nice goat cheese went a bit awry. It was a bank holiday, and none of the usual shops were open, so I had to dispatch the Big Guy to the supermarket. Unfortunately, all they had in the way of goat cheese was some presliced stuff, that could have been any generic cheese. It certainly never has the tang of goat that I was looking for in this dish. Fortunately, he returned with some sharp, crumbly feta instead. This was a much better option, it needed to match the asparagus.

The tart was tasty, filling and survived the journey. So did the salad we had with it, because we dressed it en route from a small jar. This is my top tip for picnic salads – if you dress it before you travel, the salad will cook in the acid, and you will be left with a container full of flaccid disappointment.

Cheese Please blog badgeFour Seasons Food Challenge Chez Foti & Delicieux

I know I have entered my dishes into a lot of blog hops lately, but I couldn’t resist entering this recipe into the inaugural Cheese Please Challenge, hosted by Fromage Homage. Then I heard about the inaugural Four Seasons Food, dreamed up by Anneli at Delicieux and Louisa at Chez Foti. This dish is so apt for both.

This was my perfect public transport picnic, and I didn’t waste anything in my fridge. I’d love to hear what appears on your picnic blanket, or even coach seat when you make food for on the go.

Recipe: Asparagus and Potato Tart

Ingredients

For the Pastry: 

100 g plain flour

50 g cold salted butter

Really good grinding of black pepper

1 egg yolk

For the Filling:

100 ml cream

4 eggs

small bunch chervil, very finely chopped

100 g of leftover asparagus salad, or 3-4 small salad potatoes and 5 asparagus spears cooked until just tender, and cut into 5 cm chunks

2 spring onions, sliced finely

90 g feta cheese

Method

Season the flour. I wanted this pastry to taste peppery, the rest of the tart can hold its own. Don’t be afraid of adding  more pepper than you think.

Rub the cold butter (it needs to be fridge temperature) into the seasoned flour until you have a breadcrumb consistency. Add the egg yolk and bring together into a dough. If you need to, you can add a little bit of cold milk to make it all come together. Add a splash at a time.

Form a disc with the dough, and cover it with cling film or foil, and leave it to rest in the fridge for 20 minutes to an hour.

Heat the oven to 200°C. Roll the pastry out thinly on a floured surface. Carefully line a greased flan case with the pastry, and press into the sides or fluting with a small offcut of pastry in a ball, to avoid any tears or holes, you don’t want the filling to leak and burn on the bottom.

Prick the bottom of the pastry all over with a fork. Line the pastry with greaseproof paper, and add a good layer of blind bake – this can be ceramic beans, dried beans or rice – to give some weight help keep it flat and thin. Bake in the oven for 15-20 minutes, or until the pastry looks dry and is beginning to brown on the sides. Remove the blind bake, and put back in the oven to allow the pastry to cook all over to a light golden colour.

While the pastry is browning, whisk together the cream, eggs, and chervil.

Once the tart case is cooked, remove and turn the oven down to 180°C.

Pick the salad over to remove any leftover capers and cornichons. Scatter the rest over the tart case, so that you get pretty even cover. Then scatter over the spring onions and crumble the feta around, again, so that the coverage is quite even.

Pour the eggs and cream over the rest of the filling, shaking the case a little, to ensure even distribution. Return it to the oven and bake for a further 30-40 minutes, or until the centre is just set, but still has a little wobble if you shake it.

As with all quiches, this is great served hot or cold, but if you want to serve it warm, let it rest for about 10 minutes after it comes out of the oven, so that the filling does not ooze all over the plate.

9 Comments

Filed under Feast