Tag Archives: Cheese Please Challenge

Blessed Are The Cheesemakers!

I have had a lot of fun with this month’s Cheese, Please! Challenge, hosted by Fromage Homage. This month, we were asked for recipes containing fresh cheese, which we had to make ourselves. I think it is great, encouraging people to develop skills of entry-level cheesemaking, as well as being creative in coming up with recipes to use the resulting curds. I have certainly found it inspiring. There are a lot of fantastic recipes on her blog, so do come over and have a look.

Shaped Mozzarella ball

Cheese Balls

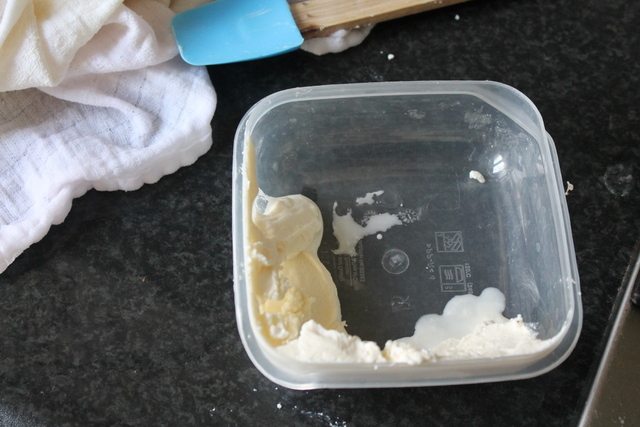
First, I made mozzarella. That was a very interesting experience. My first efforts were a little rubbery, I think because I cooled the water to 80°C, as was mentioned in one of the posts I bodged my recipe together from. The second efforts were with unpasteurised milk, and hotter water, and they were a world apart from the first batch. I could already see the difference between the curds when they were forming in the pan, they were much creamier, and there were a lot more of them!

Curds from Unpasteurised Milk

Rich, Creamy and Unpasteurised

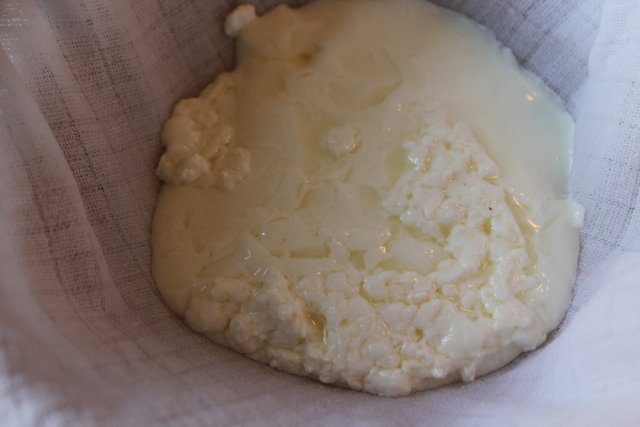
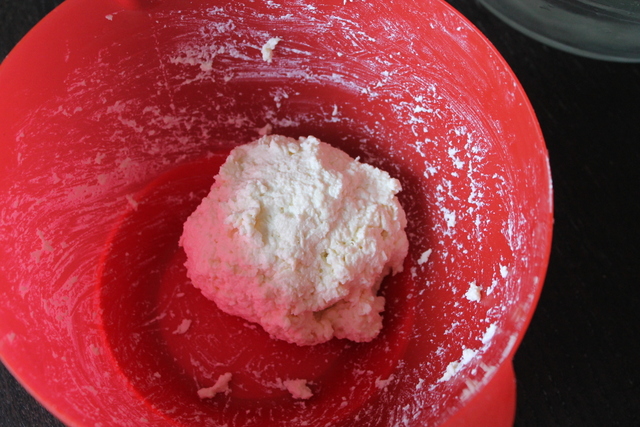
Then I had a go at ricotta, which was disappointing at first, but also vastly improved by using unpasteurised milk. From this I made gnudi, which I have always wanted to have a go at making. They were lovely, and light as a feather. I definitely recommend having a go at this, even if you can’t be doing with making fresh cheese. They were delightful, light and really very tasty. They will go with a lot of different sauces too, so also very versatile.

I smoked some of the mozzarella, which was mostly an experiment. It was successful in terms of flavour, but I think it needs longer between heating the wood chips, so that it has a better chance of staying spherical.

Breakfast Pizza - Bacon, sausage, mushrooms, spinach and egg

Breakfast Pizza

With all this cheese, there was only one thing for it – pizza! Which turned out to be both the perfect party food, and a hearty breakfast. It also had the added benefit of using up some of the whey.

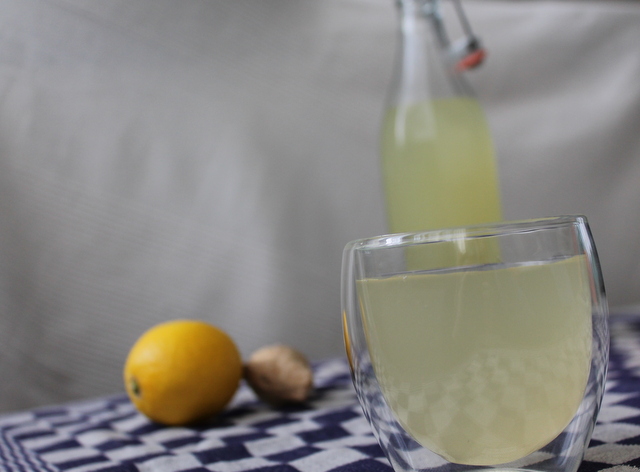
Talking of which, I tried my hand at lacto-fermenting vegetables and making Gingerade; which is what you get when your ambition exceeds the time that you have available to brew the assortment of drinks that you had planned.

Cheese Please blog badge

From 4 l of unpasteurised cow’s milk, I got:

  • 500 g mozzarella (I smoked the cheese that I made from the pasteurised whole milk)
  • 200 g ricotta
  • 3.25 l whey
  • Pizza dough for 20 individual pizzas using the whey
  • Gnudi for 2 adults
  • 2 l lacto-fermented gingerade
  • The raw ingredients for a few more lacto-fermenting adventures
  • Lacto-fermented fennel
  • Lacto-fermented cucumber
  • A load of leftover vegetarian rennet, ready for more cheesey adventures.
  • Hands softer than kittens on a velvet pillow

Next, I think I’m going to try to find some buffalo milk, to make mozzarella di buffala, for that authentic fresh cheese. I’d also like to try to make a washed rind cheese, similar to a brie. I had a very good triple cream one from Neals Yard Dairy that I may try to recreate, if the brie goes well. But before I can do that, I’ll need to bodge up somewhere to age it, unless I can use the fridge?

I have also managed more blog posts in a fortnight than I managed for most of last year. This is a warning though, that I have a few other exciting projects on the go, including a new collaboration, in Dutch, with the Tweakfabriek, where I will be doing some basic recipes, then two different tweaks to make with them. I’m very excited about this collaboration indeed! It does mean that I will not be posting as many recipes as you have seen from me in the last fortnight, but if you’d like to read some more in Dutch (or using Google translate) then watch this space for more details.

For this month, I’ve made the most of new inspiration. I’ve had a lot of fun, with and without guests, eaten well, and learned new skills, as well as a few bodges to make a hot smoker colder. What could be better than that? So, thanks again, Fromage Homage, and here’s to the next challenge!


11 Comments

Filed under Feast

Land of Milk and Ginger

Lacto-fermented Ginger Ale

Like Lemonade, but With Ginger

Well, I was intending to make three flavours of lacto-fermented lemonade and wittily call this post Lemonade, Three Wheys, but I’m afraid I’ve rather run out of steam and time. So, today you get the latest recipe in my cheesemaking adventures, but it is only one flavour of lemonade – ginger (perhaps confusingly).

If you Google milk and ginger the most common result is a ginger milk pudding, which is a rather soothing-sounding Chinese dish, apparently. Obviously, I did this, and had a look at some of the pictures. It reminded me a bit of junket, which I had to make for some historical food thing for brownies once. I am not a fan of junket. But then again, my junket did not have ginger in it. I am quite fond of ginger, so I may end up giving this a go.

I really wanted to have a go at lacto fermenting ginger beer, but that requires a starter or ginger beer plant, which I didn’t have time for. So, that is the reason that I am going to call this Gingerade. And let me tell you it is no worse for that!

This method is one of two ways to naturally carbonate drinks, without the need for a Soda Stream. The other way is to add yeast. It is also a really healthy drink – the whey has loads of probiotics, which you have to pay a good deal for if you buy those fancy yoghurts. Any bloating that you may, or may not relieve is entirely your own business.

I never really got fed the standard carbonated drinks when I was a child, so I never really developed the taste for them. I’d rather have water, or fruit juice than a fizzy drink (only if wine isn’t an option, obviously!), but I could definitely develop a taste for this. I tried it after three days, so it was lightly sparkling, which I liked a lot. You can get a fiercer bubble if you leave it in the warm for longer. I was happy, so put it in the fridge. It will continue to ferment in the fridge, but at a much lower rate.

I will definitely be trying to lacto-ferment ginger beer, and other lemonades, So I may be able to use my witty post title after all, and of course, I will be blogging the efforts. I’m also going to have a go at alcoholic ginger beers too, and why not – makes a change from Belgian beer for me, for sure!

I tried it today, in the my sunny spring garden, which is the perfect setting for this drink, in my opinion. Well, until I can have it with ice in the summer, of course!

Spice Trail Blog Badge

As well as this appearing as part of the Cheese, Please! Fresh Cheese Challenge (which really has been the gift that keeps on giving for me this month!) roundup, which I will be posting tomorrow, I’m going to have a second bite of the cherry at this month’s Spice Trail hosted by Vanesther of Bangers and Mash. Mostly because I really do love ginger, but also because I covet those beautiful little spice tins that are being offered as a prize this month. I can only hope, but this month there is a lot of stiff competition, with a lot of entries, many of which I have bookmarked for later.

Recipe: Lacto-Fermented Gingerade

Ingredients
30 g ginger
Juice of 2 lemons
150 g runny honey
1 tsp rock salt
4 tbsp fresh whey
2 l water

Method

Sterilise enough bottles to hold 2 l of gingerade. I used the sterilisers from my home-brew, which I find the easiest method for the types of bottles that I used. If you use wider necked bottles, then you can run them through  a hot dishwasher cycle, or wash them and put them in a low oven, as you might for making jam or lacto-fermented vegetables. At the same time, sterilise a funnel that fits into the top of the bottles that you are using.

Finely grate the ginger. I used a microplane, but if you don’t have one, use the finest side of a box grater. Mix the grated ginger with the rest of the ingredients in a large bowl, making sure that the honey and salt are really dissolved in the lemon juice before you add the water and the whey.

Before bottling, stir the gingerade well, so that you can be as sure as you can that there are bits of ginger and lemon pulp in each bottle. Fill each bottle with the gingerade. You will need to leave about 5 cm at the top.

Leave to start to ferment in your living room or kitchen. You may need to get it started by tipping the bottes over once to stir things up once or twice a day. Be careful, because once it starts to ferment, the pressure will build. After three days, test to see if the carbonation is to your liking. If it is, then store in the fridge. Remember that it will continue to ferment in the fridge, but at a much lower rate.

Serve on a sunny day. Maybe at a picnic (serving suggestion).

This recipe makes slightly more than 2 l of liquid. I used up the rest in a rather fantastic raspberry coulis, but you might just as well drink it, or add it to stewed apple or even rhubarb. Very good indeed.


18 Comments

Filed under Fermented

Fresh Cheese – In the Gnudi

Ricotta Gnudi and Tomato Chilli Sauce

Naked Food

Following on from my cheese making efforts, I thought that I could have a go at making ricotta. Literally translated as “twice cooked”, ricotta is right up my alley, as a way to reduce waste, and maximise leftovers. So I set about gently heating the whey left from my mozzarella to 92ºC,  and left it to cool to about 60ºC, before straining it through a thick muslin. I was so dismayed to find that it yielded next to no additional curds – 35 g to be precise.

35 g Ricotta

Bitter curds

Convinced it was something I had done badly, I turned to Google for reassurance. Whilst the technique was sound, it appears that the whey is acid, which is not conducive to making ricotta, which needs a “sweet whey”, or one that is produced from bacterial coagulation, instead of one brought on by acid. I probably should have done a bit more homework on that before I started, it would have saved time and gas!

Not one to be put off by such things, I bottled up the whey for later use. And made more mozzarella with unpasteurised milk. Having nothing to lose, and because I wanted the whey from this batch, I decided to try and extract more curds in the only way I knew.This time, I also strained it through cheesecloth, although I found that I couldn’t squeeze this out, because the curds simply fell through it.

The difference was amazing, I got 200 g of fresh, soft curds! Whilst it is perfectly possible to make cheese with any kind of milk, I think using unpasteurised milk pays off, if you can get it. I may also have a go with milk powder just to see if this is a cheaper alternative. Plus I have a lot of rennet that I need to use up now.

I have always fancied having a go at ricotta gnudi – soft Italian pillows, not dissimilar to light gnocchi. Gnudi (pronounced nyoo-dee) are, as the name suggests, “naked” ravioli. That is; they are the ravioli filling, naked of its customary pasta. They are best served with the simplest of sauces. The Big Guy and I were both coming down with colds, and so I wanted some chilli spikes in this sauce. I wavered over chilli, garlic and olive oil; but in the end settled on a tomato sauce with chilli, in order to take it from a starter to more of a main course with the addition of a nice green salad.

As well as a delivering a lovely pasta dish, my inner four year old enjoys sniggering when I announce what is on the menu. Reports that such pronouncements were accompanied with an impromptu dance of joy are totally unfounded. Cheese Please blog badge As you have probably guessed by now, This is yet another entry for the Cheese, Please! fresh cheese challenge. I have enjoyed myself this month, and you know I hate waste, so I’m determined to use up every last bit of the milk.

Recipe: Ricotta Gnudi With Tomato and Chilli Sauce

Ingredients

For the Ricotta:
Whey from making any type of cheese, the best being sweet whey from bacterial coagulation, otherwise unpasteurised acid whey will be good.

For the Pasta Sauce:
1 tbsp oil
½ red onion, finely chopped
1 red chilli, finely chopped, removing the seeds are optional
1 clove garlic, crushed to a paste
250 g tomatoes, chopped
Salt and pepper

For The Gnudi:
200 g ricotta
Zest of one lemon
Good grind of black pepper
1 tsp thyme leaves
40 g parmesan, plus more for garnish
1 egg, lightly beaten
Approx 70 g plain flour
Large knob of butter, 1 tsp and the thyme stalks for cooking

Method

Heating whey to 92ºC to make ricotta

It’s Getting Hot in Here

Make ricotta by heating the whey gently to a temperature of 92ºC. You will need to watch it, especially as the temperature exceeds 85ºC, because you do not want this to boil over, unless you especially like cleaning. Allow the whey to cool again, to a minimum of 60ºC, but preferably lower.

Strain through a sieve lined with a cheesecloth into a container large enough to hold the whey. Keep this for more things later – such as some pizza dough, other bread, stock, soups, and something else I have up my sleeve for later this week.

What you have left is ricotta. You will need to use a spoon or a spatula to remove it from the cloth. If you have left it to dry long enough, you may have to crumble it off. This is great in sweet and savoury dishes – I’ve even found recipes for ice cream. What you do with it is up to you.

For the sauce, sweat the onion in the oil until translucent. Add  the chilli and the garlic to the pan, and allow to cook for a minute. Next, add the tomatoes, and cook them down on a low heat, stirring occasionally to prevent them sticking. When the sauce is thick and the gnudi are ready,  season to taste.

While the sauce is cooking, make the gnudi. Mix together the ricotta, zest, thyme, pepper, parmesan cheese and the egg. Gradually add the flour, and mix in until the mixture forms a ball. It may take a bit more or a bit less than 70 g flour.

Shape the gnudi with wet hands. A lot of people shape them into balls, but I liked to form more elliptical gnudi. Put them on baking paper, or another non-stick surface.

Get a deep pan full of boiling water with the salt, butter and thyme stalks in. It is important to have the pan at a rolling boil. Put the gnudi into the water and cook for about 5 minutes. When they are cooked, they will float. Drain with a slotted spoon, and add to the sauce. You may also need a tablespoon or two of the water that you cooked the gnudi in to loosen up the sauce.

Coat the gnudi with the sauce, then serve immediately with a sprinkling of extra parmesan cheese.

11 Comments

Filed under Feast

From Milk to Mozzarella

Home made Mozarella balls

Milk Solids

This month, I have got quite a few cheese posts on the way, inspired by the Cheese, Please! Challenge over at Fromage Homage. As soon as she announced that the challenge this month was to be fresh cheese, I knew I wanted to play. My mind was racing over the possibilities (of which, more to come), but I have a birthday party coming up and I want to let the kids make pizzas (with ingredients made from scratch, of course!). The obvious place to start on my fresh cheese odyssey is with mozzarella. I’m probably going to enter all of my recipes in one larger round-up post at the end of the month, but I am going to share the individual recipes that I make with all the fresh cheeses too.

So, we’ll start at the very beginning; a very good place to start; mozzarella, a fresh cheese with bounce!

I looked around online, and decided that mozzarella from scratch can’t be that hard, can it? I quickly found a few nice recipes, which I cobbled together to come up with my techniques I share here. Most of the recipes include using a microwave, which I don’t have. Instead I have been most inspired by the Barefoot Kitchen Witch and the techniques used in this post from the New England Cheese Supply Company.

Cheese Please blog badge

Making one’s own mozzarella counts as a fresh cheese recipe, doesn’t it? So I think it will be a great entry for Cheese, Please! And even if it is really only precursor for the actual recipes, it doesn’t matter, it was pretty simple, I had a lot of fun, and I have the softest hands I have had in ages, so that’s an added bonus!

Recipe: Home Made Mozzarella

Ingredients

2 l milk – you can use whole, semi skimmed, pastuerised or whatever you like really. The only milk that doesn’t work is UHT.
¾ tsp citric acid, dissolved in 60 ml blood temp water
2 drops vegetarian rennet in 30 ml cold water
Salt to taste

If you do not have a measuring jug that allows you to measure such small amounts of liquid, remember that 1 ml of water =1 g, so you might find it a lot easier to simply weigh the water.

In the Netherlands, rennet is called stremsel, which I personally think sounds a lot nicer. The great news, whatever you call it, is that vegetarian and original rennet are widely available. My regular online brewshop stocks all varieties, as well as citric acid, which is great for me!

In addition to the ingredients, it is a good idea to gather together the equipment you will need before you start.

Equipment

Large saucepan
Thermometer, preferably one that can measure low temps
Cheesecloth or muslin, sterilised by boiling
Sieve
Slotted spoon
At least four large bowls
Boiling water
Ice

Method

Curds after citric acid and gentle heat

Lemon/ Curd

Add the milk to your saucepan, with the dissolved citric acid. Heat gently until it gets to 32ºC. If, like me, your thermometer will not measure that low (I used my jam thermometer, which starts at 60ºC), heat very gently until your curds look like the photo above. When you stick a (clean) finger in it, it will feel cooler than you, but not that much.

Curds after adding rennet and heating

Rennet Ready

Add the rennet water, and heat a little bit more to 37-38 degrees. Again, if your thermometer doesn’t go that low, then use the photo above. You will not feel a temperature difference if you stick your finger in this liquid.

Curds after rennet and with rest

Curd Wayhey!

Take the curds from the heat, then allow to sit for 5 minutes or so. You will clearly see the separation of the curds and the whey, which will look more watery. Cut the curds crossways with a sharp knife.

Fresh Curds

Fresh Curds

Line your sieve with a cheesecloth, or muslin square, and place over one of the bowls. With a slotted spoon, remove the curds from the pan, and put them in the sieve. They will look quite wet, like above. Cut and fold them over with the slotted spoon, to get rid of some more of the whey.

Curds, after most of the whey has run off

Whey Less!

The curds will go from watery to looking much drier, and will lose quite a lot of volume. Don’t throw away the whey, it has a lot of uses, and keeps for a long time in the fridge.

Curds, after initial kneading

Curd Need

Remove the curds to a separate bowl, and knead for a little bit, until it looks a lot less lumpy. Boil enough water to allow you to sit your sieve on a third bowl, so that the sievey bit is submerged. Get a different bowl of iced water ready as well.

Place the curds in the sieve in the hot water, and allow them to pour, stretch and fold off the slotted spoon. I’m sorry, I didn’t get a good picture of this, because it’s pretty hard to do this and photograph yourself, and the Big Guy was at work. Anyway, it will start to get more stretchy and smoother as you go on.

Curds getting smoother and sretchier

Come Together

As the water cools, the cheese will stop stretching. Once this happens, boil a kettle again. While it is boiling, remove the curds to the bowl and knead some more. At this stage, add some salt to taste, and knead to mix well.

Stretchy Cheese

Nearly There

Repeat submerging in the boiled water, stretching and then kneading until you have a stretchy, pliable cheese. You can either shape this as one large ball, or divide it into smaller balls if you prefer.

Shaped Mozzarella ball

Cheese Balls

I found it easier to use the hot water for one final shaping. I used the sieve and the slotted spoon to roll the cheese around in the hot water to make a ball shape.

Once you have shaped the cheese, submerge in iced water. Mozzarella should be used fresh, but can be stored in briney water the fridge for up to 4 days.

19 Comments

Filed under Feast