Tag Archives: Step-by-Step

Blessed Are The Cheesemakers!

I have had a lot of fun with this month’s Cheese, Please! Challenge, hosted by Fromage Homage. This month, we were asked for recipes containing fresh cheese, which we had to make ourselves. I think it is great, encouraging people to develop skills of entry-level cheesemaking, as well as being creative in coming up with recipes to use the resulting curds. I have certainly found it inspiring. There are a lot of fantastic recipes on her blog, so do come over and have a look.

Shaped Mozzarella ball

Cheese Balls

First, I made mozzarella. That was a very interesting experience. My first efforts were a little rubbery, I think because I cooled the water to 80°C, as was mentioned in one of the posts I bodged my recipe together from. The second efforts were with unpasteurised milk, and hotter water, and they were a world apart from the first batch. I could already see the difference between the curds when they were forming in the pan, they were much creamier, and there were a lot more of them!

Curds from Unpasteurised Milk

Rich, Creamy and Unpasteurised

Then I had a go at ricotta, which was disappointing at first, but also vastly improved by using unpasteurised milk. From this I made gnudi, which I have always wanted to have a go at making. They were lovely, and light as a feather. I definitely recommend having a go at this, even if you can’t be doing with making fresh cheese. They were delightful, light and really very tasty. They will go with a lot of different sauces too, so also very versatile.

I smoked some of the mozzarella, which was mostly an experiment. It was successful in terms of flavour, but I think it needs longer between heating the wood chips, so that it has a better chance of staying spherical.

Breakfast Pizza - Bacon, sausage, mushrooms, spinach and egg

Breakfast Pizza

With all this cheese, there was only one thing for it – pizza! Which turned out to be both the perfect party food, and a hearty breakfast. It also had the added benefit of using up some of the whey.

Talking of which, I tried my hand at lacto-fermenting vegetables and making Gingerade; which is what you get when your ambition exceeds the time that you have available to brew the assortment of drinks that you had planned.

Cheese Please blog badge

From 4 l of unpasteurised cow’s milk, I got:

  • 500 g mozzarella (I smoked the cheese that I made from the pasteurised whole milk)
  • 200 g ricotta
  • 3.25 l whey
  • Pizza dough for 20 individual pizzas using the whey
  • Gnudi for 2 adults
  • 2 l lacto-fermented gingerade
  • The raw ingredients for a few more lacto-fermenting adventures
  • Lacto-fermented fennel
  • Lacto-fermented cucumber
  • A load of leftover vegetarian rennet, ready for more cheesey adventures.
  • Hands softer than kittens on a velvet pillow

Next, I think I’m going to try to find some buffalo milk, to make mozzarella di buffala, for that authentic fresh cheese. I’d also like to try to make a washed rind cheese, similar to a brie. I had a very good triple cream one from Neals Yard Dairy that I may try to recreate, if the brie goes well. But before I can do that, I’ll need to bodge up somewhere to age it, unless I can use the fridge?

I have also managed more blog posts in a fortnight than I managed for most of last year. This is a warning though, that I have a few other exciting projects on the go, including a new collaboration, in Dutch, with the Tweakfabriek, where I will be doing some basic recipes, then two different tweaks to make with them. I’m very excited about this collaboration indeed! It does mean that I will not be posting as many recipes as you have seen from me in the last fortnight, but if you’d like to read some more in Dutch (or using Google translate) then watch this space for more details.

For this month, I’ve made the most of new inspiration. I’ve had a lot of fun, with and without guests, eaten well, and learned new skills, as well as a few bodges to make a hot smoker colder. What could be better than that? So, thanks again, Fromage Homage, and here’s to the next challenge!


Advertisement

11 Comments

Filed under Feast

Goodness Gracious! Great Balls of Smoke?

Smoked Mozzarella

Holy Smokes!

Having made my own mozzarella, I got a little bolder with my cheese, and decided that I should smoke it. I was given a hot smoker for my birthday and I was going to use it. A quick scour of the internet later, and again mostly inspired by The Barefoot Kitchen Witch, I realised that all of the smoking is done in a cold smoker, which I don’t have. Not one to be put off by such things, I thought that I could rig something up with the hot smoker, to do just as well. So the Big Guy and I put our heads together and decided upon what I still think is a very good bodge job.

As you can see from the photo above, I didn’t quite manage it, but I am onto something, and think with a few more goes I could get it right. The lovely round balls on the right here are scamorza that I bought from the market to try to determine what wood they use for the smoke. I managed to make great discs of smoke, rather than the balls I’d hoped would be there.However, the smoke flavour was very good, and so I was happy enough with the result.

So, in case you are ever mad enough to try hot smoking cheese yourself, this is how I did it.

Improvising a cold smoker from a hot one

Smoking Rig

Firstly, I knew I had to elevate the cheese as far away from the flame as I could, while still being within the realm that I could feasibly wrap in foil, which I would need to seal in the smoke, because the lid would not allow me to elevate the cheese. I have a small shopping basket thing that I was given one Christmas. It’s supposed to be a kitchen or bathroom tidy, but was metal and grill shaped, so perfect for my needs. You could also use the racks you find in combi microwaves, or invent your own bodge job.

Alder and Oak chips for smoking mozzarella

Smoking Mix

For the smoking mix, I thought that I’d chance my arm with a mix of alder and oak chips. I wanted all oak smoke, which is stronger, but I also needed something to have enough size to keep smoking when I turned off the heat source – because the cheese really would not hold up to continuous heat. As you can see from the photo, the oak chips on the top are really small, and I couldn’t be sure that they would continue to smoke without help, so I added the alder in an attempt to keep it smoking for longer.

Concertinering foil to make a larger smoker

Concertina Action

We tried to wrap the foil using the lip around the smoker, but could not get a good enough seal, so we decided that we would have to wrap the whole smoker up in a parcel. To seal the seams, we had to concertina long strips of foil, large enough to encase the smoker. We needed four widths, so it is a lot more foil than you think you will need.

A Frame for the cheese to rest on

A is for Almost an A Frame

Then I rigged up the cheese platform. I draped a simple piece of cheesecloth over the kitchen tidy, butI didn’t want the foil to fall in on the cheese, in case it conducted heat straight onto it.  So, I rigged up a kind of A-frame with some chopsticks, and I placed some pastry dough scraps I had leftover from cooking an apple pie over the top to prevent them piercing the foil.

Foil wrapped smoker

Fumer en Papillote

Then I wrapped the whole thing in foil, and sealed it tightly by scrunching up the edges. I put it on the smallest hob on my stove, and heated gently to make the smoke start. When the smell of smoke was pretty strong, I would turn off the heat, and just allow the cheese to sit in the smoke that was created. When I could no longer smell the smoke, about every 10-15 minutes, I would turn the heat on again, for a few minutes, and then let the cheese sit in the smoke again. I did this for 2 hours.

After an hour, I checked the cheese by opening a little of one seam and shining a torch into the gap. They were definitely still whole and plump and round then. I think that the problem was that in the second hour, I got distracted by cutting up toppings for the pizzas, and the heat may have stayed on a little longer than I had hoped for a couple of the times. I think if I make sure that I am not distracted, and leave the heat on for no more than two minutes each time, then I will be more successful.

Cheese Please blog badge

I was very pleased with the smoke, and I would use the smoke mix again. The flavour was rich, but not overwhelming. And I still believe that the gentle heat and then allowing the cheese to sit will work, maybe I need to experiment with the total time that the cheeses smoke for. However, I want to enter this to Cheese, Please! hosted by Fromage Homage, and so I have posted these very tasty smoke discs, in order to qualify in time.

13 Comments

Filed under Feast

From Milk to Mozzarella

Home made Mozarella balls

Milk Solids

This month, I have got quite a few cheese posts on the way, inspired by the Cheese, Please! Challenge over at Fromage Homage. As soon as she announced that the challenge this month was to be fresh cheese, I knew I wanted to play. My mind was racing over the possibilities (of which, more to come), but I have a birthday party coming up and I want to let the kids make pizzas (with ingredients made from scratch, of course!). The obvious place to start on my fresh cheese odyssey is with mozzarella. I’m probably going to enter all of my recipes in one larger round-up post at the end of the month, but I am going to share the individual recipes that I make with all the fresh cheeses too.

So, we’ll start at the very beginning; a very good place to start; mozzarella, a fresh cheese with bounce!

I looked around online, and decided that mozzarella from scratch can’t be that hard, can it? I quickly found a few nice recipes, which I cobbled together to come up with my techniques I share here. Most of the recipes include using a microwave, which I don’t have. Instead I have been most inspired by the Barefoot Kitchen Witch and the techniques used in this post from the New England Cheese Supply Company.

Cheese Please blog badge

Making one’s own mozzarella counts as a fresh cheese recipe, doesn’t it? So I think it will be a great entry for Cheese, Please! And even if it is really only precursor for the actual recipes, it doesn’t matter, it was pretty simple, I had a lot of fun, and I have the softest hands I have had in ages, so that’s an added bonus!

Recipe: Home Made Mozzarella

Ingredients

2 l milk – you can use whole, semi skimmed, pastuerised or whatever you like really. The only milk that doesn’t work is UHT.
¾ tsp citric acid, dissolved in 60 ml blood temp water
2 drops vegetarian rennet in 30 ml cold water
Salt to taste

If you do not have a measuring jug that allows you to measure such small amounts of liquid, remember that 1 ml of water =1 g, so you might find it a lot easier to simply weigh the water.

In the Netherlands, rennet is called stremsel, which I personally think sounds a lot nicer. The great news, whatever you call it, is that vegetarian and original rennet are widely available. My regular online brewshop stocks all varieties, as well as citric acid, which is great for me!

In addition to the ingredients, it is a good idea to gather together the equipment you will need before you start.

Equipment

Large saucepan
Thermometer, preferably one that can measure low temps
Cheesecloth or muslin, sterilised by boiling
Sieve
Slotted spoon
At least four large bowls
Boiling water
Ice

Method

Curds after citric acid and gentle heat

Lemon/ Curd

Add the milk to your saucepan, with the dissolved citric acid. Heat gently until it gets to 32ºC. If, like me, your thermometer will not measure that low (I used my jam thermometer, which starts at 60ºC), heat very gently until your curds look like the photo above. When you stick a (clean) finger in it, it will feel cooler than you, but not that much.

Curds after adding rennet and heating

Rennet Ready

Add the rennet water, and heat a little bit more to 37-38 degrees. Again, if your thermometer doesn’t go that low, then use the photo above. You will not feel a temperature difference if you stick your finger in this liquid.

Curds after rennet and with rest

Curd Wayhey!

Take the curds from the heat, then allow to sit for 5 minutes or so. You will clearly see the separation of the curds and the whey, which will look more watery. Cut the curds crossways with a sharp knife.

Fresh Curds

Fresh Curds

Line your sieve with a cheesecloth, or muslin square, and place over one of the bowls. With a slotted spoon, remove the curds from the pan, and put them in the sieve. They will look quite wet, like above. Cut and fold them over with the slotted spoon, to get rid of some more of the whey.

Curds, after most of the whey has run off

Whey Less!

The curds will go from watery to looking much drier, and will lose quite a lot of volume. Don’t throw away the whey, it has a lot of uses, and keeps for a long time in the fridge.

Curds, after initial kneading

Curd Need

Remove the curds to a separate bowl, and knead for a little bit, until it looks a lot less lumpy. Boil enough water to allow you to sit your sieve on a third bowl, so that the sievey bit is submerged. Get a different bowl of iced water ready as well.

Place the curds in the sieve in the hot water, and allow them to pour, stretch and fold off the slotted spoon. I’m sorry, I didn’t get a good picture of this, because it’s pretty hard to do this and photograph yourself, and the Big Guy was at work. Anyway, it will start to get more stretchy and smoother as you go on.

Curds getting smoother and sretchier

Come Together

As the water cools, the cheese will stop stretching. Once this happens, boil a kettle again. While it is boiling, remove the curds to the bowl and knead some more. At this stage, add some salt to taste, and knead to mix well.

Stretchy Cheese

Nearly There

Repeat submerging in the boiled water, stretching and then kneading until you have a stretchy, pliable cheese. You can either shape this as one large ball, or divide it into smaller balls if you prefer.

Shaped Mozzarella ball

Cheese Balls

I found it easier to use the hot water for one final shaping. I used the sieve and the slotted spoon to roll the cheese around in the hot water to make a ball shape.

Once you have shaped the cheese, submerge in iced water. Mozzarella should be used fresh, but can be stored in briney water the fridge for up to 4 days.

19 Comments

Filed under Feast

Aye Crumble!

Apple Crumble and Custard

A Faithful Friend

Today’s post is for my Brother Out-Law (since the Big Guy and I are not married, otherwise he would be my in-law!). Whenever I need a relatively simple dessert, that I can  make up quickly, but that can sit in the oven while we eat a main course, I always fall back on a crumble. Good, comforting, and a great way of using up fruit if you find yourself with a glut; or if you were tempted at the market, but now they are sitting there looking sad, and you need something to use them up with.

I made a pear and apple crumble for the Big Guy’s sister and her family for just such an occasion over Christmas. They asked if I would be blogging the recipe. At first, I resisted, because it is a common dessert. Except, it is a common British Dessert (and in the US, where it is called a Crisp, for reasons I am unable to fathom). It was quickly pointed out that a lot of different people read my blog, including my Swedish family, and they may not think it that common. So, I relented, and here is my version of crumble.

Let’s be honest, crumble is never going to be fine dining, but it is always a great dish to have as a standby for when you need to serve up a tasty dessert.

You can, and probably should, serve a crumble with ice cream, custard or pouring cream. I served this one for dessert after the Beer Can Chicken with some warm, thick custard that I made up using my usual custard methodology. This may have been served in the Netherlands, but you really can’t get more British than that.

Made with Love Mondays

Since I always make crumble and custard from scratch, and always with a lot of love, I’m going to add this to this week’s Made with Love Mondays, hosted by Mark at Javelin Warrior. I haven’t joined this in quite a while, but I always enjoy the posts.

Ingredients
For the crumble:
120 g plain flour
40 g cold butter
50 g rolled oats (you may need a bit more if you use cut oats, for texture)
50 g nuts, roughly chopped
3 tbsp demerara sugar
Fruit of your choice
Butter to grease the dish and dot on the top of the crumble
For the custard:
2oo ml double cream
150 ml milk
1 vanilla pod
4 egg yolks
65 g caster sugar

Method

Rubbing in the Flour and the Butter

Rubbing in the Flour and the Butter

Make the crumble mix. Cut the butter into small cubes, and add to the flour and then rub into the flour, using your fingers and thumbs. Keep going until they look like fine breadcrumbs.

Flour and butter at the fine breadcrumb stage

Stop When the Mixture Looks Like This

You can use rolled or cut oats in this mix, but since their inclusion is as much about texture as they are about flavour, you will need more if you use cut oats.

Roughly chopped nuts

Roughly Chopped for Texture

You can also use whatever nuts you like, or leave them out altogether if you prefer. I have happily used whole almonds, blanched, or flaked, hazelnuts and macadamia nuts. I’ve also used pumpkin seeds, although these burn a bit easier than nuts. I’m confident that walnuts, pecans or brazil nuts will work just as well. They do not top my list of favourite nuts, so I rarely have them in the house.

This another one of those recipes where you can play fairly fast and loose with what you add. For a real crumble you must have the flour, butter and sugar. I personally think that oats are essential, although this may be controversial in some quarters. In fact, I have also used muesli at a push, which I substituted for both the oats and the nuts. I did remove the dried grapes, because the layers you use are thin, and the currants/ raisins will burn. I dislike burnt currants, but you may be of a different opinion, in which case, use muesli and leave the dried grapes in to your heart’s desire.

Add the rest of the ingredients to the flour and butter, except one tbsp of the sugar, and mix thoroughly.

Then, grease an oven proof dish well with butter. Place large chunks of fruit across the base of the dish in a single layer. Again, it is pretty much anything goes. You can use a single fruit, like the traditional apple, or more unusual peach. You can mix it up; combinations like rhubarb and strawberry, or apple and pear work well. I have added chopped crystallised ginger, and herbs and spices. What you add is up to you. If you are adding fruits that will exude a lot of liquid, such as rhubarb, plums or peaches, then you may find stirring a tablespoon of plain flour through the fruit before you put it in the dish will help stop the juices soaking into the crumble topping, and leaving you with a steaming bowl of soggy disappointment.

Pre-Baked Crumble

Pre-Baked Crumble

Sprinkle the crumble topping over the fruit in a thin layer. It needs to coat the fruit, but not be too thick, or it will be claggy when you come to eat it. If there is any topping leftover, don’t worry, this mixture freezes really well, and you can save it for a time when you want to make a smaller crumble – maybe one just for yourself, made in a smaller pot or ramekin. Sprinkle the remaining tablespoon of sugar over the crumble, and dot here and there with a little butter.

Put in the centre of the hot oven, and bake for 30-40 minutes, or until the fruit is cooked, and topping is golden brown. If you have quick cooking fruit, cook in the oven until the fruit is done, then finish browning the topping under the grill.

Serve warm with custard or ice cream.

14 Comments

Filed under Feast

Southern Cross Buns

Southern Cross Buns

One a Dollar, Two a Dollar…

I have been searching around for ingredients for an Easter dinner for my friends. These are mostly the same friends who came for the International Christmas Dinner, so I wanted something that would encompass all of our traditions, as well as a nod to the Dutch. Some of these recipes will appear here in the coming days, as they are much less specific to Easter, but this one couldn’t be delayed.

One of the traditions that I found out about was the Australian one. For friends from the Southern Hemisphere, Easter heralds the start of autumn, and thus is naturally a little less about rebirth and rejuvenation, even though they  do continue to keep many of the same traditions as us in the North (hint: eggs and chocolate feature in all Easter traditions, as far as I can tell).

According to this website, there are a few key differences. Anyone who has seen an episode of Border Security will know that Australians are none too keen on letting in non-native animals, due to the havoc that they wreak. It is no surprise then, that they have replaced the Easter Bunny with the much more native Bilby. However, my chocolate work needs a lot more practice, and it is certainly not up to making small chocolate marsupials without a mould.

So, I was very happy when I saw the fact that the Aussies have taken the hot cross bun, and made their own version. With chocolate.

I had already decided to make traditional Hot Cross Buns for dessert. Strictly speaking, they are served on Good Friday, but as it is my tradition to break the rules for international dinners, I am going to serve them for Easter Sunday itself. And I get to do two kinds. We will serve them toasted, to be smeared with butter moulded in the shape of a lamb, which is a Dutch tradition.

Boterschaap

Aw Look, a Butter Lamb! We Named Him Wonky

I made the British buns using the recipe from the River Cottage Bread Book, by Daniel Stevens. Then, I adapted it to make what I am calling Southern Cross Buns, which I think are good for any occasion, and you can keep the cross, since they are named after the Australian flag.

And I photographed the steps for you.

Recipe: Southern Cross Buns

Ingredients

For the Bun:

250 g strong white bread flour (plus some for dusting)

250 g plain white flour

2 tbsp cocoa powder

125 ml warm water

125 ml warm milk

1 sachet dried yeast (7 g)

10 g salt

50 g caster Sugar

1 egg

70 g plain chocolate chips

30 g candied peel (orange only if possible)

Zest of ½ orange, grated

6 green cardamom pods

For the Cross:

75 g plain white flour

100 ml water

For the Glaze:

1 tbsp apricot jam

1 tbsp water

Method

You may remember that I made my own candied peel. This is not compulsory, but it does make it a lot easier to use only the orange peel for this recipe. If you have (or wish to make) your own candied peel, chop it finely before you start the rest of the steps.

Extracting cardamom seeds from the pods

Remove the Seeds from the Cardamom Pods

Also lightly crush the cardamom pods to release the black seeds inside, and grind these to a coarse powder with a pestle and mortar.

Sieve together the flours and the cocoa. I usually skip the sifting step in a recipe, but this will help prevent the cocoa from forming lumps.Mix together with the sugar, salt and yeast

Make a Well in the Centre of the Dry Ingredients

Make a Well in the Centre of the Dry Ingredients

I found that mixing boiling water from the kettle, and cold milk from the fridge, the resulting liquid was warm, but not too hot for the yeast. You can use a food mixer with a dough hook for this recipe, but I am gadget-averse, so I had to do it with my hands. whichever way you choose, the dough is fairly sticky. Pour the liquid into the well, and mix.

After Mixing in the Milk & Water

After Mixing in the Milk & Water

Once it looks a bit like this, add the butter and the egg. This is when it gets sticky. Mix it well, so that you cannot see lumps of butter in the mixture anymore.

The mixture will get a little smoother

The mixture will get a little smoother

Then add the chocolate, candied peel and the ground cardamom. Knead this in well.

When it loos like this, cover it and leave it to prove

When it looks like this, cover it and leave it to prove

Try and leave it somewhere warm. It should take about an hour. I left it a bit longer, because I was busy with getting a lamb cooked, and other things. It was fine, and still rose nicely. Knock back – by punching the air out of it.

Cut the dough into eight equal(ish) pieces

Cut the dough into eight equal(ish) pieces

I got the proportions mostly right when I cut it. Only one was smaller than the rest. Make it easier on yourself by cutting the dough in half, roughly shaping each half into a thick sausage which you cut in half, then half again. It should be fine, if the sausage doesn’t taper too much.

Shape each piece of dough into a round. The following steps are straight from the River Cottage book, but they work really well, so they are the steps you need. Put the flat side of the dough on a lightly floured counter.

Bring a piece of the dough into the centre and press lightly

Bring a piece of the dough into the centre and press lightly

Each time that you do this, turn the dough a little, then repeat. Do this until all the dough is folded into the middle, and press firmly. Flip it over onto the other side. If you are not that confident in working sticky dough, like me, then you will probably want to flour the work surface again a little bit. More confident bakers work focaccia, which is a much wetter dough, so you will probably be fine. I found that I didn’t need to flour the buns later, because they were fine after I floured the surface.

The next bit is difficult to describe. You need to stretch the top of the bun, while tightening the pinch at the bottom. To do this, you need to flatten your hands, place the heel of one hand against one side of the roll, and the fingers of your other hand on the other side.

Step one of turning the bun

Step 1: flatten your hands at either side of the bun

Next you need to move your hands in opposite directions, and bring them together under the bun, so that it spins. This will stretch the top of the dough.

Step Two: Spin the bun, by moving hands in opposite directions

Step 2: Spin the bun, by moving hands in opposite directions

You will end up with your hands in the opposite configuration to that in which you started.

Step Three: how your hands end up

Step 3: how your hands end up

Do this little move three times per bun. Then put it on a board, and dust it lightly with flour, if you didn’t do it on the work surface.

Place them on a lightly floured board and leave to prove for another half an hour

Place them on a lightly floured board and leave to prove for another half an hour

Preheat the oven to 200°C

While the  buns are proving, mix up the flour and water, with a whisk. This will form your cross. I think the paste needs to be fairly thick. If you get the thickness right, I don’t think you need the amount of flour I have given here. I think mine was too thin, because the contrast on the ordinary bun was not good enough, so I didn’t get a cross. The contrast between the chocolate buns was much better, due to their brown colour. However, for you I have upped the ratio of flour to water. My advice would be to start with 50 g flour, and very slowly add the water, until you get a thick batter. it should leave ribbons when you pour it from a spoon, not run off.

Once you have a good consistency for the paste, and the buns have proved, then you need to make the cross. Transfer the buns to a baking sheet. Put the flour paste into a sandwich bag (or piping bag, if you have all the fancy equipment) and snip off a really small corner – be careful, the piped line is much bigger than the hole appears. Pipe the paste over the bun in a straight line, then again, at right angles to the first.

The piping bit is tricky, and needs a fairly steady hand

The piping bit is tricky, and needs a fairly steady hand.

I have to admit to a few drips where there should be none. They wiped off easily enough, but I had a thin paste. It is best to be as careful as you can.

Put the baking tray in the oven, and bake for between 15 and 25 minutes. Mine took nearer 25 minutes, so keep an eye on them. Like most bread-based products, they sound a little hollow when tapped on the bottom, when they are done.

While the buns are in the oven, melt the apricot jam and the water to make a glaze. Glaze them by painting the jammy liquid  over the top of each bun as they come out of the oven.

Leave them to cool on a wire rack.

Toasted Hot Cross Buns

Toasty!

Toasted is the correct way to serve these. Possibly slathered with butter from a wonky sheep.

4 Comments

Filed under Feast

Custard – a Step by Step Guide

You may have noticed by now that I am rather fond of dishes that involve custard. This is partly because I can only get Vla in the Netherlands, which is too sweet for use on desserts, and has been thickened with flour; but partly because homemade custard is much more tasty than it’s packet counterpart . It would, indeed, be possible to add Bird’s Custard to the list of Stuff Visitors Must Bring From the Motherland, but actually, making custard is relatively easy, so I don’t usually bother.

As it is so easy, and I have a couple of recipes coming up that require custard (and many more to follow, I’m sure) I thought that I would give a quick step-by-step guide, to save me typing out the method all the time.  The recipe calls for the use of vanilla bean. I know they are expensive, but they really are superior to using vanilla extract, so try to get them if you can. There is a good vanilla bean paste on the market too, that would be a better substitute if you really have to. Of course, I have managed to find a way to eke out the most value from a single vanilla bean, and nothing is wasted!

Most of the time, a recipe will call for you to split a vanilla pod in half, then add all of the seeds, and the pod to the warming milk/ milk replacement. I usually only ever scrape half of the bean, and add the seeds to the liquid. The exception to this is when making ice cream, or a LOT of custard, as these will require a whole pod.  I always add the split pod too, but when the milk has warmed through, I remove the pod, rinse, and dry the halves. When they are dry, I put them aside in an airtight container (a small jar with a lid). The next time that I need to make a custard, I still have seeds from half of the pod, and the old pod to add to the milk, so I get double the custard for the price of one.

Still not done, you can then dry the pods for a second time, and snip them into shorter lengths. Add these to an airtight jar filled with sugar. The remaining oils in the pod will infuse, leaving you with vanilla sugar. This is a much more acceptable substitute for vanilla pods in your next batch of custard, than using vanilla extract. There are many other recipes that you can use this in. I find stewing fruit with a little of this sugar is a really great addition. The vanilla pods will continue to be useful in this way for a few weeks. When they are dried up, they have imparted all their flavour to the sugar, and only then should you discard (or better yet, compost) them. That is a lot of value from one lowly bean, making it all a lot more worthwhile!

I have not given proportions here, as this will vary from recipe to recipe, whether you are using milk, cream, soya milk or even coconut milk (which is excellent in custard – I recommend that you give it a go). You can also make savoury custards but the methodology differs, so this is for sweet custards only.

STEP ONE – The Milk

Flavoured milk, just below boilng point

When the milk looks like this, remove from the heat

The milk (or replacement) has to carry the flavour. Usually, this will be vanilla, but could also be cocoa, ginger or fruit syrups. Whatever flavour you are adding needs to get heated with the milk. Some flavours, like the vanilla will infuse sufficiently having been brought up to the boiling point. Others will need to steep for a while before you heat the milk, to intensify their flavour.

Whichever way, you will need to gently bring the milk up to boiling point, but try not to let it boil. You will have reached this point when there are small bubbles at the sides of the pan. Take it off the heat at this point.

STEP TWO – The Eggs

While the milk is slowly coming to the boil, separate your eggs. I have assumed that a picture is not necessary for this part of step two. Be careful not to get yolk in your whites. I advise breaking each egg over a small, separate container before adding the whites and the yolks to the main batches. This way if any do break, you haven’t lost the lot. I have also taken a risk on scooping out some egg yolk when I managed to get a little bit (and I stress it was little) of yolk in my whites once when I didn’t follow my own advice, and it turned out OK, with no discernible effect on the yolks, but it was not great worrying about it.

Don’t throw away the egg whites. They make great meringues and macarons. They also freeze well, if you don’t have time to do something with them straight away. I would love to hear any other suggestions for using up egg whites, particularly in savoury dishes, if you have them. Although egg white omlets need not apply!

Egg yolks and sugar, whisked until pale

Egg yolks and sugar, whisked until pale

Once you have your egg yolks, you need to combine with the sugar, by whisking them together, until the mixture is pale.

A tip here is not to add the sugar to the egg yolks unless you are going to whisk them straight away. If sugar is left on the yolks, it will change them, and a skin will form, making the end result a little bit lumpy. This would be the time not to answer the phone if anyone rings!

It is the yolks that act as the thickening agent. I have heard that it is possible to make a sort of vegan custard, using soy flour as a thickener, and coconut milk, but I have never tried this method. Anyway, my point in telling you this is that you need the egg yolks – don’t be tempted to cut down on these, unless you also cut down on liquid too.

STEP THREE – Combining Eggs and Milk

Adding milk to eggs to make custard, slowly at first

Add a small amount of milk first

Some people will tell you that this is the hard part of the custard making process. As long as you don’t let it intimidate you, and you have a bit of patience, it need not be difficult. There is a risk that you could scramble the eggs, if you heat them up too quickly in one spot. This only happens if you apply direct heat to them, or if you try to add too much hot liquid at once.

An easy way to get around this is to only add a small amount of milk at first (really, only 20-30 ml), and make sure that you have whisked it in well before adding the next lot of milk.

You will need to put a damp cloth under your bowl, as I have done here, to stop it sliding around as you whisk, which leaves you with both hands for custard, not bowl-stabilisation.

Whisking in the first bit of milk

Thoroughly combine the first bit of milk before adding more

You can gradually increase the amount that you add each time. At some point, the egg will become quite liquid, at which point you have custard – congratulations! You  can add the remaining milk in a continuous stream, as long as you continue to whisk the custard all the time as you do so.

Adding Milk faster, continuing to whisk

You can start to add the milk faster, but continue whisking

I usually continue to whisk the custard for a little while, once all the milk has been added, more from habit than anything else, I think.

Whisking well to make sure the milk & eggs are thoroughly combined

Give the custard a whisk after all the milk is added, to ensure it is all combined well

STEP FOUR – Thickening the Custard

Custard, not yet thickened

When you return the custard to the pan, it will look like this

Next, the custard needs to be thickened. If you are making custard from scratch, you will need to stir it constantly. There is no getting away from this. I like to see it as spending time with the custard rather than getting impatient about it. Making custard can be relaxing, and fairly zen, if you let it.

Return the custard to the pan that you heated your milk in. Put it on a low heat and start to stir. You need to try to stir so that you are  moving the wooden spoon over all of the base of the pan, so that no custard can catch on the bottom, and cause lumps.

As it cooks, the custard will gradually start to thicken. When you draw a line on the back of the spoon, and the line stays there, and does not run, then your custard is done.

Thickened, Warm Custard

You know your custard is done when you get a line on your spoon

Never allow the custard to boil at this stage. If it boils, you will split it, and will end up with lumpy, scrambled custard, which will taste nice, but will look awful and the texture in your mouth will be horrible.

If this does happen, don’t despair too much. It can be salvaged to make it passable again, but it will have lost a little of the rich, silky texture that good custard is known for.

You can let the split custard cool a little, then put it into a food processor. Start it on a low setting, and gradually increase the speed and keep going until it is smooth again. I got this tip from the Accidental Hedonist a very long time ago, when I first started making custards, and one split on me (or rather, I split it, if we are going for full disclosure…). It really works, and the custard will be almost as good as new.

You can pour custard, hot, onto pies and puddings, baked fruits, or fresh ones. You can chill it for use in trifles or flans. Once chilled, you can cover  it with sugar that you burn under a blow torch, or a very hot grill for a créme brulée. You can bake it in the oven. You can even bathe in it to demonstrate how wacky you can be to raise money for charity, if you really must (not recommended, better use Bird’s for this purpose). Whatever you do with it, you will have a lovely homemade treat that will impress your friends, and that you can be very proud of.

4 Comments

Filed under Feast

Bun’s the Word for Chinese New Year

Dragon in China

Lóng Nián Kuài Lè Happy Year of the Dragon

(c) M. Medeiros 2010

Monday was Chinese New Year, so I decided that I would cook Chinese food. The Lunar New Year is the most part of the most important festival in the Chinese calendar, Chūn Jié (Spring Festival). Anyone who has Chinatown in a part of their city will know what a great party it is. It started on Monday, and will go on until the 15th day of the Lunar Calendar, when it will end with the  Festival of Lanterns.

The Chinese have a number of traditional foods for their Lunar New Year celebrations. They like to eat noodles, which must remain uncut for longevity. I cheated a bit and decided that the noodles in the Pho would have to do for this. It was eaten for the same meal, so it counts, right?

They also eat chicken, to represent good fortune, and shiitake mushrooms to fulfill wishes. I had some shredded chicken in the fridge that I had stripped from chicken carcasses that I used for stock, and I had to get some shiitake mushrooms for the pho anyway, so I wanted to use these as the basis for my Chinese meal.

I know that I am going on about it a bit, but we were lucky enough to sample some amazing Chinese food in Sydney. Some of which I blogged about, but a lot of which I didn’t. My recent experience led me to recall the vegan yum cha at Bodhi, where the Hom Bao (steamed buns) were incredible.

Hom Bao would also help me hit some more New Year’s Resolutions;  make more asian food, and bake more bread. Given that I coud also use up leftovers, there were really few other options for my first chinese meal of the year.

So, I threw myself right in at the deep end, and decided to make two fillings for Hom Bao, made two ways.  One was meaty, and used the chicken, and the other was vegetarian. It would have been vegan, but vegetarian oyster sauce has milk protein in it apparently. Who knew?

I am not going to lie, these buns are not a trivial undertaking, and involve several techniques. However, the results are really worth it, with a casing of sweet, soft dough, and rich savoury fillings.

Next time, I will make sure that I have some guests to share them with.

Recipe: Hom Bao

Ingredients

For the bun starter:

1 sachet dry active yeast

4 tbsp plain flour

4 tbsp warm (not hot, you need to be able to comfortably put a finger in it) water

1 tsp caster sugar

For the bun dough:

110 ml lukewarm water – if you can’t measure this accurately in a jug, weigh it (110 g)

200 g plain flour

2 tbsp caster sugar

1 tbsp vegetable oil (not one with a strong flavour)

¼ tsp salt

½ tsp baking Powder

For the Chicken Filling:

100 g cooked chicken, shredded

½ small onion, finely chopped

1 garlic clove, finely chopped

A little vegetable oil for frying

2 spring onions, sliced thinly

1 tbsp soy sauce

½ tsp sugar

For the Mushroom Filling:

½ small onion, finely chopped

1 garlic clove, finely chopped

A little vegetable oil for frying

2 cm lump root ginger

½ leek

100 g shiitake mushrooms, or mix of shiitake & oyster mushrooms, roughly chopped.

1 tsp chinese five spice powder

1 tbsp vegetarian oyster sauce (or make your own, and you can make it vegan)

1 tbsp soy sauce

1 tbsp mirin (rice wine)

Method

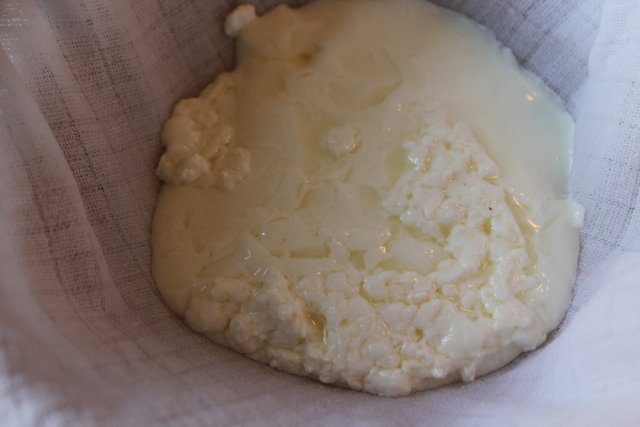
Firstly, make the bun starter. Mix together the flour, water & sugar so the sugar starts to dissolve. Sprinkle in the yeast. and mix well.

Bun dough starter

Starter at the very beginning

Set it aside for 30 minutes to allow the yeast to start to work.

Bun dough starter after 30 mins

The starter develops bubbles and will rise a little

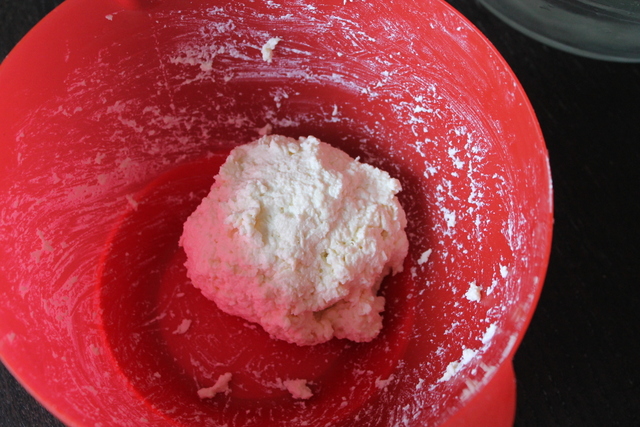
Add the rest of the dough ingredients, except for the baking powder, and combine well, until it comes together into a dough.

Bun dough

Dough formed

Turn the dough out onto a lightly floured surface and knead, by holding onto the end of the dough with the fingers of one hand, then pushing the top of the dough down and away from you with the other hand. Fold it in half, then make a quarter turn.  Keep repeating the kneading action until the dough becomes smooth and elastic. This should take about 10 minutes. If you over or under knead the dough, it will affect the bread, but it is easy to know when to stop kneading, this will be at the point when a finger jabbed into the dough stays there, and does not disappear.

dough, after first knead

Fingers sticking – good

Then put it into a lightly oiled bowl (a large one). The oil should not be strongly flavoured, but you need it to stop the dough from sticking to the bowl.

Dough ball before rising

Dough balls!

Cover the bowl with a clean tea towel, and place it in a warm place. I use the top of my stairs, which is the warmest place in my flat, due to there being a door at the top of them. You can put it in your warmest room, or an airing cupboard if you have one. Don’t put the bowl directly on a radiator, and keep it out of draughts if you can. Leave it to prove for a few hours (maybe 2-3) until the dough has tripled in size

Dough after proving

Proved, you have large dough balls

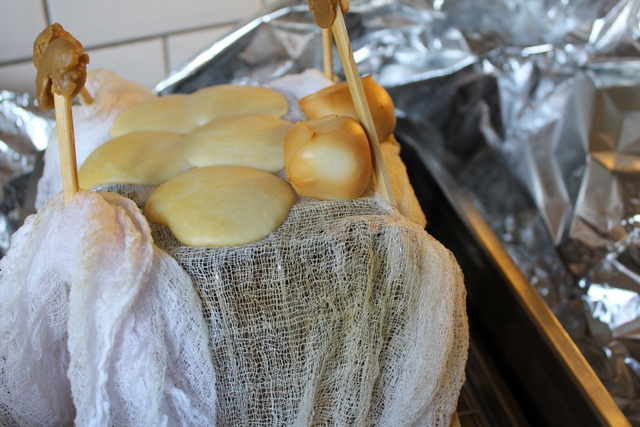
While the dough is proving, make the fillings, then set them both aside to go cold.

For the chicken filling, gently sweat the onion and the garlic until translucent. Add the rest of the ingredients, and mix thoroughly. The mixture should not be very liquid, so if it is, slake a little bit of cornflour, and stir it in.

Cicken & Soy Filling

Soy Chicken Lickin’

For the mushroom filling, sweat the onion until translucent. Add the garlic and the ginger and cook until you can smell them.

You will have julienned the leek as part of the preparations. the julienne need to be small.

Julienned leek

Fine cuts

Add these and the mushrooms to the pan, and cook down until the leeks are silken. You will need to stir this so that the leeks don’t burn. The observant may notice that I have sliced my mushrooms instead of chopping them. Don’t do this, it makes the buns harder to stuff. Chopped will be better.

Add the rest of the ingredients and stir well. Again, you don’t want it too liquid, so cook it down if it is runny.

Mushroom Filling

Oyster mushroom filling – much tastier than it looks

When your dough has risen, knock it down (give it a punch until the air goes out of it), then spread it onto a lightly floured surface. Sprinkle evenly with the baking powder, then knead it again for about 5 minutes.

Divide the dough into 2, using a sharp knife. Put one half back into the oiled bowl, and cover it again. Roll the other half into a sausage, then divide it up into 8-12 pieces.

Divide the dough ino bun size

Bun Size Dough Balls

Put any dough that you are not working on back into your bowl and cover it over.

Shape each small dough piece into a round, then flatten with your hands

Flattening the dough

As flat as a Hom Bao

Place about a tablespoon of filling into the centre of the flattened disk.

Buns and filling

Filling

Then draw up the sides of the bun as follows:

Half & pinch

Fold in half over the filling & pinch the dough together

Stretch out sides

Stretch the sides out a bit

Be careful not to stretch the dough too thin,or tear it, because it will split when you cook it.

Pinch together

Pinch the sides together

Then bring the ‘gaps’ to the centre and pinch them all together to form a seal.

Sealed Hom Bao

Sealed Hom Bao

Place, sealed side down, on a 10 cm square of greaseproof paper.

The finished bun

The Finished Bun

Put the bun aside in a warm room, covered with a clean tea towel to prove for a bit more. You should find that you get better as you go along, my last buns were certainly a lot quicker than the first ones.

Repeat until you have finished the dough. You might have a little bit of filling left over, but that’s OK. I used my leftover mushroom mixture up in an omlette, and I intend to have the chicken with a jacket potato.

After about 30 minutes, the buns will have risen a bit more, and should look puffy.

Hom Boa after final proving

Buns – done!

You can then steam the buns over a little water, or brush them with egg wash and bake them in the centre of an oven at 180°C. Either way, they will take about 15-20 minutes, until they are fluffy and hot.

Hom Bao two ways

Hom Bao Two Ways – Golden and Steamed

I split the bao in the front, to show you the filling. Unfortunately, I didn’t capture the steam, but there was a lot.

You cannot freeze the baked bao, but the steamed version freezes beautifully, and they will last a long time. Freeze after steaming, by placing on it’s cooking paper into one of those plastic takeaway cartons. You can fit three or four in each, depending on the size of of your bao.

Steam from frozen, still on the paper. Stick a  knife in to make sure they are warm all the way through before serving.

Leave a comment

Filed under Feast

Making Meringues

I am sure that you may have noticed by now that I use a lot of egg yolks – in stuff like custards, mayonnaises, pasta, pastry and sauces. This leaves me with a lot of egg whites to use up.  Since I hate waste, I try always to use them, which invariably means making macaroons, and meringues. I need to expand this repertoire, so expect to see consommés and more stir fries appearing here soon. If you have other suggestions for using up egg whites (although not the egg-white omelette, please, some things are a step too far, even for me!) feel free to leave them in the comments.

I had originally intended to make advocaat, in keeping with the Anglo-Dutch theme for my party, but I ran out of time. However, this time, the advocaat was actually the by-product of the intention to make meringues, instead of the usual situation where I have a load of egg whites left over from something else. No one missed the advocaat, anyway!

Since I make them so much, I thought that I would share my technique here. I haven’t given a recipe, as it will depend on how many egg whites you have and to some extent how old they are.

Start by heating the oven to 110°C. Then measure out  45 g sugar for each egg white. I like to use raw cane sugar, but you can also use caster, granulated or icing sugar. I have also seen sugar solution, but that seems to be for Italian or Swiss style meringues, and I tend to stick with French. It is possible to use soft brown sugar, but be aware that this makes it very hard to get a crisp, dry meringue. I think this technique may be best left alone or, if you insist, only use it to top lemon meringue pie.

Put the egg whites in a very clean bowl. There must be no fat or detergent in it. If you are unsure, wipe it with the cut side of a lemon (or other citrus), which will act as a degreaser. If the bowl has any fat, it may affect the ability of the eggs to maintain the air that you are about to whip into them. The same goes if there are any traces of egg yolk, so be careful when separating the egg, too. Note that the fresher the egg, the less likely that the egg yolk is to break when you separate it.

Next, whip the egg whites until they form stiff peaks. This is when the egg whites look drier, the whisk or a spoon will create peaks when you remove it from the mixture, and if you are brave, you can upend the bowl and the egg white will not slide out. I would advise using an electric whisk if you don’t want it to take you hours.

Egg Whites at the Stiff Peak stage

The stiff peak - sadly lacking in many ski resorts this year

Then, a tablespoon at a time, add the sugar and whisk in thoroughly before you add the next spoonful. The egg white will stiffen further, as you add the sugar. At this stage, you are beating to incorporate the sugar, not to add any further air, so it won’t increase in volume.

Egg Whites plus half the required sugar

About half way through - stiffer and peakier, but not more voluminous

Keep adding the sugar, and whipping, a tablespoon at a time. Eventually, the mixture will become really stiff, to the point of being really hard to work,  and will look shiny. This is when you stop adding sugar. Because I use cane sugar, I find I need less than the stated 45 g per egg white. If you are using caster or icing sugar, you may find that you need to use all of it. This is also fine.

Finished Meringue mix

The final product - glossy, thick and much harder to beat

Don’t add more sugar than needed to get to this stiff consistency (or than the 45 g, whichever happens to come first), otherwise your meringues will leach sugar. This does not really affect the taste, but it does give them a rather unattractive look. A bit like a tree that is leaching sap.

Now your meringue is ready to be shaped. You need to line a baking sheet with some greaseproof paper. You can stick it down with oil or by dabbing a bit of the meringue in each corner and the centre of the paper and using this as glue to stick it to the baking sheet. Once the baking sheet is ready, you need to choose what shape and size you are going to have your meringue. You may wish to have it as a pavlova, in which case you need to shape one large disc, with slightly elevated sides, to hold the fruit in. I normally go for individual ones, because these are better for parties or for sharing. Most commonly, I will get two spoons and shape individual quenelles, which can then be stuck together with cream and fruit in a sandwich. However, I wanted to fill these with Chestnut Jam, so I decided that mini versions of the pavlova-style would be better suited to the task.

Some people would use a piping bag for that, but I lack the finesse, and the piping bags, so I made do with shaping them with two spoons. You can try either, I think both are just as good. I made them vaguely circular, like a nest.

Meringue nests

Not sure what I did here, but you get the meringue nest picture

Then it is ready to go in the oven. Bake the meringues for up to 1 ½ hours (but check after 1). If you have made one large pavlova style meringue, you will need longer – check after 1 ½, and leave in the oven up to 2 hours.

A Meringue nest

Meringue nest - a better view

The idea is not really that the meringue cooks, more that it dries out. You need to check that it is no longer soggy to the touch, and that it generates a hollow sound when tapped very gently on the base.It will have darkened a little, even if you use icing sugar. Mine are generally more golden than off-white, because the unrefined sugar I use is a light brown.

When you get the hollow sound, it is done. If it is at all possible, turn off the oven, but leave the meringue in there to continue to dry overnight. This will give the best result, but it will be OK if you leave it to cool outside the confines of the oven.

Once it is done, fill it with fruit, cream, fruit and cream, jam, or serve it with ice cream, mash it up with fruit and cream to make Eton Mess – whatever you like, really.

2 Comments

Filed under Feast