Tag Archives: Party Food

A Choose-Your-Own-Adventure Pizza Party

Choose-Your-Own-Adventure Pizza


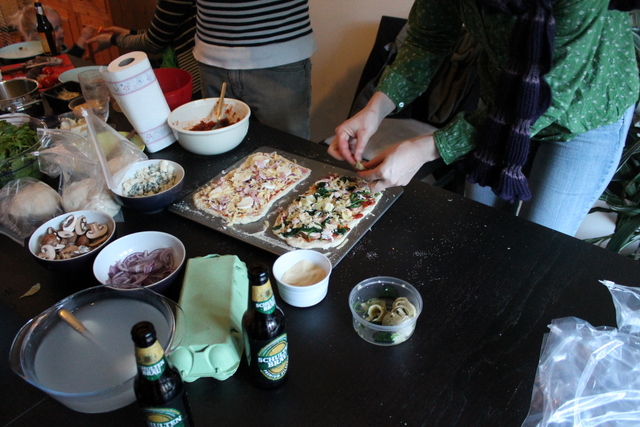
Do you remember those Choose-Your-Own-Adventure books you had as a child? The ones where if you wanted your hero to fight the dragon, you should turn to page eight, but if you preferred her to choose the better part of valour and retreat to come up with a cunning plan, then you should head straight for page thirty-four. All of the building blocks were there; you just had to decide how to put them all together to come up with what you hoped would be a sensible plot. I have stumbled upon the Choose-Your-Own-Adventure pizza as the perfect way to cater a party.

Of course, I cannot lay claim to the invention of choosing toppings for pizza any more than I can, or would, the adventure books. Children’s cafés have been doing this for years. What I didn’t foresee was what a low stress way it would be to feed adults too, nor how much fun they would have doing it either.

Picking out the perfect pizza - fun for kids and adults

Relaxed dining

Normally, I am rushing about at dinner parties, because I make a lot of food, often that has to be prepared at once. I am not one of these people who comes up with dishes that can be prepared in advance. If you are like me, the Choose-Your-Own-Adventure pizza party is a great way to allow you to relax. Everything was made in good time for the guests to arrive, or sliced, as appropriate, and laid out on the dining room table so people could choose what to put on it.

Of course, because it was me, I had made most of the components, including the mozzarella, and the smoked mozzarella, as well as the dough, and the pizza sauce. I didn’t make the charcuterie, though, maybe that is for another pizza party another time. But in general, it was pretty relaxed, with no fancy elements to put on, or to be pureeing as the guests arrived. I also split the dough into individual portions, and placed them ready and waiting for the final proving inside a ziploc bag. All in all, it was a success, low stress, meant I got time with my guests to have fun, and they got time to make the pizza of their choice.

Breakfast Pizza - Bacon, sausage, mushrooms, spinach and egg

Breakfast Pizza

We even had two servings of dough and just enough pizza sauce leftover the next day to make the perfect hangover breakfast, with bacon, sausage, mushroom, spinach and the egg. The dough kept well in the fridge, and should freeze well too.

Made with Love Mondays

And, because I made all of the elements of the pizzas, and my friends loved to make their own, I’ve decided to enter them into this week’s Made with Love Monday hosted by Mark of Javelin Warrior. Of course, it will also appear in the round-up post for this month’s Cheese, Please! because I used the fresh cheeses that I made, and the dough had the whey from the cheese in it.

Also,

Recipe: Choose-Your-Own-Adventure Pizza

Ingredients

Home-made mozzarella

Home-smoked mozzarella

Pizza dough – I made 2 double batches of this recipe,which is really great, but I used whey from the cheese making in place of the water, which worked out really well

For the Pizza Sauce:
The amounts given below is enough for 4 individual pizzas. I made enough for 20, but I’ve scaled it down here.
1 red onion, finely chopped
1 fat clove of garlic
Splash red wine
200  g tomatoes, chopped
1 tbsp fresh oregano (flowers and all), or 1 tsp dried

For the Toppings:
Whatever you feel appropriate, really. I used
Red onion, sliced
Raw mushrooms, sliced,
Raw pepper, deseeded and sliced
Artichoke hearts
Blue cheese
Ham
Chorizo
Fennel sausage
Speck
Cooked spinach
Eggs
Olives
Method

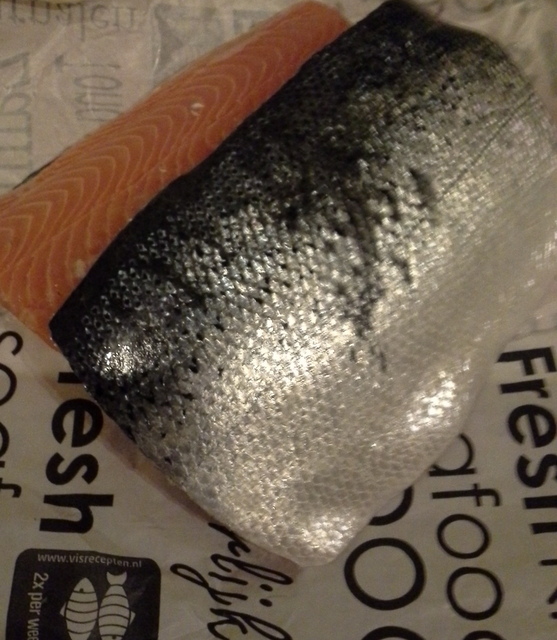
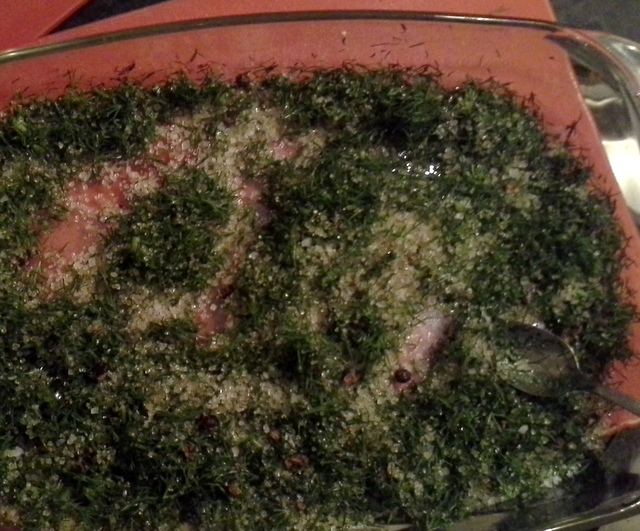
On the morning of your party, make the mozzarella, and bodge up a smoker to smoke about half (or buy both, I won’t judge).

Make up the dough, according to the recipe I’ve linked to – or use another favourite of yours. Allow to prove for 90 minutes. You can totally relax or eat lunch, or do whatever you like for a bit at this point – most unusual for getting ready to host a crowd.

At some point chop up and lay out your toppings, in a very leisurely fashion. You even have time to decide you should offer pineapple after all, and run out to get some. It’s up to you.

Fold over the dough, as Dan shows you in the recipe I linked to. Leave it to sit for another half an hour. Treat yourself to a cup of tea – or something stronger if you prefer.

Divide the dough into your ziploc bags, and place them on the table with the rest of your toppings.

Then you need to make up your sauce. In a frying pan, so that you can get a lot of evaporation, soften the red onion. Add the garlic and cook off until the scent hits you.

Splash a good helping of red wine into the pan and cook until it has almost evaporated. Finally, add the tomatoes and oregano. Cover the pan with a lid for about five minutes, until the tomatoes breakdown a little. Remove the lid and cook on a medium heat, until the sauce is really thick. Put this in a large bowl on the centre of the table.

Serve up the mozzarella, and open the smoker, hoping you still have resplendent balls, and not smoky little discs, unlike mine. Even if they are, use them anyway.

Stand back and watch the children show the adults how to get stuck into the shaping and topping of their pizzas, closely followed by the adults trying to top one another’s efforts.

Advertisement

20 Comments

Filed under Feast

Gravad Lax: Buried Treasure

Gravad Lax with creamy dill sauce

A Christmas Cracker

I love trying food from different cultures, especially as a different take on Christmas food, such as our Aussie Christmas dinner. I guess that by now, Swedish food isn’t so different for me, but I thought I’d share a favourite recipe of mine.

A traditional Swedish julbord, or “Christmas table” is a pretty meat-heavy affair, eaten at 4pm on Christmas eve, after the nation has sprung to life again following their Disney favourite; “Kalle Anka och hans vänner önskar God Jul” or “Donald Duck And His Friends Wish You Happy Christmas”. It is always the same clips, and this is one Christmas tradition I’m not overkeen on, but when in Stockholm…

Anyway, back to the julbord; it groans under a ham, which for me this year was a wild boar one, because the out-laws know I don’t like to eat factory farmed meat; various kinds of inglagd sill ; cold cuts; sausages; lutfisk; spare ribs; and Janssons Frestelse.

In my family, we also often have gravad lax. Also known as gravlax, gravlaks, graavilohi, or graflax depending on where you are in Scandinavia. In any country, it means buried salmon. In times before refrigeration, especially in northern European countries where snow covered the ground for a good part of the year, curing and burying meat was a great way to preserve it. Originally, people would use spruce or pine needles in the cure, but the balance needs to be perfect if your fish is not to end up tasting of a certain kind of disinfectant.

These days, everyone can make this easy recipe; you don’t even need a spade! In fact, you still have time to make it in time for a new year’s gathering, if you are having one. It looks impressive, for relatively little effort, and it is a big hit.

Organic Farmed Salmon

Organic Farmed Salmon

One thing I must urge you is to source your fish well. The increase in popularity of salmon in the last decade or so is concurrent with fish farming, most of which causes horrible environmental damage, due to over feeding and routine, excessive use of antibiotics. At the same time wild stocks are seriously dwindling, due to overfishing, ocean acidification and habitat destruction. In my opinion, salmon should be a treat, eaten very occasionally, so that we can afford to eat the best organically farmed salmon we can, meaning there is no unnecessary antibiotic use, and better care is taken to ensure that the fish are not over fed. This cure also works well for other types of fish, so you could still enjoy the recipe with cheap and plentiful fish, such as mackerel, or herring, so do feel free to experiment.

I made this amount of salmon for a large party, so you can also reduce the amounts of fish you use, but you must have enough cure to really cover the fish, so make a little more of that than you think you might need for the amount of fish that you have.

Recipe: Gravad Lax With A Creamy Mustard Sauce

Ingredients

For the Salmon:
100 g demerera sugar

75 g sea salt

100 g dill

1 tbsp juniper berries crushed

1.5 kg salmon fillet, halved

3 tbsp brandy

3-4 bay leaves

For the Sauce:
250 ml crème fraîche

2-3 tbsp finely chopped dill, depending on how much you like it

2 tbsp wholegrain mustard

1 tbsp runny honey

Salt and pepper to taste

Method

Gravad Lax mix

A Fitting Salmon Send Off

Mix together the salt and sugar until really well combined. Remove the stalks from the dill and chop the rest finely. Mix into the cure with the juniper berries. The cure needs to look pretty green and herby, because you want to get a lot of flavour in there.

In a shallow dish, get some cling film or a cheesecloth, and coat with about a quarter of the cure. Press one half of the fish down well into the cure, skin side down. Rub the cure into the skin, and leave skin side down on the wrapping.

Then you need to load the flesh with the cure. Do this by brushing the flesh with half the brandy and laying about another quarter of the cure over the flesh. Lay a few bay leaves over the fish.

Repeat the brandy and cure on the flesh of the second fillet. Once it is well covered, then lay it on the first fillet, so they are flesh to flesh. If the cure falls out, tuck it back between the fillets.

Rub the last of the cure into the skin of the second fillet. Wrap the fillets tightly together. If you are using cheesecloth, bind it with a series of butcher’s knots, as tight as you can get. The fish will lose liquid as it cures, so it is best to keep it in the shallow dish, unless you really like cleaning the contents of your fridge.

Weigh down the fish, by piling a load of tins on top of a baking sheet on top of the fillets, and placing the whole lot into the fridge. Leave it to cure for 3 days, turning once each day. Rinse off and pat dry with kitchen towel before serving.

What Gravad Lax Should Look Like

The Finished Product

To make the sauce, simply mix together the crème fraîche, dill, mustard and the honey. Season to taste.

Serve with the thinly sliced gravad lax on bread, melba toast or knäckebröd, as a delicious starter or hors d’oeuvre.

11 Comments

Filed under Feast

Merry Christmas and Tarted Up Mince Pies

P1040219

Merry Christmas

Hello!

Well, It’s been a long time since I fired up the old blog. I haven’t gone away, but things have changed a little. Not least, WordPress have been messing about with the software, and the photos upload differently, so sorry if they look a little bit weird, until I can get used to the new  way.

Anyway, since I posted last I had a bit of computer trouble, so I know that I may owe a few of you e-mails, and I have some catching up to do for Seedy Penpals.

I also have a little news, that is probably exciting for me, and not for many others, but I’m going to tell you anyway. After a lot of deliberation, I decided to take a role as the Campaign Manager for the Land of Promise Campaign to get better working conditions and the use of fewer pesticides in the pineapple industry in the Philippines, and three weeks ago I signed a contract with Fairfood International. I am excited because it is combining my skills of campaigning, and food, and I’m helping Fairfood plan and deliver a new campaigning strategy.

I have dived right in, with planning for the campaign, which has taken all of my head space, but now I have done the background reading, I am hoping to get back to blogging regularly. It does mean that I need to settle into a different posting pattern, but for the time being I have a bit of a backlog of posts to catch up with, which I’ll schedule in the coming days and weeks.

But that’s enough about me. I am with my family, and have just finished the preparations for tomorrow’s food. I have also managed to squeeze in some jam making. I haven’t had as much time this year as I normally would to make all the preserves ready for Christmas, so I haven’t made my own mincemeat. The mincemeat that I picked up on Saturday is at the more mediocre end of the spectrum, and I am not one to compromise on quality that much, so I thought that I would also share my tarted up mincemeat recipe.

And of course, I wanted to wish you all a very merry Christmas, Great Yuletide, and a Happy Winter Solstice, whichever you celebrate.

Mince pie with tarted up mincemeat

Tarted up!

Recipe: Tarted Up Mincemeat

Ingredients

50 g dried fruit, I used a mix of cranberries, raisins and golden sultanas

Port to cover the fruit

1 jar mincemeat

Zest of a lemon

50 g of almonds and hazelnuts, chopped

Sweet shortcrust pastry I added lemon zest to this

Milk or egg wash

Method

Soak the dried fruit in the port until the fruit is plump. This will take at least an hour. Stir in the mincemeat, and lemon zest, and allow to soak together with the fruit.

If you are making your own pastry, make it now using the method here. Wrap it up and let it rest in the fridge for about an hour.

Tarted up mincemeat

Mincemeat Plus

Add the chopped nuts to the mincemeat just before rolling out your pastry. By using shop bought mincemeat, you are taking advantage of the pulped fruit (usually apple) and the spices. Normally mincemeat has to mature for at least a month before use, so this is a shortcut to tasty, fruity mincepies, without compromising on flavour.

Heat the oven to 160°C.

Roll out your pastry to about 3mm thick. Use two cutter sizes, one slightly larger for the base, cut an even number of bases and tops. Grease some tart tins. Cover with the bases, then press down gently with some dough offcuts.

Add a heaped tsp of the mincemeat to each base.

Brush the rim of one side of the top with milk or egg wash, cover the tart, wash side down, and either crimp or press gently with a shot glass to seal the pie.

Mince pies

Cheating Tarts

Brush the pies with more milk or egg wash. Put in the oven for about 15 minutes, or until they are golden brown.

Serve them to your friends and guests and no-one will tell that you cheated a little bit.

3 Comments

Filed under Feast

Sauce Grib-ish

Dill, Boiled Egg & Capers

Ooh, Saucy!

I first had a dish like this whilst having dinner at my friend’s. He writes the excellent Morning Claret wine blog. He really knows his stuff, so if you want some good wines, and great writing, go and give him a visit. Both he and his partner are very accomplished cooks, and it is always a joy to be invited to their house for fine wines, great food and excellent company. His version had anchovies in it, and he served us boiled globe artichokes to dip in it. I loved it, and decided that I would have a go at recreating it.

A bit of research later, and I have found that it was a variation of one of two classic French dishes. Either Sauce Gribiche or Ravigote. Of course, as with any classic dish, there are a lot of variations and the lines are blurred between the two. It seems that ravigote is more like a vinaigrette to which chopped boiled egg has been added, and in gribiche, the yolk is used to make a mayonnaise, and the chopped white is added. This is sauce is not quite either of those things, so I have called it Sauce Grib-ish.

I first made this after an Easter egg hunt left me with quite a few boiled eggs to use up. It also needed to be vegetarian for the friends that I had coming over. It is so versatile, you can serve it as a dip, over asparagus, or with fish and chicken. I’m also going to try to make a potato salad with it, I think it will be a great combination.

I am entering this simple seasonal sauce into Herbs on Saturday at Lavender and Lovage, although I only use dill in the recipe given, it will also be really good with tarragon, chervil or even parsley.

Sauce Grib-ish

Sauce Grib-ish

Recipe: Sauce Grib-ish

Ingredients

This sauce is easy to scale up or down, depending on how many people there are. I have given the amount for two people to have as a sauce to go with vegetables or fish. Taste is the key to this dish, as you need to balance the richness of the egg with the acid of the lemon and/or caper vinegar. The amounts I give here are approximate, so keep testing and adjusting the sauce, according to taste.

1 egg, hard-boiled

2 tbsp capers plus vinegar from the caper pot

Juice of ½ a lemon (or just the vinegar from the capers)

Small bunch dill, finely chopped

Good quality extra virgin olive oil

Method

First, halve the egg, and remove the yolk. Then finely chop the white.

Mash the yolk with a little lemon juice or vinegar. You want the yolk to be a smooth, runny paste, about the same consistency as thick pancake batter.

Roughly chop the capers, and mix together with the dill, egg yolk and egg white. Taste and adjust for acidity, adding caper vinegar if needed.

Add some olive oil and taste and adjust again. The amount of olive oil you need will depend on what you want to use it for. For example, if you are serving it as a dip with crudités, you will want a thick sauce that will stay on bread, tortillas or short lengths of carrot and cucumber. If you want to serve it to accompany artichokes or asparagus, you will want a much thinner consistency, so add more oil. For potato salad, you will want it somewhere in between. The oil will also alter the acidity, so make sure you taste and adjust as you go along.

5 Comments

Filed under Feast

Beans, Beans are good for your …Burgers!

Bulgur & Bean Veggie Burger

Barbecues – Not Just for Carnivores

You may have gathered by now that I like to barbecue. We don’t have a fancy grill or gas burner, and rely on simple charcoal. I don’t really see the point in lighting up a barbie if it is only going to be the two of us, so I tend to supersize mine, and invite loads of people. I’m pretty well-practiced at it now, and can happily cope with 20-30 guests.

We fill a baby bath with ice, for the drinks to chill in, and I set about making the things that will go onto it, with various salads, and dips. There are a few things that must feature – ribs, sausages, vegetable skewers, and of course burgers. I make my own meat burgers, and I don’t leave out veggie friends.

BBQ used as heat for guests

Burn All The Things

Of course, as is tradition, I do all the prep work, and step back to let the Big Guy get the glory, as he (and often a few other grill kings/ queens) ‘caramelises’ my food.

I am not a fan of fake meats. I know that they have saved many a vegetarian at a barbecue, but they just aren’t for me. These vegan burgers are not pretending to be meaty, I think that their flavour and texture is good enough to speak for themselves. And they are great in a bun!

The recipe is a good basis for a veggie burger. From here, you can change the spice mix, substitute coriander for the parsley, use fresh chilli instead of the cayenne pepper, or add nuts or some other vegetables to the mix. I have made a few variations myself. I’d love to hear your variations, and maybe steal them give them a try.

These burgers keep well in the fridge or freezer, and you can cook them in a frying pan too, if you don’t have enough people round light the barbecue.

You may have noticed that a lot of my recipes have been veggie or vegan lately. This is because a friend recently cycled the Dunwich Dynamo, and I agreed to “sponsor” him by signing up to reduce my carbon through Do-Nation. This is a great way of getting people to do a few simple green actions for a short period of time, to see how they get on. It is also a lovely way to help people to feel involved in supporting your event without asking them to donate money, which can be a little awkward in these straightened times. The actions themselves are not too difficult to achieve, and it may get a few people to continue to do them, after all it is supposed to take 30 days to form a habit, so after 2 months it may be second nature.

Peter managed to smash the carbon target that he set himself at the start. I chose the Veg Out option. I really don’t eat all that much meat, so for two months, I have pledged to cut it even further, and also to go vegan a couple of days a week.

The Dunwich Dynamo took place over the weekend, and so far reports are that my friend is very happy, and a little sore, but I expect that there will be no lasting problems. Congratulations Pete, on getting your friends to take some small carbon friendly actions, and for the epic ride!

Bulgur & Bean Burgers Ready to Grill

Grill Ready

Ingredients

200 g dried beans, or one can. I usually use kidney or brown beans here, but the variety is really up to you.

1 onion, finely chopped

2 cloves garlic, finely chopped

1 tsp cumin seeds

½ tsp cayenne pepper

100 g bulgur wheat

400 ml vegetable stock

1 tbsp soy sauce

Good bunch of parsley, finely chopped

Method

If you are using dried beans, soak them for a few hours. Drain then bring them to the boil in fresh, unsalted water. Cook until they are tender. You’ll probably need at least 40 mins for this, but it depends on the age of the beans. Don’t be tempted to salt the beans, or you will make the skins tough.

If you are using tinned beans, drain and rinse them, and heat them in fresh, unsalted water.

It is best to work with warm ingredients, as they bind a bit better, so try to get all the ingredients cooked at roughly the same time. If you are using dried beans, they will need to be started first, if you are using tinned, they should be warmed through as you come to the end of the bulgur preparation.

In a dry pan, toast the cumin seeds until they give off their characteristic scent. Keep them moving, as they will catch quickly. Once they are done, remove immediately to a mortar or a spice grinder.

Add a little oil to the warm pan, and sweat the onion on a gentle heat. You don’t want to colour the onion.

Meanwhile, grind up the cumin, and add the cayenne and garlic, and grind up to a paste. Add to the translucent onion, and fry until the aroma begins to waft.

Add the bulgur and stir to coat all of the grains in the onion and spice and oil. Add the stock, and bring to the boil. Reduce the heat, cover and simmer until the stock has been absorbed.

When the beans are done, drain, but don’t discard the cooking water. If the burger mix is too crumbly, you can add a bit of this to help it to bind.

Mix the soy, beans and parsley into the bulgur mix. Use the stalks of the herb too, as they pack loads of flavour. Set aside about a quarter of the mixture, and then pulse the rest in a blender until it is comes together. You want it to be sticky, but not a paste.

Add the reserved mixture from earlier, for texture and stir well.

Make patties by rolling lumps into balls in your hands, and then flattening on a board to make the burger. They will look surprisingly round. This is normal.

Chill for at least an hour before you grill them, to help them retain their shape. Grill or fry on either side over low coals. Preferably on a summer’s day. You may be able to make great burgers, but you can’t control the weather!

8 Comments

Filed under Feast

Bun’s the Word for Chinese New Year

Dragon in China

Lóng Nián Kuài Lè Happy Year of the Dragon

(c) M. Medeiros 2010

Monday was Chinese New Year, so I decided that I would cook Chinese food. The Lunar New Year is the most part of the most important festival in the Chinese calendar, Chūn Jié (Spring Festival). Anyone who has Chinatown in a part of their city will know what a great party it is. It started on Monday, and will go on until the 15th day of the Lunar Calendar, when it will end with the  Festival of Lanterns.

The Chinese have a number of traditional foods for their Lunar New Year celebrations. They like to eat noodles, which must remain uncut for longevity. I cheated a bit and decided that the noodles in the Pho would have to do for this. It was eaten for the same meal, so it counts, right?

They also eat chicken, to represent good fortune, and shiitake mushrooms to fulfill wishes. I had some shredded chicken in the fridge that I had stripped from chicken carcasses that I used for stock, and I had to get some shiitake mushrooms for the pho anyway, so I wanted to use these as the basis for my Chinese meal.

I know that I am going on about it a bit, but we were lucky enough to sample some amazing Chinese food in Sydney. Some of which I blogged about, but a lot of which I didn’t. My recent experience led me to recall the vegan yum cha at Bodhi, where the Hom Bao (steamed buns) were incredible.

Hom Bao would also help me hit some more New Year’s Resolutions;  make more asian food, and bake more bread. Given that I coud also use up leftovers, there were really few other options for my first chinese meal of the year.

So, I threw myself right in at the deep end, and decided to make two fillings for Hom Bao, made two ways.  One was meaty, and used the chicken, and the other was vegetarian. It would have been vegan, but vegetarian oyster sauce has milk protein in it apparently. Who knew?

I am not going to lie, these buns are not a trivial undertaking, and involve several techniques. However, the results are really worth it, with a casing of sweet, soft dough, and rich savoury fillings.

Next time, I will make sure that I have some guests to share them with.

Recipe: Hom Bao

Ingredients

For the bun starter:

1 sachet dry active yeast

4 tbsp plain flour

4 tbsp warm (not hot, you need to be able to comfortably put a finger in it) water

1 tsp caster sugar

For the bun dough:

110 ml lukewarm water – if you can’t measure this accurately in a jug, weigh it (110 g)

200 g plain flour

2 tbsp caster sugar

1 tbsp vegetable oil (not one with a strong flavour)

¼ tsp salt

½ tsp baking Powder

For the Chicken Filling:

100 g cooked chicken, shredded

½ small onion, finely chopped

1 garlic clove, finely chopped

A little vegetable oil for frying

2 spring onions, sliced thinly

1 tbsp soy sauce

½ tsp sugar

For the Mushroom Filling:

½ small onion, finely chopped

1 garlic clove, finely chopped

A little vegetable oil for frying

2 cm lump root ginger

½ leek

100 g shiitake mushrooms, or mix of shiitake & oyster mushrooms, roughly chopped.

1 tsp chinese five spice powder

1 tbsp vegetarian oyster sauce (or make your own, and you can make it vegan)

1 tbsp soy sauce

1 tbsp mirin (rice wine)

Method

Firstly, make the bun starter. Mix together the flour, water & sugar so the sugar starts to dissolve. Sprinkle in the yeast. and mix well.

Bun dough starter

Starter at the very beginning

Set it aside for 30 minutes to allow the yeast to start to work.

Bun dough starter after 30 mins

The starter develops bubbles and will rise a little

Add the rest of the dough ingredients, except for the baking powder, and combine well, until it comes together into a dough.

Bun dough

Dough formed

Turn the dough out onto a lightly floured surface and knead, by holding onto the end of the dough with the fingers of one hand, then pushing the top of the dough down and away from you with the other hand. Fold it in half, then make a quarter turn.  Keep repeating the kneading action until the dough becomes smooth and elastic. This should take about 10 minutes. If you over or under knead the dough, it will affect the bread, but it is easy to know when to stop kneading, this will be at the point when a finger jabbed into the dough stays there, and does not disappear.

dough, after first knead

Fingers sticking – good

Then put it into a lightly oiled bowl (a large one). The oil should not be strongly flavoured, but you need it to stop the dough from sticking to the bowl.

Dough ball before rising

Dough balls!

Cover the bowl with a clean tea towel, and place it in a warm place. I use the top of my stairs, which is the warmest place in my flat, due to there being a door at the top of them. You can put it in your warmest room, or an airing cupboard if you have one. Don’t put the bowl directly on a radiator, and keep it out of draughts if you can. Leave it to prove for a few hours (maybe 2-3) until the dough has tripled in size

Dough after proving

Proved, you have large dough balls

While the dough is proving, make the fillings, then set them both aside to go cold.

For the chicken filling, gently sweat the onion and the garlic until translucent. Add the rest of the ingredients, and mix thoroughly. The mixture should not be very liquid, so if it is, slake a little bit of cornflour, and stir it in.

Cicken & Soy Filling

Soy Chicken Lickin’

For the mushroom filling, sweat the onion until translucent. Add the garlic and the ginger and cook until you can smell them.

You will have julienned the leek as part of the preparations. the julienne need to be small.

Julienned leek

Fine cuts

Add these and the mushrooms to the pan, and cook down until the leeks are silken. You will need to stir this so that the leeks don’t burn. The observant may notice that I have sliced my mushrooms instead of chopping them. Don’t do this, it makes the buns harder to stuff. Chopped will be better.

Add the rest of the ingredients and stir well. Again, you don’t want it too liquid, so cook it down if it is runny.

Mushroom Filling

Oyster mushroom filling – much tastier than it looks

When your dough has risen, knock it down (give it a punch until the air goes out of it), then spread it onto a lightly floured surface. Sprinkle evenly with the baking powder, then knead it again for about 5 minutes.

Divide the dough into 2, using a sharp knife. Put one half back into the oiled bowl, and cover it again. Roll the other half into a sausage, then divide it up into 8-12 pieces.

Divide the dough ino bun size

Bun Size Dough Balls

Put any dough that you are not working on back into your bowl and cover it over.

Shape each small dough piece into a round, then flatten with your hands

Flattening the dough

As flat as a Hom Bao

Place about a tablespoon of filling into the centre of the flattened disk.

Buns and filling

Filling

Then draw up the sides of the bun as follows:

Half & pinch

Fold in half over the filling & pinch the dough together

Stretch out sides

Stretch the sides out a bit

Be careful not to stretch the dough too thin,or tear it, because it will split when you cook it.

Pinch together

Pinch the sides together

Then bring the ‘gaps’ to the centre and pinch them all together to form a seal.

Sealed Hom Bao

Sealed Hom Bao

Place, sealed side down, on a 10 cm square of greaseproof paper.

The finished bun

The Finished Bun

Put the bun aside in a warm room, covered with a clean tea towel to prove for a bit more. You should find that you get better as you go along, my last buns were certainly a lot quicker than the first ones.

Repeat until you have finished the dough. You might have a little bit of filling left over, but that’s OK. I used my leftover mushroom mixture up in an omlette, and I intend to have the chicken with a jacket potato.

After about 30 minutes, the buns will have risen a bit more, and should look puffy.

Hom Boa after final proving

Buns – done!

You can then steam the buns over a little water, or brush them with egg wash and bake them in the centre of an oven at 180°C. Either way, they will take about 15-20 minutes, until they are fluffy and hot.

Hom Bao two ways

Hom Bao Two Ways – Golden and Steamed

I split the bao in the front, to show you the filling. Unfortunately, I didn’t capture the steam, but there was a lot.

You cannot freeze the baked bao, but the steamed version freezes beautifully, and they will last a long time. Freeze after steaming, by placing on it’s cooking paper into one of those plastic takeaway cartons. You can fit three or four in each, depending on the size of of your bao.

Steam from frozen, still on the paper. Stick a  knife in to make sure they are warm all the way through before serving.

Leave a comment

Filed under Feast

Baked, Glazed Ham and Crunchy Christmas Crackling

Glazed Ham

A great roast!

The Swedes are a very traditional bunch at Christmas, and everything must take place in a particular order. They celebrate on Christmas eve, which starts with a bowl of Risgrynsgröt, which is essentially sloppy rice pudding with no sugar in. The celebrations do not start until their annual Disney clip show, Kalle Anka och hans vänner önskar God Jul: “Donald Duck and his friends wish you a Merry Christmas.”, has finished. This was originally made in 1958, and they Swedified it, taking off Walt Disney’s narration, and adding a Swedish guy. They show it every year at 3pm, and woe betide you if you choose to call in the middle of it! They show the same clips, in the same order, every year, and no-one talks during it at all. I understand that they tried to change some of the clips one year, but so many people wrote in to complain that they have never dared try that again. I am not the only non-Swede to have been baffled by their absolute enthrallment by this programme.

After Kalle Anke, they have their Christmas meal. This is as traditional and not-to-be-messed-with as old Kalle and his clip show. As well as inlagd sill (which must be eaten with a beer), they always, always have a baked ham, served cold, meatballs, Prinskorv, and very little in the way of vegetables (unless you count beetroot in one of the herring dishes).

In the UK it has become traditional to have a turkey or a goose, roasted in the oven at Christmas, served alongside a number of cooked veg, often with the much-loathed Brussels sprouts as an accompaniment. We probably have loads of things that the Big Guy finds odd too – I remember his reaction the first year he got crackers, he loved all of that, and just could not stop giggling at the rubbish cracker jokes. I am not as aware of our idiosyncrasies in this regard, but if he wants to go on about them, he should probably start his own blog!

The great thing about having a non-traditional Christmas dinner, especially when it is not actually Christmas day, is that you can mix it up a bit, and dispense with some things altogether. A number of my guests enjoy my hot roast dinners, but I don’t really like turkey or goose (although I recently had wild goose, and loved that, I find domestic geese just too fatty for my taste), so I decided that a mix of the traditions was the way forward, and settled on a baked ham, with the traditional roasted and cooked veggies on the side, including an acceptable way with sprouts.

The roast and the trimmings

Served with all the trimmings

I had intended to do a gammon, but due to a bit of a loss in translation, I got a nice piece of what I suspect was raw back bacon instead. Never mind, I have a lovely butcher, and so next time I want one, I know what to ask for. This, folks, is one of the many benefits of using a butcher over buying meat from a supermarket. On top of this, we swapped tips on how I was going to cook it, and also what sauce to use. Please support local butchers, it really is a case of use them or lose them right now, as more of them lose out to the supermarkets. It would be a shame to lose their knowledge, miss out on some useful banter, or even improve your  language skills (not guaranteed if you and your butcher have the same mother tongue, but you could be surprised)

I originally got this recipe from the Dairy Book of Home Cookery which was produced by the Milk Marketing Board, and you used to have to buy it from your milkman (remember them?). It has been published since 1972, and is practically an institution, almost as entrenched in British households as stopping everything for Kalle Anke is in Sweden.

We are currently on holiday in Australia, and so due to travelling, I have not been able to get this post finished before Christmas. I decided to publish it anyway, as it is a great roast dinner and a good celebratory meal, whatever you are celebrating.

This was to feed 8 adults and one small child, but you can adjust your ham/ gammon according to how many people that you have to feed, and how much you want for lovely leftovers.

Recipe: Baked, Glazed Ham & Crackling

Ingredients

2.1 kg raw ham or gammon, skin on. I got mine vacuum packed, but this may not be possible.

Cloves

100g muscovado sugar or donker basterdsuiker

200 ml apple juice or cider

1 tbsp Worcestershire Sauce

1 tsp English mustard powder

Method

If you have a large gammon, you need to soak it for at least 12 hours, with several changes of water, to remove the salt.

Next, you will need to boil the ham. If you have ham like mine, or you have access to a vacuum packer, I recommend boiling it sealed. This will require less boiling, and will help keep the finished ham moist. If you are boiling it this way, you will need an hour. If you are not using a vacuum seal, then boil it for up to 2 hours, in plain water. You will definitely not need to add salt for this one. I usually add onion, carrots, celery and bay, to make a lot of stock. Either way you cook the ham, it must remain covered with water, so place a plate over it, and use weights, if necessary. Check regularly throughout the boil to see if the water may need to be topped up. If you do need a top-up, use boiling water from the kettle, don’t add cold and reduce the water temperature.

When the ham has finished boiling, take it out of the water. If it is vacuum sealed, then be careful to retain the stock that will have been made within the plastic. If you have boiled it plain, then keep the boiling stock, but remove the vegetables. Either way, you will have a lovely, rich, gelatinous stock, which is great with bean dishes, stews and soups. Leave it to cool, and remove the fat, but please don’t throw it away!

Next, remove the skin. Try to keep a thin layer of the fat on the ham, because this will help with the glaze. You also need some of the fat on the skin, if you want your crackling to be lovely and crisp.

Score the skin, but don’t cut it all the way through, if possible. You want a block of the skin, which can be carved up later. Rub a fair bit of salt, and herbs or spices into the skin – I used fennel seeds, but cumin, rosemary, lemon zest, jerk seasoning, or a garam masala would all be equally good. You could rub with a little bit of olive oil first, to make sure the seasoning sticks, but this is not entirely necessary. Do make sure you rub the salt and spies into the slashes as well.

Place the skin in a roasting tray and put it in an oven at 180°C. Start to check after 20 minutes and remove when the skin has formed crisp crackling. This can be made ahead of time and warmed through when you want to serve it.

When the crackling is in the oven, carefully score the fat on the ham, taking care not to slash the flesh. You want to score lines going one way, then turn it 90 degrees, , and score in lines again, so that you end up with a diamond pattern over the ham. Stick a clove through the fat, and anchor in the meat on alternate diamonds.

The rest of the ingredients will make up the glaze. Put them all in a saucepan, and warm through until the sugar has melted. It should be quite viscous, which makes it easier to glaze the whole ham with, without too much running over the sides.

Spread all of the glaze over the ham. Make sure that it is covering all the fat, and don’t worry if some of it dribbles down the sides of the meat, it all adds to the flavour.

Bake the ham at 180°C for 40 minutes to an hour, depending on the thickness of the meat. If you have a meat thermometer, you want to keep the meat at 80°C, which will keep the meat moist. I don’t have one of these, so I judge it by sticking a skewer in the thickest part of the meat, and seeing if it is warm. The temperature thing was a tip from my butcher, so rather than waste the advice, I thought I would share it here.

Baste the ham with the glaze at least twice throughout the baking process, to maximise the flavours and to use up that delicious glaze.

Serve it with the crackling, some cooked veggies (including roast potatoes), and a thick sauce made from chopped shallot, port wine, ground cloves, and muscovado sugar.

This is a real treat and great for any celebration. As you won’t have been able to read this for Christmas, I would like to wish you a very happy and prosperous New Year.

Carvery

A Proper Carve Up

(c) J. Caspar 2011

Leave a comment

Filed under Feast

Mince Pies

And so we finally come to the stars of the party, my mince pies. If they weren’t, I would have had to call it a Mulled Wine and Some Snacks Party,and  to be quite honest, I’m not really sure it would have had the same draw.

Mince Pies are a traditional British Christmas snack. My best friend refuses to eat them, due to an early childhood disappointment when he discovered that they did not contain mincemeat, but rather that they had fruits and spices inside. Originally, they actually did contain spiced meat, which was a way of disguising the fact that by the middle of winter, the meat was not at its freshest. They also contained some dried fruits.

Mince pies have existed since about the 13th Century, when crusaders brought back the idea of mixing spice with meat from their trips to win the hearts and minds of the residents of the Middle East. They were considered symbolic of garish Catholic Idolatry by the professional miserablist Oliver Cromwell, but apparently it is quite difficult to come between us Brits and our little Christmas pies, so he was not successful in his attempts to ban them. Again, quite lucky for me and my themed parties.

There is something to be said for the traditional ritual of baking these little treats that I find really restful, but exciting at the same time, as it heralds the start of my Christmas celebrations.

I had made some Pear and Ginger Mincemeat back in September, which I got out. You can just use mincemeat to fill your pies, but I like to fiddle some more, for a more luxurious pie. To ordinary fruit mince, I would add nuts and port, and let them soak for a few hours. As this mince had ginger wine in, I let this one soak in a little brandy, although I did add more nuts, for some crunch.

I had invited some people to the party that are vegan, and so I made up a batch of the Vegan Shortcrust Pastry. Some people prefer puff pastry in their mince pies, but I really think this is pastry overkill. Shortcrust is traditional, and for me it is the best way to get the right balance of pastry to filling.

The best bit about making these pies is getting the right mix of the circles between base and lid, so as to maximise the number of them you can cut from a single roll of the pastry.

Making mince pies

Terrific Tessellation

Firstly, you need to get the right size of circle for your tins. I use muffin trays, because I like the added depth that you can get than with ordinary tart trays. Whichever you choose, you need to cut out 2 sizes of circles for the base and the lid. The base should be about 2 cm larger than the diameter of the “hole” in your tray – this is to allow the pastry to sink into the tray, and to come right up the side. The lid should be about the same diameter as the hole. If you are going to use pastry cutters, then choose the size down from the base. I have also used a variety of glasses, and find a wine glass and a shot glass is also fine to use.

Roll out your pastry thinly. If you can 2-3 mm is ideal. Cut out the same number of base and lids. You will be likely to need to collect up the offcuts and re-roll these. If there is any left over, you can make a pasty with your mincemeat, or fill it with currants, a little sugar and some lemon zest and make an eccles cake.

Grease the tart or muffin trays well using butter or olive oil, and put the oven on at 180°C. Then gently put the bases into the trays, and press down with a little offcut pastry.

Add a heaped teaspoon of the mincemeat into each base. It needs to be generous, but not too full, otherwise your pie will burst in the oven.

Take the lid, and brush round the rim of one side with a little water (if you are not making this for vegans, then you can use egg wash or milk). Place the lid, watered side down, over the pie. You will need to seal the pie, which I do by placing a glass that is slightly smaller than the diameter of the lid over the lid, and pressing it down to seal he base and the lid together.

Filled pies

Pies – filled and sealed

Brush with a little water and place into the oven for 20 minutes, or until the pastry is a golden brown.

Serve the pies warm with a little icing sugar sprinkled over the top. You can make these in advance, and warm then through in a low oven before serving.

Mince Pies

Mmm Mince Pies

Great on their own, or with cream. Best served with a glass of mulled wine!

4 Comments

Filed under Feast

Making Meringues

I am sure that you may have noticed by now that I use a lot of egg yolks – in stuff like custards, mayonnaises, pasta, pastry and sauces. This leaves me with a lot of egg whites to use up.  Since I hate waste, I try always to use them, which invariably means making macaroons, and meringues. I need to expand this repertoire, so expect to see consommés and more stir fries appearing here soon. If you have other suggestions for using up egg whites (although not the egg-white omelette, please, some things are a step too far, even for me!) feel free to leave them in the comments.

I had originally intended to make advocaat, in keeping with the Anglo-Dutch theme for my party, but I ran out of time. However, this time, the advocaat was actually the by-product of the intention to make meringues, instead of the usual situation where I have a load of egg whites left over from something else. No one missed the advocaat, anyway!

Since I make them so much, I thought that I would share my technique here. I haven’t given a recipe, as it will depend on how many egg whites you have and to some extent how old they are.

Start by heating the oven to 110°C. Then measure out  45 g sugar for each egg white. I like to use raw cane sugar, but you can also use caster, granulated or icing sugar. I have also seen sugar solution, but that seems to be for Italian or Swiss style meringues, and I tend to stick with French. It is possible to use soft brown sugar, but be aware that this makes it very hard to get a crisp, dry meringue. I think this technique may be best left alone or, if you insist, only use it to top lemon meringue pie.

Put the egg whites in a very clean bowl. There must be no fat or detergent in it. If you are unsure, wipe it with the cut side of a lemon (or other citrus), which will act as a degreaser. If the bowl has any fat, it may affect the ability of the eggs to maintain the air that you are about to whip into them. The same goes if there are any traces of egg yolk, so be careful when separating the egg, too. Note that the fresher the egg, the less likely that the egg yolk is to break when you separate it.

Next, whip the egg whites until they form stiff peaks. This is when the egg whites look drier, the whisk or a spoon will create peaks when you remove it from the mixture, and if you are brave, you can upend the bowl and the egg white will not slide out. I would advise using an electric whisk if you don’t want it to take you hours.

Egg Whites at the Stiff Peak stage

The stiff peak - sadly lacking in many ski resorts this year

Then, a tablespoon at a time, add the sugar and whisk in thoroughly before you add the next spoonful. The egg white will stiffen further, as you add the sugar. At this stage, you are beating to incorporate the sugar, not to add any further air, so it won’t increase in volume.

Egg Whites plus half the required sugar

About half way through - stiffer and peakier, but not more voluminous

Keep adding the sugar, and whipping, a tablespoon at a time. Eventually, the mixture will become really stiff, to the point of being really hard to work,  and will look shiny. This is when you stop adding sugar. Because I use cane sugar, I find I need less than the stated 45 g per egg white. If you are using caster or icing sugar, you may find that you need to use all of it. This is also fine.

Finished Meringue mix

The final product - glossy, thick and much harder to beat

Don’t add more sugar than needed to get to this stiff consistency (or than the 45 g, whichever happens to come first), otherwise your meringues will leach sugar. This does not really affect the taste, but it does give them a rather unattractive look. A bit like a tree that is leaching sap.

Now your meringue is ready to be shaped. You need to line a baking sheet with some greaseproof paper. You can stick it down with oil or by dabbing a bit of the meringue in each corner and the centre of the paper and using this as glue to stick it to the baking sheet. Once the baking sheet is ready, you need to choose what shape and size you are going to have your meringue. You may wish to have it as a pavlova, in which case you need to shape one large disc, with slightly elevated sides, to hold the fruit in. I normally go for individual ones, because these are better for parties or for sharing. Most commonly, I will get two spoons and shape individual quenelles, which can then be stuck together with cream and fruit in a sandwich. However, I wanted to fill these with Chestnut Jam, so I decided that mini versions of the pavlova-style would be better suited to the task.

Some people would use a piping bag for that, but I lack the finesse, and the piping bags, so I made do with shaping them with two spoons. You can try either, I think both are just as good. I made them vaguely circular, like a nest.

Meringue nests

Not sure what I did here, but you get the meringue nest picture

Then it is ready to go in the oven. Bake the meringues for up to 1 ½ hours (but check after 1). If you have made one large pavlova style meringue, you will need longer – check after 1 ½, and leave in the oven up to 2 hours.

A Meringue nest

Meringue nest - a better view

The idea is not really that the meringue cooks, more that it dries out. You need to check that it is no longer soggy to the touch, and that it generates a hollow sound when tapped very gently on the base.It will have darkened a little, even if you use icing sugar. Mine are generally more golden than off-white, because the unrefined sugar I use is a light brown.

When you get the hollow sound, it is done. If it is at all possible, turn off the oven, but leave the meringue in there to continue to dry overnight. This will give the best result, but it will be OK if you leave it to cool outside the confines of the oven.

Once it is done, fill it with fruit, cream, fruit and cream, jam, or serve it with ice cream, mash it up with fruit and cream to make Eton Mess – whatever you like, really.

2 Comments

Filed under Feast

World’s Easiest Chocolate Truffles

Easy Chocolate Truffles

Easy and Delicious

I have to start this post with a warning. These truffles will not last. Not because they are made from anything particularly perishable, but because people will not believe that you made them, because they are so good. This is what my party guests said to me the other day. Of course, I liked this so much; I thought I would reproduce their words.

Warnings aside, these little chocolates are at the least difficult end of the chocolatier’s scale. If you watch any TV programmes where they make desserts, the chefs will always tell you that chocolate work is demanding, exact and delicate. The only thing that is true of these very basic truffles is that you have to be exact about the amounts that you use, otherwise you will end up with the basis for a nice chocolate sauce, but it will not be thick enough for the ganache that is required. There is no heating things up to precise temperatures, as you have to when tempering chocolate; no delicate curls or swirling effects; no allowing things to set so you can complete the next stage; really none of the complex stuff that you see the likes of Eric Lanlard or Adriano Zumba would have you believe is part of every pâtissier’s daily life.

So, these little treats would not be elegant enough to grace the shelves of a Belgian chocolatier, or a Parisian Pâtissier, or even your local Thornton’s, now I mention it. But if you make them for guests, or as a present, they will go down a treat. Because they do represent something into which you have invested love, and time, anyone you make these for will be more spoilt than the guests at the ambassador’s party!

Recipe: Chocolate Truffles

Ingredients

225 g of the best chocolate that you can get hold of. I think (although this is, as yet, untested) that this is the secret to these truffles. It doesn’t matter if it is plain, milk or white, just good quality.

175 ml of double cream. It is important that you measure this as accurately as you can. If your measuring jug is not accurate enough, either double the amount you make, so you need 350 ml of cream, or weigh it. Although not precise, you can use 1g to = 1 ml, just dont add all the cream at once.

Cocoa powder / icing sugar/chopped nuts for dusting.

Method

In a pan, slowly bring the cream up to boiling point (where small bubbles form around the edge of the pan) but do not allow it to boil.

Cream at boiling point

Note -bubbles, not boiling

Meanwhile chop the chocolate up into small pieces.

Finely Chopped Chocolate

The finer you can chop it, the smoother the truffles will be

Pour the warm cream into the chocolate. The cream should melt the chocolate, but it should still be pretty thick. Stir the chocolate to make sure there are no lumps. This is your ganache.

Chocolate Ganache

Ganache – cooling

You may need slightly less cream in milk and white chocolate, to form a thick ganache, so pour it in slowly. You can always add a little more cream, but you cannot take it away if you have added too much, so caution here is advisable.

Leave the ganache to cool and thicken. This will take at least 1 ½ hours, but if you wish, you can speed this up slightly by placing the bowl to sit in a sink of cold water. It is very important that you do not allow any water to get into your ganache, as this will affect the thickness and the way it sets. Do not refrigerate to speed up the cooling. This will make your ganache too hard to work with. Plus putting hot things into a fridge is not very efficient, as the fridge then has to work much harder to maintain a constant temperature.

Ganache at the right thickness

This is about the right consistency for shaping

Once you have a thick ganache, spoon out small amounts, and roll gently into balls. Try to keep your hands cold, so that you don’t melt the chocolate too much. You can do this by running them in cold water, between each ball. Alternatively, you can shape them into quenelles, by using two teaspoons to mould them. If you have a little melon baller, you could also shape them with that too.

Once you have your shaped truffles, prepare a saucer with some cocoa powder, icing sugar, or finely chopped nuts. Or have saucers with some of each if you want variety. Gently roll the truffles on the saucer until they have a fine coating of your choice.

These are the finished truffles, which you can either plate up and put out for guests, or put in a pretty box to give out as presents. I promise you, people will be really impressed.

Variations

Just like Mareike’s Mayan Chocolate Mousse, varieties are very easy to make.

Use different flavours of chocolate, although avoid any with large nuts or lumps

Spice or flavour the cream, using spices, flavoured syrups for coffee, extracts (e.g. vanilla or flower extracts – I would not use “essence” which is usually artificial) ginger, vanilla, or a little alcohol of your choice

Once the ganache is made add a little chopped dried fruit or nuts for variety

Roll in flavoured sugars to coat

5 Comments

Filed under Feast