Tag Archives: Technique

Generosity and the Art of Gourmet Camping

Campervan in Mackay Creek DOC Campsite, Fiordland, NZ

Camping Kitchen

As you saw from my last post, the Big Guy and I are in New Zealand. I have to tell you, it is spectacular here, although I was very surprised to find that some of the foraging is pretty similar. It’s autumn, and the trees are groaning with rowan, elder, apples, and the fattest haw berries I’ve ever seen. I wasn’t expecting these plants to be so similar, given how far away it is. I also bought a Forager’s Treasury by Johanna Knox  and on looking through, most of the wild edibles are very familiar from a Northern European perspective. Luckily, it seems that most of the poisonous plants are also the same, which is handy.

We have also been bowled over by the people here. Everyone has been friendly, welcoming and have gone a little out of their way to be helpful. The lady in the supermarket told us how to get the best bargains, and went the extra mile to find out where we might buy harissa. The petrol station attendant caught us up on the international news and gave us a free cookie each.

New Zealand Trout

There Is Such A Thing As A Free Lunch (And Dinner, And Breakfast)!

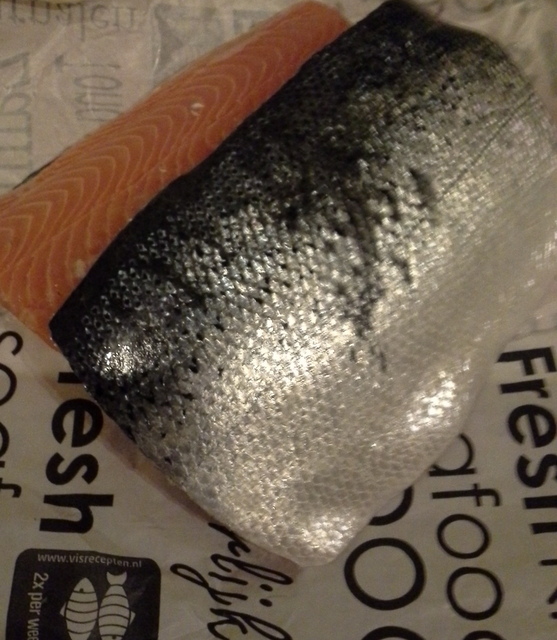
But by far the nicest thing that anyone has done to date is the fisherman we got talking to. We have a campervan, but in our first days here, we got caught out by jetlag, and simply could not drive onto our intended destination, so we had to book into a motel en route. As is common here, the gentleman in question was friendly and chatty, and we got talking with him over breakfast. It turned out that his parents were both Dutch, so we chatted about the differences in life here and at home. As we were leaving, he tapped on our window and offered us one of his catch. We were stunned, but he very kindly kicked off the gourmet element of our trip with a fresh trout. He had three fresh, and two that were being smoked in a local smokehouse, and he was heading out that day to get some more. This was no small fry, either. He gave us the smallest of his catch, but it still weighed in at just under 3 kg. It really was beautiful.

I spent the entire day thinking about how I was going to cook that trout. My foraging book was helpful, because it mentioned that wood sorrel can also be found here. So, I planned to look for some, and make a cream and sorrel sauce to go with the trout. Unfortunately, where we had chosen to stop for the night, on our way to Milford Sound, offered up no wood sorrel. We had chosen it specifically because we could barbecue there.

Trout and Spring Onion Omelette, with Campers Mayonnaisse

Breakfast, Not at Tiffany’s

Luckily, I had a back up, because I had the foresight to buy some dill when I stopped at a shop for potatoes. So, a plan was born, for a gourmet meal, made with basic equipment, to be served under the Southern stars. We have eaten many gourmet campsite meals since; including succulent lemon and pepper lamb, venison and mushrooms, and even shakshuka for breakfast. But that trout, which served us three hearty meals, plus a little more to pick at was the nicest.

Outdoor Natural Winecooler

Camping Cooler

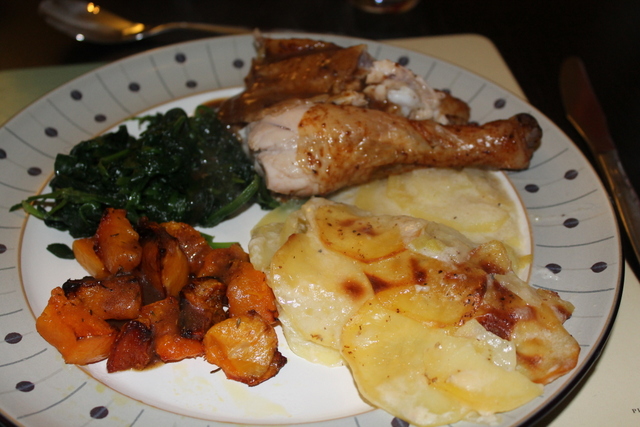
The first night, we barbecued the trout and served it with a green salad with mayonnaise. Served with a nice local Riesling, that we had cooled down naturally. The the leftovers kept nicely in a couple of ziplock bags in the cool box (which also had a big bag of ice), and made excellent omelette, and went nicely with pasta in a creamy sauce, with more dill.

You can’t get more gourmet, or more generous than that. Thank you very much, kind stranger!

Campsite Trout, Mayonnaise, potatoes  and green salad

Campsite Trout

Recipe: Campsite Trout

Ingredients

1 large trout or salmon

Dill fronds

Lemon slices

2 egg yolks

Juice of half a lemon, plus more to taste

About a quarter of a small bottle of plain oil

Salt and pepper to taste

15 g fennel, finely chopped (I had to do mine with scissors, due to the very blunt knives I was dealing with)

Method

Barbecued Trout

Gourmet Stay

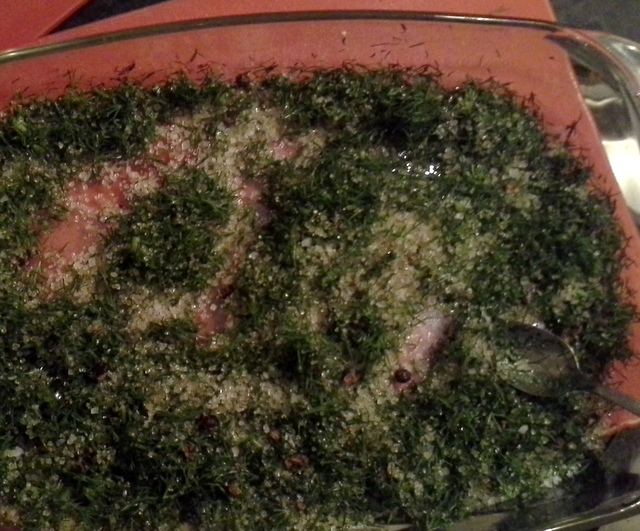
Wash the trout and pat it dry with kitchen towel. Season the cavity of the fish with salt and pepper, and put the dill and lemon slices inside. Barbecue for about 40 minutes on a camp barbecue that is too high off the coals. If you are doing it on the barbecue at home, then you can put the fish closer to the heat source, and so it will take less time. Turn once during cooking, so it cooks well throughout.

Campsite Sauce Equipment

Basic Sauce Equipment

I have previously only made mayonnaise with a balloon whisk, so I was worried the fork would take ages. Now I’m sure this won’t work if you are trying to whisk egg whites for meringue, but the simple fork makes surprisingly speedy mayonnaise.

Whisk together the lemon juice, egg yolks and a little salt. Gradually add the oil. My tip is to add a little, then make sure it is thoroughly whisked into the egg before adding more. This way, the mayonnaise is less likely to split.

Thick and Glossy Mayonnaise

Thick and Glossy Mayonnaise

Once the mayonnaise is thick and glossy, taste it. You may need to adjust for seasoning, and possibly add more lemon juice to get the right balance of flavours.

Finally, chop up the dill. As I said, I resorted to some scissors, because the knives I had were less than sharp, but you chop yours however you like. Add it to the mayonnaise and mix well.

Serve the fish with a nice green salad, some simply boiled potatoes and a lot of the mayonnaise. Best served under the stars, but this is still good, even if you are forced inside by the weather.


Advertisement

16 Comments

Filed under Feast

Blessed Are The Cheesemakers!

I have had a lot of fun with this month’s Cheese, Please! Challenge, hosted by Fromage Homage. This month, we were asked for recipes containing fresh cheese, which we had to make ourselves. I think it is great, encouraging people to develop skills of entry-level cheesemaking, as well as being creative in coming up with recipes to use the resulting curds. I have certainly found it inspiring. There are a lot of fantastic recipes on her blog, so do come over and have a look.

Shaped Mozzarella ball

Cheese Balls

First, I made mozzarella. That was a very interesting experience. My first efforts were a little rubbery, I think because I cooled the water to 80°C, as was mentioned in one of the posts I bodged my recipe together from. The second efforts were with unpasteurised milk, and hotter water, and they were a world apart from the first batch. I could already see the difference between the curds when they were forming in the pan, they were much creamier, and there were a lot more of them!

Curds from Unpasteurised Milk

Rich, Creamy and Unpasteurised

Then I had a go at ricotta, which was disappointing at first, but also vastly improved by using unpasteurised milk. From this I made gnudi, which I have always wanted to have a go at making. They were lovely, and light as a feather. I definitely recommend having a go at this, even if you can’t be doing with making fresh cheese. They were delightful, light and really very tasty. They will go with a lot of different sauces too, so also very versatile.

I smoked some of the mozzarella, which was mostly an experiment. It was successful in terms of flavour, but I think it needs longer between heating the wood chips, so that it has a better chance of staying spherical.

Breakfast Pizza - Bacon, sausage, mushrooms, spinach and egg

Breakfast Pizza

With all this cheese, there was only one thing for it – pizza! Which turned out to be both the perfect party food, and a hearty breakfast. It also had the added benefit of using up some of the whey.

Talking of which, I tried my hand at lacto-fermenting vegetables and making Gingerade; which is what you get when your ambition exceeds the time that you have available to brew the assortment of drinks that you had planned.

Cheese Please blog badge

From 4 l of unpasteurised cow’s milk, I got:

  • 500 g mozzarella (I smoked the cheese that I made from the pasteurised whole milk)
  • 200 g ricotta
  • 3.25 l whey
  • Pizza dough for 20 individual pizzas using the whey
  • Gnudi for 2 adults
  • 2 l lacto-fermented gingerade
  • The raw ingredients for a few more lacto-fermenting adventures
  • Lacto-fermented fennel
  • Lacto-fermented cucumber
  • A load of leftover vegetarian rennet, ready for more cheesey adventures.
  • Hands softer than kittens on a velvet pillow

Next, I think I’m going to try to find some buffalo milk, to make mozzarella di buffala, for that authentic fresh cheese. I’d also like to try to make a washed rind cheese, similar to a brie. I had a very good triple cream one from Neals Yard Dairy that I may try to recreate, if the brie goes well. But before I can do that, I’ll need to bodge up somewhere to age it, unless I can use the fridge?

I have also managed more blog posts in a fortnight than I managed for most of last year. This is a warning though, that I have a few other exciting projects on the go, including a new collaboration, in Dutch, with the Tweakfabriek, where I will be doing some basic recipes, then two different tweaks to make with them. I’m very excited about this collaboration indeed! It does mean that I will not be posting as many recipes as you have seen from me in the last fortnight, but if you’d like to read some more in Dutch (or using Google translate) then watch this space for more details.

For this month, I’ve made the most of new inspiration. I’ve had a lot of fun, with and without guests, eaten well, and learned new skills, as well as a few bodges to make a hot smoker colder. What could be better than that? So, thanks again, Fromage Homage, and here’s to the next challenge!


11 Comments

Filed under Feast

Fresh Cheese – In the Gnudi

Ricotta Gnudi and Tomato Chilli Sauce

Naked Food

Following on from my cheese making efforts, I thought that I could have a go at making ricotta. Literally translated as “twice cooked”, ricotta is right up my alley, as a way to reduce waste, and maximise leftovers. So I set about gently heating the whey left from my mozzarella to 92ºC,  and left it to cool to about 60ºC, before straining it through a thick muslin. I was so dismayed to find that it yielded next to no additional curds – 35 g to be precise.

35 g Ricotta

Bitter curds

Convinced it was something I had done badly, I turned to Google for reassurance. Whilst the technique was sound, it appears that the whey is acid, which is not conducive to making ricotta, which needs a “sweet whey”, or one that is produced from bacterial coagulation, instead of one brought on by acid. I probably should have done a bit more homework on that before I started, it would have saved time and gas!

Not one to be put off by such things, I bottled up the whey for later use. And made more mozzarella with unpasteurised milk. Having nothing to lose, and because I wanted the whey from this batch, I decided to try and extract more curds in the only way I knew.This time, I also strained it through cheesecloth, although I found that I couldn’t squeeze this out, because the curds simply fell through it.

The difference was amazing, I got 200 g of fresh, soft curds! Whilst it is perfectly possible to make cheese with any kind of milk, I think using unpasteurised milk pays off, if you can get it. I may also have a go with milk powder just to see if this is a cheaper alternative. Plus I have a lot of rennet that I need to use up now.

I have always fancied having a go at ricotta gnudi – soft Italian pillows, not dissimilar to light gnocchi. Gnudi (pronounced nyoo-dee) are, as the name suggests, “naked” ravioli. That is; they are the ravioli filling, naked of its customary pasta. They are best served with the simplest of sauces. The Big Guy and I were both coming down with colds, and so I wanted some chilli spikes in this sauce. I wavered over chilli, garlic and olive oil; but in the end settled on a tomato sauce with chilli, in order to take it from a starter to more of a main course with the addition of a nice green salad.

As well as a delivering a lovely pasta dish, my inner four year old enjoys sniggering when I announce what is on the menu. Reports that such pronouncements were accompanied with an impromptu dance of joy are totally unfounded. Cheese Please blog badge As you have probably guessed by now, This is yet another entry for the Cheese, Please! fresh cheese challenge. I have enjoyed myself this month, and you know I hate waste, so I’m determined to use up every last bit of the milk.

Recipe: Ricotta Gnudi With Tomato and Chilli Sauce

Ingredients

For the Ricotta:
Whey from making any type of cheese, the best being sweet whey from bacterial coagulation, otherwise unpasteurised acid whey will be good.

For the Pasta Sauce:
1 tbsp oil
½ red onion, finely chopped
1 red chilli, finely chopped, removing the seeds are optional
1 clove garlic, crushed to a paste
250 g tomatoes, chopped
Salt and pepper

For The Gnudi:
200 g ricotta
Zest of one lemon
Good grind of black pepper
1 tsp thyme leaves
40 g parmesan, plus more for garnish
1 egg, lightly beaten
Approx 70 g plain flour
Large knob of butter, 1 tsp and the thyme stalks for cooking

Method

Heating whey to 92ºC to make ricotta

It’s Getting Hot in Here

Make ricotta by heating the whey gently to a temperature of 92ºC. You will need to watch it, especially as the temperature exceeds 85ºC, because you do not want this to boil over, unless you especially like cleaning. Allow the whey to cool again, to a minimum of 60ºC, but preferably lower.

Strain through a sieve lined with a cheesecloth into a container large enough to hold the whey. Keep this for more things later – such as some pizza dough, other bread, stock, soups, and something else I have up my sleeve for later this week.

What you have left is ricotta. You will need to use a spoon or a spatula to remove it from the cloth. If you have left it to dry long enough, you may have to crumble it off. This is great in sweet and savoury dishes – I’ve even found recipes for ice cream. What you do with it is up to you.

For the sauce, sweat the onion in the oil until translucent. Add  the chilli and the garlic to the pan, and allow to cook for a minute. Next, add the tomatoes, and cook them down on a low heat, stirring occasionally to prevent them sticking. When the sauce is thick and the gnudi are ready,  season to taste.

While the sauce is cooking, make the gnudi. Mix together the ricotta, zest, thyme, pepper, parmesan cheese and the egg. Gradually add the flour, and mix in until the mixture forms a ball. It may take a bit more or a bit less than 70 g flour.

Shape the gnudi with wet hands. A lot of people shape them into balls, but I liked to form more elliptical gnudi. Put them on baking paper, or another non-stick surface.

Get a deep pan full of boiling water with the salt, butter and thyme stalks in. It is important to have the pan at a rolling boil. Put the gnudi into the water and cook for about 5 minutes. When they are cooked, they will float. Drain with a slotted spoon, and add to the sauce. You may also need a tablespoon or two of the water that you cooked the gnudi in to loosen up the sauce.

Coat the gnudi with the sauce, then serve immediately with a sprinkling of extra parmesan cheese.

11 Comments

Filed under Feast

Speculoos Ice Cream; Get Some Special Lotus in Your Life

Speculaas Ice Cream

Lotus Paste Without the Postage

When I used to do Foodie Penpals, many people would yearn for a jar of Speculoos (or Biscoff) paste in their parcel, and would covet jars sent to others. Since I live in the Netherlands, I have ready access to a supply from Lotus (original and best), if I should want any, which I mostly don’t. But, posting jars is expensive, especially since the smallest size they make is 400 g, so I decided to make my own. People make their own nut butters and choc-nut butters, so it couldn’t be that hard, right?  So I thought, until I actually looked at the ingredients.

It is mostly oil – palm, and rapeseed; sugar of one kind or another; rice and soya flours; and stabilisers. I won’t buy palm oil, so I  would really struggle to get the consistency right.

Last summer, I happened to read this recipe for Specunana Brownies. I won’t be making these, because I can’t eat bananas. But, Camilla’s photo with the brownies and ice cream really inspired me. I knew then that the best way to give speculoos to others without having to pay excess postage would be to make a speculoos ice cream, and write down the recipe for you all to enjoy.

I have entire notebooks (and a draft blog post) where I scribble down ideas that I have. If I live to be a million, I won’t live long enough to make them all, but it doesn’t stop me. Every so often, I go back over them, and I came across this one again recently. I had some egg yolks going spare, so I decided to give speculoos ice cream a go.

Speculaas Spices: cinnamon, nutmeg, ground ginger, aniseeds, cloves, peppercorns

Speculaas Spices

David Lebovitz makes a cinnamon ice cream using whole spices. I like this approach, and so I based my own recipe on as much whole spice as I could, whilst remaining true to the speculaas spice. As David suggests, you also have the option of adding more ground speculaas spice mix before you freeze it. If you aren’t near the Netherlands around the beginning of December, then you can always make up the spice mix I have used for my Kruidnoten. I found that with the amounts I used, I didn’t need it, but the strength of spice can vary hugely. I waited only until the custard had cooled, because I was happy with the taste – anything eaten cold will lose flavour, so the original base must have real depth. You can leave it overnight to be sure, if you prefer. If you do need to add some ground spice, add half a teaspoon at a time, mix well (there may be lumps), and taste before adding more.

Another main ingredient in the Lotus speculoos spread is brown sugar. I knew it would give the ice cream its classic colour, but I didn’t want it to be the dominant flavour. So I settled for a couple of tablespoons, which worked perfectly.

I don’t have an ice cream machine, so I made mine by hand. It will be quicker, but just as good if you use a machine, I’m sure.

This ice cream is a smooth and as tasty as the original spread,  just colder. So, instead of having Speculoos/ Biscoff envy, why not make your own?

Spice Trail Blog Badge

And since there is plenty of ginger in this recipe, I’m going to enter it for the Bangers and Mash Spice Trail.

Recipe: Speculoos Ice Cream

Ingredients

500 ml double cream
700 ml milk
5 cinnamon sticks
About 1/4 whole nutmeg, grated
1 tsp ground ginger
10 cloves
1/4 tsp aniseed
1/2 tsp whole black peppercorns
100 g caster sugar
2 tbsp dark muscovado sugar
6 egg yolks

Method

I made a handmade ice cream before, with pictures. The ice cream may be a different colour, but the steps are the same.

Break up the cinnamon sticks slightly into big chunks with a pestle. Then place the milk, cream and all of the spices into a saucepan. Heat to just below boiling point. Remove from the heat, and set aside for at least half an hour to steep. Once the spices have worked their magic, strain through a fine sieve.

Bring the milk back up to just under boiling point. Whisk together the egg yolks and both sugars until they are light and creamy. You’ll be making a custard base for the ice cream.

Put the bowl containing the eggs and sugar onto a damp cloth, so you can pour and whisk without the custard going everywhere. Very slowly, add the warm milk to the eggs and sugar, whisking all of the time. You must take your time with this stage, or the egg will scramble.

Once all of the milk and egg are combined, return it to the pan. Heat gently, stirring constantly to stop the milk from catching on the bottom. Do not allow the milk to boil; again, you’ll get spicy, scrambled eggs. When the custard has thickened so that  it leaves a line when you run a finger down the back of the spoon you are stirring with, it is done. Return it to the bowl you used to beat the eggs and sugar in.

Now you need to cool it down quickly. Run a sink full of the coldest water you can manage. You need enough water to come most of the way up the bowl that you are using, but the water must not get into the custard, or it won’t thicken. Place the bowl of custard in the sink and stir while it cools.

Taste the custard. If the flavour is already really deep, then you can proceed to freezing. If you are at all unsure, then refrigerate the custard overnight, and see how it tastes when it is much colder. If you don’t think there is enough flavour, then by all means add some ground speculaas spice. If you need to add ground spice, then you will need to give the custard a really good whisk, to avoid lumps of spice in the mix.

Pour into freezable containers with a lid on. I use recycled ice cream containers, which are perfect for the job.  Put the lids on, and freeze for an hour.

I always make custard with a balloon whisk, because it gives me more control, and doesn’t make the custard froth too much, which will give a weird consistency. However, I always churn the ice cream with an electric whisk, to really make smooth ice cream. Remove the ice cream into a mixing bowl, using a spatula to make sure there are no crystals left around the edges. Churn the ice cream until smooth, using the electric whisk. Return to the container, and refreeze. Repeat churning and refreezing until you have a thick, but smooth ice cream, then leave to freeze completely overnight.

Remove from the freezer about 10 minutes before serving.

15 Comments

Filed under Feast

From Milk to Mozzarella

Home made Mozarella balls

Milk Solids

This month, I have got quite a few cheese posts on the way, inspired by the Cheese, Please! Challenge over at Fromage Homage. As soon as she announced that the challenge this month was to be fresh cheese, I knew I wanted to play. My mind was racing over the possibilities (of which, more to come), but I have a birthday party coming up and I want to let the kids make pizzas (with ingredients made from scratch, of course!). The obvious place to start on my fresh cheese odyssey is with mozzarella. I’m probably going to enter all of my recipes in one larger round-up post at the end of the month, but I am going to share the individual recipes that I make with all the fresh cheeses too.

So, we’ll start at the very beginning; a very good place to start; mozzarella, a fresh cheese with bounce!

I looked around online, and decided that mozzarella from scratch can’t be that hard, can it? I quickly found a few nice recipes, which I cobbled together to come up with my techniques I share here. Most of the recipes include using a microwave, which I don’t have. Instead I have been most inspired by the Barefoot Kitchen Witch and the techniques used in this post from the New England Cheese Supply Company.

Cheese Please blog badge

Making one’s own mozzarella counts as a fresh cheese recipe, doesn’t it? So I think it will be a great entry for Cheese, Please! And even if it is really only precursor for the actual recipes, it doesn’t matter, it was pretty simple, I had a lot of fun, and I have the softest hands I have had in ages, so that’s an added bonus!

Recipe: Home Made Mozzarella

Ingredients

2 l milk – you can use whole, semi skimmed, pastuerised or whatever you like really. The only milk that doesn’t work is UHT.
¾ tsp citric acid, dissolved in 60 ml blood temp water
2 drops vegetarian rennet in 30 ml cold water
Salt to taste

If you do not have a measuring jug that allows you to measure such small amounts of liquid, remember that 1 ml of water =1 g, so you might find it a lot easier to simply weigh the water.

In the Netherlands, rennet is called stremsel, which I personally think sounds a lot nicer. The great news, whatever you call it, is that vegetarian and original rennet are widely available. My regular online brewshop stocks all varieties, as well as citric acid, which is great for me!

In addition to the ingredients, it is a good idea to gather together the equipment you will need before you start.

Equipment

Large saucepan
Thermometer, preferably one that can measure low temps
Cheesecloth or muslin, sterilised by boiling
Sieve
Slotted spoon
At least four large bowls
Boiling water
Ice

Method

Curds after citric acid and gentle heat

Lemon/ Curd

Add the milk to your saucepan, with the dissolved citric acid. Heat gently until it gets to 32ºC. If, like me, your thermometer will not measure that low (I used my jam thermometer, which starts at 60ºC), heat very gently until your curds look like the photo above. When you stick a (clean) finger in it, it will feel cooler than you, but not that much.

Curds after adding rennet and heating

Rennet Ready

Add the rennet water, and heat a little bit more to 37-38 degrees. Again, if your thermometer doesn’t go that low, then use the photo above. You will not feel a temperature difference if you stick your finger in this liquid.

Curds after rennet and with rest

Curd Wayhey!

Take the curds from the heat, then allow to sit for 5 minutes or so. You will clearly see the separation of the curds and the whey, which will look more watery. Cut the curds crossways with a sharp knife.

Fresh Curds

Fresh Curds

Line your sieve with a cheesecloth, or muslin square, and place over one of the bowls. With a slotted spoon, remove the curds from the pan, and put them in the sieve. They will look quite wet, like above. Cut and fold them over with the slotted spoon, to get rid of some more of the whey.

Curds, after most of the whey has run off

Whey Less!

The curds will go from watery to looking much drier, and will lose quite a lot of volume. Don’t throw away the whey, it has a lot of uses, and keeps for a long time in the fridge.

Curds, after initial kneading

Curd Need

Remove the curds to a separate bowl, and knead for a little bit, until it looks a lot less lumpy. Boil enough water to allow you to sit your sieve on a third bowl, so that the sievey bit is submerged. Get a different bowl of iced water ready as well.

Place the curds in the sieve in the hot water, and allow them to pour, stretch and fold off the slotted spoon. I’m sorry, I didn’t get a good picture of this, because it’s pretty hard to do this and photograph yourself, and the Big Guy was at work. Anyway, it will start to get more stretchy and smoother as you go on.

Curds getting smoother and sretchier

Come Together

As the water cools, the cheese will stop stretching. Once this happens, boil a kettle again. While it is boiling, remove the curds to the bowl and knead some more. At this stage, add some salt to taste, and knead to mix well.

Stretchy Cheese

Nearly There

Repeat submerging in the boiled water, stretching and then kneading until you have a stretchy, pliable cheese. You can either shape this as one large ball, or divide it into smaller balls if you prefer.

Shaped Mozzarella ball

Cheese Balls

I found it easier to use the hot water for one final shaping. I used the sieve and the slotted spoon to roll the cheese around in the hot water to make a ball shape.

Once you have shaped the cheese, submerge in iced water. Mozzarella should be used fresh, but can be stored in briney water the fridge for up to 4 days.

19 Comments

Filed under Feast

Aye Crumble!

Apple Crumble and Custard

A Faithful Friend

Today’s post is for my Brother Out-Law (since the Big Guy and I are not married, otherwise he would be my in-law!). Whenever I need a relatively simple dessert, that I can  make up quickly, but that can sit in the oven while we eat a main course, I always fall back on a crumble. Good, comforting, and a great way of using up fruit if you find yourself with a glut; or if you were tempted at the market, but now they are sitting there looking sad, and you need something to use them up with.

I made a pear and apple crumble for the Big Guy’s sister and her family for just such an occasion over Christmas. They asked if I would be blogging the recipe. At first, I resisted, because it is a common dessert. Except, it is a common British Dessert (and in the US, where it is called a Crisp, for reasons I am unable to fathom). It was quickly pointed out that a lot of different people read my blog, including my Swedish family, and they may not think it that common. So, I relented, and here is my version of crumble.

Let’s be honest, crumble is never going to be fine dining, but it is always a great dish to have as a standby for when you need to serve up a tasty dessert.

You can, and probably should, serve a crumble with ice cream, custard or pouring cream. I served this one for dessert after the Beer Can Chicken with some warm, thick custard that I made up using my usual custard methodology. This may have been served in the Netherlands, but you really can’t get more British than that.

Made with Love Mondays

Since I always make crumble and custard from scratch, and always with a lot of love, I’m going to add this to this week’s Made with Love Mondays, hosted by Mark at Javelin Warrior. I haven’t joined this in quite a while, but I always enjoy the posts.

Ingredients
For the crumble:
120 g plain flour
40 g cold butter
50 g rolled oats (you may need a bit more if you use cut oats, for texture)
50 g nuts, roughly chopped
3 tbsp demerara sugar
Fruit of your choice
Butter to grease the dish and dot on the top of the crumble
For the custard:
2oo ml double cream
150 ml milk
1 vanilla pod
4 egg yolks
65 g caster sugar

Method

Rubbing in the Flour and the Butter

Rubbing in the Flour and the Butter

Make the crumble mix. Cut the butter into small cubes, and add to the flour and then rub into the flour, using your fingers and thumbs. Keep going until they look like fine breadcrumbs.

Flour and butter at the fine breadcrumb stage

Stop When the Mixture Looks Like This

You can use rolled or cut oats in this mix, but since their inclusion is as much about texture as they are about flavour, you will need more if you use cut oats.

Roughly chopped nuts

Roughly Chopped for Texture

You can also use whatever nuts you like, or leave them out altogether if you prefer. I have happily used whole almonds, blanched, or flaked, hazelnuts and macadamia nuts. I’ve also used pumpkin seeds, although these burn a bit easier than nuts. I’m confident that walnuts, pecans or brazil nuts will work just as well. They do not top my list of favourite nuts, so I rarely have them in the house.

This another one of those recipes where you can play fairly fast and loose with what you add. For a real crumble you must have the flour, butter and sugar. I personally think that oats are essential, although this may be controversial in some quarters. In fact, I have also used muesli at a push, which I substituted for both the oats and the nuts. I did remove the dried grapes, because the layers you use are thin, and the currants/ raisins will burn. I dislike burnt currants, but you may be of a different opinion, in which case, use muesli and leave the dried grapes in to your heart’s desire.

Add the rest of the ingredients to the flour and butter, except one tbsp of the sugar, and mix thoroughly.

Then, grease an oven proof dish well with butter. Place large chunks of fruit across the base of the dish in a single layer. Again, it is pretty much anything goes. You can use a single fruit, like the traditional apple, or more unusual peach. You can mix it up; combinations like rhubarb and strawberry, or apple and pear work well. I have added chopped crystallised ginger, and herbs and spices. What you add is up to you. If you are adding fruits that will exude a lot of liquid, such as rhubarb, plums or peaches, then you may find stirring a tablespoon of plain flour through the fruit before you put it in the dish will help stop the juices soaking into the crumble topping, and leaving you with a steaming bowl of soggy disappointment.

Pre-Baked Crumble

Pre-Baked Crumble

Sprinkle the crumble topping over the fruit in a thin layer. It needs to coat the fruit, but not be too thick, or it will be claggy when you come to eat it. If there is any topping leftover, don’t worry, this mixture freezes really well, and you can save it for a time when you want to make a smaller crumble – maybe one just for yourself, made in a smaller pot or ramekin. Sprinkle the remaining tablespoon of sugar over the crumble, and dot here and there with a little butter.

Put in the centre of the hot oven, and bake for 30-40 minutes, or until the fruit is cooked, and topping is golden brown. If you have quick cooking fruit, cook in the oven until the fruit is done, then finish browning the topping under the grill.

Serve warm with custard or ice cream.

14 Comments

Filed under Feast

Beer Can Chicken and Gravy: Is This The Perfect Roast?

Beer Can Chicken

Beer Can Chicken: Tasty, Crispy-Skinned, Moist.

For a while now, the internet has been going on about beer can chickens. As the name suggests, this is chicken, usually cooked over a barbecue, with a beer can inserted where the sun don’t shine.

The other day, the Big Guy wanted a simple roast, and I have been thinking about giving this a go, since I saw Lisa Allen do something similar in the Great British Menu. Like me, she wasn’t going to light a barbecue just for the one dish. I am glad for this, since February in the Netherlands is the perfect time for roasting meat, but not the perfect time for barbecues.

Anyway, I think that is where the similarity ends. I vaguely remembered her rubbing a marinade on the chicken, with which she used paprika and mustard, but didn’t actually look this recipe up until the chicken was roasting away quite happily. She marinated hers in beer overnight, which I didn’t. And she used pale ale, whereas I just used any old lager I found in the cupboard. Our spice rub was similar, but not identical, and she rubbed butter under the skin, which, again, I did not do. Do you know what? I’ve no idea how her chicken would have tasted, but this was blooming delicious.

Having the bird propped upright during the cooking process actually gives a more even roast. Even with a grill to allow the meat juices to pass through, a normally-cooked chicken does not really get the same crisp to the skin, and having the legs falling away from the bird meant that I didn’t get the normal issue of the breast meat cooking before the legs did. The beer kept it moist, and helped to make the gravy really tasty. It also needs a bit less cooking time. It did just start to catch on the top, as you can see, so you do need to watch it towards the end of the cooking time, in case it, like all good conspiracy theorists, could do with a tin foil hat.

Since I never cook a roast just for the Big Guy and I, I invited a newly-resident friend over, to welcome her to the Netherlands. For some reason, we started talking about gravy browning (I’ve no idea how these things come up in conversation, really). She was curious how to see how I made gravy. She said her Danish grandmother would not approve of my method, but she was impressed with the colour I managed to get, despite not using gravy browning. I agreed that I would add the recipe to this post, so that she can practice coloured gravy without the browning.

The Perfect Roast: Beer Can Chicken, Gravy and Veg

The Perfect Roast

I think this could be the best way to roast a bird; producing succulent meat, and crispy skin. I’m sure that this could be a controversial position, however. What do you think is the best roast?

Recipe: Beer Can Chicken and Gravy

Ingredients

For the Chicken:
1 whole chicken
150 ml of beer, kept in the can it comes in, otherwise this won’t be beer can chicken, plus 2 tbsp for the marinade
½ tsp English mustard powder
½ tsp chili powder
1 tsp sumac
1 tsp dark muscovado sugar

For the Gravy:
Meat juices and a little of the fat from the pan,
2 tbsp plain flour
200 ml beer, from cooking the chicken
200 ml chicken stock
Pinch of salt

Method

Beer Can Chicken, before Roasting

Oven-Ready Chicken

Make paste with 2 tbsp beer, the spices and the sugar. Rub into the chicken and marinate for a while. I did an hour but longer would be better, up to 4 hours would be ideal. Keep any leftover marinade for later.

Preheat the oven to 180°C.

When the chicken has finished marinating, pierce 4-5 holes in the sides of the can, near the top, so that they are clear of the remaining liquid.  This is easily achieved with an old-fashioned can opener, or corkscrew. Then place the chicken over the can, so it goes into the cavity from the leg side. As long as the chicken can stand on the can, it doesn’t matter too much how far it inserts, but it mustn’t topple over.

Rub or paint a little more marinade over the chicken, and put it in the oven, standing up on the can. The chicken should stand clear of the top by at least 5 cm. After 20 minutes, baste the chicken with any leftover marinade, and the pan juices, and turn the oven down to 160°C. Roast for a total of 45 mins, to one hour, depending on the size of the bird. Mine was 1.6 kg, and took about 50 minutes. Test to see if it  is done, by piercing the thickest part of the thigh, and seeing if the juices run clear.

Once the chicken is cooked, remove the beer can carefully from the cavity. Tent it loosely with aluminium foil, not too tightly,  or the chicken will continue to cook. Leave to rest for 20 minutes.

While the bird is resting, get the gravy going.

Remove most of the fat from the pan, being very careful not to pour off the precious meat juice. You will see the difference – the fat is clear and the meat juices are brown and beautiful. Once you have removed as much as you can, put the roasting pan on your hob, so that it rests over two rings. Turn on the one closest to you, on a low heat, you don’t want both on at this stage, because all the precious scrapings from the pan could burn. Add the flour over the ring that you have just turned on. Add a spoonful of the fat back to the pan, along with the flour, mix well, and keep stirring to cook the flour through until it turns a light brown.

Turn on both rings of the hob on a high heat, and add the beer from the chicken cavity. Stir like crazy while the pan comes to the boil. Deglaze the pan, which will flavour and bring depth to your gravy. Once the beer is boiling, add the stock. If  you prefer, you can now remove the gravy to a saucepan, which reduces the risk of things burning. Stir well, and cook over a medium heat until the gravy thickens a little. Season to taste.

Serve the gravy piping hot over your well rested meat, and with the vegetables of your choice.

14 Comments

Filed under Feast

Gravad Lax: Buried Treasure

Gravad Lax with creamy dill sauce

A Christmas Cracker

I love trying food from different cultures, especially as a different take on Christmas food, such as our Aussie Christmas dinner. I guess that by now, Swedish food isn’t so different for me, but I thought I’d share a favourite recipe of mine.

A traditional Swedish julbord, or “Christmas table” is a pretty meat-heavy affair, eaten at 4pm on Christmas eve, after the nation has sprung to life again following their Disney favourite; “Kalle Anka och hans vänner önskar God Jul” or “Donald Duck And His Friends Wish You Happy Christmas”. It is always the same clips, and this is one Christmas tradition I’m not overkeen on, but when in Stockholm…

Anyway, back to the julbord; it groans under a ham, which for me this year was a wild boar one, because the out-laws know I don’t like to eat factory farmed meat; various kinds of inglagd sill ; cold cuts; sausages; lutfisk; spare ribs; and Janssons Frestelse.

In my family, we also often have gravad lax. Also known as gravlax, gravlaks, graavilohi, or graflax depending on where you are in Scandinavia. In any country, it means buried salmon. In times before refrigeration, especially in northern European countries where snow covered the ground for a good part of the year, curing and burying meat was a great way to preserve it. Originally, people would use spruce or pine needles in the cure, but the balance needs to be perfect if your fish is not to end up tasting of a certain kind of disinfectant.

These days, everyone can make this easy recipe; you don’t even need a spade! In fact, you still have time to make it in time for a new year’s gathering, if you are having one. It looks impressive, for relatively little effort, and it is a big hit.

Organic Farmed Salmon

Organic Farmed Salmon

One thing I must urge you is to source your fish well. The increase in popularity of salmon in the last decade or so is concurrent with fish farming, most of which causes horrible environmental damage, due to over feeding and routine, excessive use of antibiotics. At the same time wild stocks are seriously dwindling, due to overfishing, ocean acidification and habitat destruction. In my opinion, salmon should be a treat, eaten very occasionally, so that we can afford to eat the best organically farmed salmon we can, meaning there is no unnecessary antibiotic use, and better care is taken to ensure that the fish are not over fed. This cure also works well for other types of fish, so you could still enjoy the recipe with cheap and plentiful fish, such as mackerel, or herring, so do feel free to experiment.

I made this amount of salmon for a large party, so you can also reduce the amounts of fish you use, but you must have enough cure to really cover the fish, so make a little more of that than you think you might need for the amount of fish that you have.

Recipe: Gravad Lax With A Creamy Mustard Sauce

Ingredients

For the Salmon:
100 g demerera sugar

75 g sea salt

100 g dill

1 tbsp juniper berries crushed

1.5 kg salmon fillet, halved

3 tbsp brandy

3-4 bay leaves

For the Sauce:
250 ml crème fraîche

2-3 tbsp finely chopped dill, depending on how much you like it

2 tbsp wholegrain mustard

1 tbsp runny honey

Salt and pepper to taste

Method

Gravad Lax mix

A Fitting Salmon Send Off

Mix together the salt and sugar until really well combined. Remove the stalks from the dill and chop the rest finely. Mix into the cure with the juniper berries. The cure needs to look pretty green and herby, because you want to get a lot of flavour in there.

In a shallow dish, get some cling film or a cheesecloth, and coat with about a quarter of the cure. Press one half of the fish down well into the cure, skin side down. Rub the cure into the skin, and leave skin side down on the wrapping.

Then you need to load the flesh with the cure. Do this by brushing the flesh with half the brandy and laying about another quarter of the cure over the flesh. Lay a few bay leaves over the fish.

Repeat the brandy and cure on the flesh of the second fillet. Once it is well covered, then lay it on the first fillet, so they are flesh to flesh. If the cure falls out, tuck it back between the fillets.

Rub the last of the cure into the skin of the second fillet. Wrap the fillets tightly together. If you are using cheesecloth, bind it with a series of butcher’s knots, as tight as you can get. The fish will lose liquid as it cures, so it is best to keep it in the shallow dish, unless you really like cleaning the contents of your fridge.

Weigh down the fish, by piling a load of tins on top of a baking sheet on top of the fillets, and placing the whole lot into the fridge. Leave it to cure for 3 days, turning once each day. Rinse off and pat dry with kitchen towel before serving.

What Gravad Lax Should Look Like

The Finished Product

To make the sauce, simply mix together the crème fraîche, dill, mustard and the honey. Season to taste.

Serve with the thinly sliced gravad lax on bread, melba toast or knäckebröd, as a delicious starter or hors d’oeuvre.

11 Comments

Filed under Feast

I Want (Fennel) Candy

Candied Fennel

Sweet and Fresh

Having been inspired to start blogging again, I have been making the most of recent inspiration for the next few Feast posts. The cooking and recipes, as always, are my own, but credit for the dishes are definitely due elsewhere. I take a magpie approach to food, often finding shiny little pieces here and there. Maybe one day I’ll enter the 21st century and get myself a smart phone, but for now, I forage for ideas, as well as edibles, and record them all in a series of notebooks, which I have to go digging through in order to remember the inspirations. Does anyone else do this? Please tell me that I am not the only one scribbling things down furtively in restaurants, shops and even the street. For me, it is like foraging and farming in note form, and as much of an obsession as they are for me in real life.

I’m sure we are all familiar with candied peel, and even crystalised angelica, if you are fond of cake decoration. These days , it seems that candied vegetables of all nature are appearing on both sweet and savoury dishes in restaurants and pop ups up and down the country. One of the first, and the one that instantly caught my magpie eye was candied fennel. I have also seen candied celery and beets (especially chioggia beets) among other things on menus, although I find the idea of them much less appealing.

Fennel is one of my favourite vegetables, and I love it in risotto, soup, and salad, braised, roasted and raw. This is a great way to use the tougher outer leaves and stalky bits if you are not keeping them for stock, too.

This version is really simple, despite my fears that it may require multiple exposures to sugar syrups of varying strengths, it isn’t the case. I kept mine plain, but they are also good served as sweets, and sprinkled with sugar.

Today’s recipe was inspired by Simon Rogan, who is a far better forager and cook than I could ever hope to be. I can’t remember where I first heard about it, but I suspect it was on a cookery programme, because  I have written down “candied fennel, Rogan. V. interesting, possibly for strawberry tarts? Experiment”. I finally got round to making this, as part of an even wider experiment, that does not involve strawberries or tarts of any kind, but you’ll have to wait until my next Feast post to find out more about what I wanted them for. This cliffhanger is not quite of Eastenders Duff Duff proportions, but hopefully, you’ll want to keep reading.

Recipe: Candied fennel

Ingredients

50 g sugar

50 ml water

1 tbsp lemon juice

Half a fennel bulb diced

Method

Make a simple sugar with the water, sugar and lemon juice. Heat gently until the sugar has dissolved.

Add the fennel. Bring to the boil then reduce to a simmer until the fennel is translucent, but retains some texture. It took me about 15 minutes, but it depends on the size of the dice,  and how much bite you want them to have.

Remove from the heat, and strain off the cooking syrup. Don’t discard this, it is perfectly good for other uses, and you know it’s a shame to waste such a tasty sauce.

Put some greaseproof paper, wax side up on a baking tray, and spread the fennel dice out into a single layer. Allow to cool on the tray, then store in an airtight container before use.

Enjoy them on their own, with sugar or as part of something delicious.

2 Comments

Filed under Feast

A Stock From Scraps

Vegetable Stock

The Basis of Many, Many Meals

Today’s recipe was inspired by a request from a friend who reads Edible Things. It is great to hear from people, so if you have any requests, let me know, and I can blog about those too.

If you have a recipe you’d like to see, or something to inspire, please feel free to get in touch or find me on twitter.

Anyway, my friend asked about how to make vegetable stock, particularly in reference to making stock from scraps. Obviously, she has come to exactly the right place. I never throw anything out if I can help it. I was accused of being from the 1950s when I admitted to an acquaintance that I make my own stock. He doesn’t know what flavour he is missing out on!

In my freezer, there is an entire drawer given over to scraps and offcuts of one kind or another.  I keep them separate in bags or freezer containers (for the meat products), ready to be used later. I routinely keep and freeze the stalks and outer leaves of cabbage; the tough outer leaves of fennel; carrot tops and peel; the tops of leeks; and the root and tip of onions that I have chopped for other dishes, and the stalks of any herbs where I have only needed to use the leaves.I would probably also keep the gnarly bits at the bottom of a head of celery too, if it weren’t for the fact that I have guinea pigs that eat them.

Frozen Food Trimmings

Stock Drawer

Currently there are also apple cores, lemon and orange zests, bones from a chicken, pork fat and rind, and a whole load of vegetable offcuts and peels. There will be a use for all of these in various stocks, jellies, sauces, or something.

I actually don’t like the term food waste when talking about unloved offcuts and trimming. There is so much you can do with them, up to and including composting, which I also do, but only when I have got the maximum value from them first.

Obviously, I know that most people do not have the freezer space or the geekiness to save stuff like I do, but if you do nothing else with your “waste”, do give stock a go. I guarantee that it really easy, and will really improve the flavour of soups, stews, sauces and gravies.

I make a number of different stocks, so I bag my veggies separately, because  I don’t want cabbage in a chicken stock, for example. If you have limited space, put them all into the same bag and chop them up a little. If you have no freezer space at all, you can make a quick stock using scraps, and supplementing it with the odd celery stick or whatever. The finished stock will keep in the fridge for a couple of weeks, in an airtight container, so you can still add it to dishes (NB it will be shorter for meat stock), and have great-tasting stock.

You can pretty much use what you want in a stock. I know that some people use potato peelings in stock, although I personally don’t like the flavour it lends. Some people also choose to put the papery onion skins in, although this will mostly impart a yellow colour, so again, I tend not to bother. Similarly, beetroot tops and peel can be used, but it will both colour and flavour the stock.

I have used pumpkin, pea pods, lettuce that looks as though it is going over, the ends of aubergine, tomato skins, mushroom trimmings,asparagus ends, the leaves of celariac,  beets and carrots at different times. As long as you wash the vegetables thoroughly before freezing, or putting straight into the stock pot, it really is up to you, and experimentation is the key for your tastes, and the dishes that you cook with.

There are a few vegetables that you cannot use the leaves from, and this includes rhubarb (which are a vegetable, but used as a fruit), aubergine and parsnip leaves. I have used the vines of tomatoes, but not the leaves.

The basis for most stock is the triumvirate of celery, carrot and onion (or leek – they are the same family).This is the basis of both meat and vegetarian stocks. It is really a question of balance. In the recipe below, I have outlined the rough proportions that I used. For vegetable stock, I try to use a cabbage (or broccoli stalks, or chard or something similar) in my veg stocks, because it gives a depth of flavour.

As you get more used to scrap stock, you will also develop a sense of the proportions of each that you want. I can do it by eye now. It does not take long to gain confidence in this technique. And believe me, you will really be glad that you gave it a go.

Basic Stock Amount, by eye

An Eyeful

You also don’t have to wait until you have the same amounts as I do. You can make stock with the ends of one leek, the peel and tops from one carrot and a single cabbage leaf, if that is all you have. Really, nothing is set in stone for this, the ingredients are down to what you have.

Recipe: Vegetable Stock

Ingredients

250 g leek/onion trimmings(frozen weight)

150 g carrot peel

2 celery stalks, (it weighed about 150 g)

50 g herb stalks, including mint, parsley & thyme (if making meat stock, I would most likely leave out the mint stalks)

50 g cabbage stalks & leaves

100 g fennel leaves

2 dried bay leaves. I have a bay tree, so I usually use fresh bay, if you are doing so, double the amount given in your recipe

10 or so peppercorns

3 cloves

pinch salt

You can also use other spices. It will depend on what you want to use the stock for. I use pepper and cloves for a generic stock, but if I wanted an asian one, I would add cinnamon and star anise. But, when I want to make a pho, or something, I take my generic stock and add the spices at the time. Again, this is a matter of your own taste.

2½ l cold water (or enough to just cover the vegetables that you have, although bear in mind that they will float)

Method

I  use a very large saucepan for making stock (my stockpot), but even if you have an average sized one, you will need a well-fitting lid for it.

Put all of the vegetable trimmings in the pan. I chuck them in from frozen, having washed them before I froze them. You can also put fresh ones in, it doesn’t matter. Cover the vegetables with cold water, and put the lid on the pan.

Stock ingredients with water to cover

Put a Lid On It

Bring the water up to the boil, then turn it down to a gentle simmer. Keep the lid on the pan while it simmers.

A Simmer Plate

My Simmer Plate

I have a simmer plate, which I like to use, because I can turn the hob down to the lowest setting, and it distributes the heat more evenly across the pan. They are not essential though, so  don’t worry if you don’t have one. Let it simmer for about an hour (longer for meat stocks, depending on the size of the bone that you have).

Allow it to cool with the vegetables still in it, then strain the liquid. This is your stock. If you are still reluctant to throw away your vegetables, you can take a little of the stock and the veg, and blend it up, and you have the very tasty basis of a soup that you can either eat like that, or add more things to for bulk. Every aspect of making stock is about taste, not waste. If you are making meat stocks, obviously, you should remove the bones before you do this.

The stock can be used as is. If you have limited freezer space, you can boil the stock to reduce it by half, which will concentrate the flavour. Don’t use a lid on your pan for this stage.

I measure off half litres and put them in into individual containers (usually take away ones are fine, they stack and they have lids), which I label and freeze. I find that this is a convenient amount to use in most recipes.

They are easily defrosted on a worktop, or if you are less organised, you can heat them in a microwave or a pan ready for immediate use.

If you don’t have a lot of space, concentrate the stock, you can freeze them in ice cube trays, then transfer them to a bag once frozen.

Whichever way you freeze it, don’t forget to label, as there is nothing more irritating than forgetting them in the freezer, then scratching your head a few weeks later when you find them again.

So there you go; cheap, practically effortless, and really tasty stock, that you know is right for you. It doesn’t contain any hidden ingredients, so you know it will be suitable for your friends with special dietary requirements or preferences. And you have the basis for many soups, dishes, sauces and whatever you like really. This stock of scraps is really much, much more than the sum of its parts!

Update: I have entered this post into Turquoise Lemon’s No Waste Food Challenge, which is all about fennel for the month of April

Turquioise Lemon's No Waste Food Challenge

14 Comments

Filed under Feast