Category Archives: Fermented

Land of Milk and Ginger

Lacto-fermented Ginger Ale

Like Lemonade, but With Ginger

Well, I was intending to make three flavours of lacto-fermented lemonade and wittily call this post Lemonade, Three Wheys, but I’m afraid I’ve rather run out of steam and time. So, today you get the latest recipe in my cheesemaking adventures, but it is only one flavour of lemonade – ginger (perhaps confusingly).

If you Google milk and ginger the most common result is a ginger milk pudding, which is a rather soothing-sounding Chinese dish, apparently. Obviously, I did this, and had a look at some of the pictures. It reminded me a bit of junket, which I had to make for some historical food thing for brownies once. I am not a fan of junket. But then again, my junket did not have ginger in it. I am quite fond of ginger, so I may end up giving this a go.

I really wanted to have a go at lacto fermenting ginger beer, but that requires a starter or ginger beer plant, which I didn’t have time for. So, that is the reason that I am going to call this Gingerade. And let me tell you it is no worse for that!

This method is one of two ways to naturally carbonate drinks, without the need for a Soda Stream. The other way is to add yeast. It is also a really healthy drink – the whey has loads of probiotics, which you have to pay a good deal for if you buy those fancy yoghurts. Any bloating that you may, or may not relieve is entirely your own business.

I never really got fed the standard carbonated drinks when I was a child, so I never really developed the taste for them. I’d rather have water, or fruit juice than a fizzy drink (only if wine isn’t an option, obviously!), but I could definitely develop a taste for this. I tried it after three days, so it was lightly sparkling, which I liked a lot. You can get a fiercer bubble if you leave it in the warm for longer. I was happy, so put it in the fridge. It will continue to ferment in the fridge, but at a much lower rate.

I will definitely be trying to lacto-ferment ginger beer, and other lemonades, So I may be able to use my witty post title after all, and of course, I will be blogging the efforts. I’m also going to have a go at alcoholic ginger beers too, and why not – makes a change from Belgian beer for me, for sure!

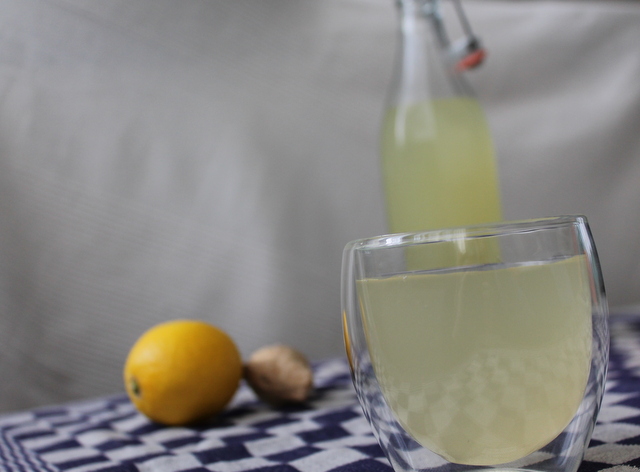
I tried it today, in the my sunny spring garden, which is the perfect setting for this drink, in my opinion. Well, until I can have it with ice in the summer, of course!

Spice Trail Blog Badge

As well as this appearing as part of the Cheese, Please! Fresh Cheese Challenge (which really has been the gift that keeps on giving for me this month!) roundup, which I will be posting tomorrow, I’m going to have a second bite of the cherry at this month’s Spice Trail hosted by Vanesther of Bangers and Mash. Mostly because I really do love ginger, but also because I covet those beautiful little spice tins that are being offered as a prize this month. I can only hope, but this month there is a lot of stiff competition, with a lot of entries, many of which I have bookmarked for later.

Recipe: Lacto-Fermented Gingerade

Ingredients
30 g ginger
Juice of 2 lemons
150 g runny honey
1 tsp rock salt
4 tbsp fresh whey
2 l water

Method

Sterilise enough bottles to hold 2 l of gingerade. I used the sterilisers from my home-brew, which I find the easiest method for the types of bottles that I used. If you use wider necked bottles, then you can run them through  a hot dishwasher cycle, or wash them and put them in a low oven, as you might for making jam or lacto-fermented vegetables. At the same time, sterilise a funnel that fits into the top of the bottles that you are using.

Finely grate the ginger. I used a microplane, but if you don’t have one, use the finest side of a box grater. Mix the grated ginger with the rest of the ingredients in a large bowl, making sure that the honey and salt are really dissolved in the lemon juice before you add the water and the whey.

Before bottling, stir the gingerade well, so that you can be as sure as you can that there are bits of ginger and lemon pulp in each bottle. Fill each bottle with the gingerade. You will need to leave about 5 cm at the top.

Leave to start to ferment in your living room or kitchen. You may need to get it started by tipping the bottes over once to stir things up once or twice a day. Be careful, because once it starts to ferment, the pressure will build. After three days, test to see if the carbonation is to your liking. If it is, then store in the fridge. Remember that it will continue to ferment in the fridge, but at a much lower rate.

Serve on a sunny day. Maybe at a picnic (serving suggestion).

This recipe makes slightly more than 2 l of liquid. I used up the rest in a rather fantastic raspberry coulis, but you might just as well drink it, or add it to stewed apple or even rhubarb. Very good indeed.


Advertisement

18 Comments

Filed under Fermented

Under the Milky Whey

Fresh Whey and Vegetables

Chop A-Whey!

A quick look on Pinterest reveals that you can lacto-ferment pretty much anything – from garlic to hummus. I saw fruits, vegetables, herbs, spices, beers, mayonnaise, BBQ sauces and even mustard on there. Apparently it is amazing what won’t be improved by bunging in some whey.

As you know, I happen to have quite a lot of whey taking up all the space stored very carefully in my fridge.It is the yellowish liquid in the photo above, and it is the by-product of making your own cheese, or straining yoghurt.

Apart from the miracle of being the new superfood, due to all the probiotics; you can feed whey to animals, use it as a fertiliser, make various toiletries for skin benefits, and body builders dry it then consume it by the bucket load.

You can also soak beans, or grains in it before cooking, use it instead of the liquid in pancakes, cakes, and bread (or pizza dough). soups, and stock. You can even add it to shakes and use it as a cheese starter in some kind of lactose Inception.

Whatever you do with it, you should not pour it down the sink. Apparently, it can de-oxygenate water systems. So, for this reason, and the fact that I hate waste, I’m going to use mine. Don’t worry, it also freezes really well, so if you can’t get through it all, you can keep it for later.

You may have noticed that I enjoy a nice pickle, go crazy for chutney, and take pleasure in preserves. It is only natural, then,  that I should have a go at lacto-fermenting as a novel way of preserving food, and as a way to use up leftovers. I’ve had a good dig round the internet, including over at the lovely host of Cheese, Please!, who lacto-fermented cucumber and carrots to come up with the following recipes.

For the first, I wanted to be able to make a direct comparison with a pickle that I already know. I make pickled fennel a lot, based on the River Cottage Preserves book, so I used the same aromats and dill here.

The second lot are inspired by a friend of mine who makes amazing pickled cucumber from a mysterious Asian salt. I have no idea what this stuff is, but it is hot, sour and sweet at the same time. I have tried to recreate this with the whey – we’ll see where we get to.

Apparently, lacto-fermenting is pretty long-lasting, but depends on how strong the cell wall of the thing you are preserving is. You can expect the fennel to last between 4-6 months in cold storage, and the cucumber to last up to 3. The fermentation will continue, even in cold storage, so it is something to be aware of, and date the jars well before you store them in a cool, dry place.


Lacto fermented fennel and cucumber

Perfectly Preserved

Recipe: Lacto-Fermented Vegetables

Ingredients

For the Fennel:
1 tsp mixed peppercorns
1 tsp coriander seed
1 tsp fennel seed
1 bulb of fennel, cored and thinly sliced
Fronds of dill
100 ml whey
300 ml boiled water, allowed to cool
1 tbsp rock salt

For the Cucumber:
1 tsp mixed peppercorns per jar
1 tsp juniper berries per jar
1 large cucumber, in 3 cm slices on the diagonal
1 red chillies, sliced on the diagonal but seeds left in
Fronds of dill
200 ml whey
600 ml boiled water, allowed to cool
1 tbsp table salt
1 tbsp sugar

3 jam jars

Method

Sterilise your jars on a hot cycle in the dishwasher, or by washing in hot soapy water, drying and placing in a low oven for an hour.

Prepare the vegetables, and boil the water for your fermenting liquid.

To the sterile , still warm jars, add the relevant spices, then layer up the vegetables, making sure to get a layer of dill fronds in between them as you go. Pack them as tightly as you can.

Mix together the whey, water and salt, as well as the sugar for the lacto-fermented cucumber. Fill the now packed jars with the fermenting liquid, up to 3 mm from the top of the jar. Screw on the lids tightly and store in a cool dark place for between 3 days and the maximum time for the vegetables.

I intend to leave these for about a month, before I try them. When I do, I will be sure to let you know what I thought.

11 Comments

Filed under Fermented

A Fruity Little Snifter

Japanese quince brandy

There’s Brandy in the Jar – Oh!

As you will probably have gathered if you have read more than this post, I do like to get the maximum use from my produce, especially if I have grown or gathered it myself. In this, the last of my Japanese quince posts, I am getting even more out of my harvest. I’m also starting right in on my resolutions, by blogging about booze. And I assure you, this one couldn’t be easier.

I have read a lot about quince liqueurs with vodka and honey. I have also read a fair bit about quince brandy, which sounded a lot better to me. Especially after I was given a copy of Salt, Sugar, Smoke by Diana Henry for Christmas, and she gives some really tempting takes on Kir Royale using quince brandy and either French cider or English sparkling white wine. I am also thinking of taking the best of both ideas and making something with the brandy and this very special cider from Sussex, Gospel Green Champagne Method Cider (look out for them, they are from West Sussex, but don’t have a website. This is truly remarkable “bubbly” style cider) if I can get hold of some.

Fruit brandies of this kind, and those distilled from scratch used to be pretty popular. You may know them as eau de vie, rakia, or brandywine, and they are still popular across Europe, but especially in the Eastern countries – Bulgaria, Serbia, Macedonia, and as far down as Turkey.

Of course, these are meant for quince or Cydonia oblonga, but I see no reason why they shouldn’t translate into Japanese quinces too. I selected some of the nicest fruit, and set them aside.

Then the next dilemma was whether or not to go with sugar.  For advice on this, I turned to Twitter. Luckily for me, preserving queen, Vivien Lloyd and beekeeper extroadinaire, Zoë Lynch were listening, and they both said sugar was wise, so sugar it was. Thank you both, if you are reading, although I didn’t go with that much, because I figured that I can always add sugar, but I can’t take it away if the brandy is too sweet.

The brandy needs to steep  for anything up to a year, so I haven’t tried this yet, but when I do, I’ll let you know how it goes.

Recipe: Japanese Quince Brandy

Ingredients

5-6 Japanese Quince

50 g muscuvado sugar

2 star anise

Brandy

Sterilised jar wide enough to get the fruit into

Method

Slice the quince, but leave the seeds in. Layer the quince into the jar, and sprinkle the sugar and the star anise between the layers.

Top the jar up with brandy. The fruit will be fine in here, as long as the jar is full, and the fruit doesn’t get exposed to air. I used a 700 ml jar, so needed a fair bit of brandy.

Leave it in a cool, dark place for up to 12 months, taking it out to shake it when you remember.

Strain off the brandy, and pour into a sterilised bottle, where it will keep until you have tracked down some of that excellent cider. Top up with more brandy, if necessary.

Oh, and I’m also thinking that there will be a good use for the fruit, possibly added to apples. I’m sure I’ll think of something tasty to do with them.

6 Comments

Filed under Fermented

A Whole Lot of Rosie

Wild rose petal cordial

Entente Cordiale

At the same time as we collected all the elderflower, we were also delighted to find some wild roses. The most common of these is the dog rose, but they have mostly gone over in the more accessible places. I did manage to get a photo, but couldn’t reach the  blooms, as they were on a steep slope, and behind a lot of brambles.

Wild Dog Rose

Dog Rose

Luckily, we also came across a load of what I think is most likely to be prickly rose, or rosa acicularis. This is a really beautiful rose, with abundant, dark pink flowers. They also have a lot of thin thorns on them. I was so excited to find them that I forgot to take pictures, but I’ll try to go back soon to get some. When the sunshine comes back. If the sunshine comes back.

The good news is that all rose petals are edible. The more highly scented, the better they will taste. As well as some basic foraging rules please be careful that the roses that you use have not been sprayed with any pesticides, which can be an issue if you are foraging in a park. Another word of caution; if you are allergic to bee stings, like I am, please check each flower before you pick the petals. Bees love roses, and will spend a lot of time feeding from each one. I very nearly picked one up with some petals, but it warned me by buzzing angrily, and I quickly dropped the petals. Bees are quite polite really, and will warn you before they sting.

You could dry the petals, and use them in cakes and jelly, or even brush them in egg white and dip them in caster sugar to crystallise them and then use them as a cake decoration.

Rose petals with & without claw

The white claw (L) is bitter and must be removed

When you use rose petals, you need to remove the claw, or the part where by which the petal is joined t the rest of the flower. This is bitter and can taint your produce. I usually just snip them off with scissors.

The first thing that I made was a cordial. This recipe is inspired by one that Sandie made at Herb and Wild Food Recipes. Sandie intended to make a jam, but actually made a syrup with dog roses. I used the same technique to prepare the roses, and then made a cordial as I would normally. This is a great blog, full of wild food recipes, so please do go and have a look.

It has also taken on the dark pink of the rose. I have had it as a refreshing drink, but I’m also going to try this in a syllabub, and maybe to cook some gooseberries in. If you have any suggestions for ways to try this cordial, I’d love to hear them in the comments.

Recipe: Rose Cordial

Ingredients

2 large handfuls of rose petals (claws removed as above)

Juice of a lemon

500 ml water

300 g sugar

Method

Sterilise a 500 ml bottle and the lid. You can do this in a number of ways. I find it trickier to get bottles clean in the dishwasher, as I would do for jam jars. You can wash them in hot soapy water, using a bottle brush to get into the nooks and crannies. I give them a good soak in the steriliser I use for brewing before I rinse, and put in them in a w arm oven (150°C). If you have a pressure cooker, you can also hold it in steam.

In a saucepan, add the lemon juice to the flower petals and the water. Simmer for 15 minutes.

Strain through muslin, and return the liquid to the saucepan. As you would expect, I didn’t throw out the rose petals. I have a great recipe for them to come. You can refrigerate or freeze them, if you want to use them later.

Add the sugar to the rose-water, and heat, stirring until the sugar has dissolved. Allow to simmer for five minutes, then hot-fill the sterile bottle.

Keep this little jewel in the fridge.

3 Comments

Filed under Fermented, Found

Respect Your Elders

Elderflower cordial

Extending the seasons

It is that glorious time of the year when lots of delicious produce is in season. In the garden broad beans, the last of the asparagus, courgettes, the very first tomatoes (if you can grow them under glass); and in the hedgerow you will find nettles, dock, sorrel, mallow, and many other delicious treats. It is also your shortish window for the elderflower.

Gathering Elderflowers

Harvest Festival!

The elder has been used and revered for centuries. It has provided stakes, shelter, medicine, fuel and food to animals and man since prehistoric times. There is a lot of folklore and superstition around the elder, and in some places people would leave offerings for the Elder Mother before they picked from the tree.

Harvested elderflowers

An Exuberance of Elderflowers

In early summer, hedgerows froth with white elder flowers at hedge height, and moon daisies at their feet. It is a time of great potential, and great recipes. Although, it is also important to remember that the potential of this tree is not just about summer, but that there are also good things to be had at all stages of fruiting, as well as the berries being a valuable food supply for many bird species, who will be laying down reserves for the coming winter.

Luckily, the elder is ubiquitous in most parts of Europe, and they seed themselves easily, even in places where there is no tradition of a hedgerow (such as the Netherlands). As long as you don’t take all of the blooms from a single tree or shrub, there will be plenty left throughout mid-May to mid-June to allow for your own use of elderberries and for the birds, as well as allowing the tree to reproduce.

This year, I have also learned some other tricks from wise women on Twitter about uses for this wonderful tree.  Cally from Country Gate mentioned that elder leaves make a good pesticide against aphids. I have been plagued by them this year, seemingly more so than in previous years. She says to simmer 500 g of elder leaves in 3.5 l of water (use an old saucepan if you can for this), and replace any water lost as steam. Strain, and bottle. This concoction should keep for 3 months, and is great for aphids.

Elder buds

Bud of Delights

Liz from Forage also mentioned that the buds of elderflowers are delicious in salads and omelettes, and lend a smoky flavour to a dish. I picked a couple of elderflower brackets in bud to test this, and they are really very good in an omelette aux fines herbes. Although it is probably a little late in the year to get the buds now, I am definitely going to play a little more with this next year.

When picking the flowers, try to go in the morning, on a sunny day, when the pollen levels will be at their highest. Try to pick fresh, white brackets with no brown patches or blemishes, as these have the best taste. Elderflowers will keep for a couple of days, but they start to go brown quickly, and will deposit pollen and nectar, which is essential for the flavour, so it is best to try to use them on the day that they are picked.

This is my recipe for elderflower cordial. I originally cut it from a reader’s letter to the Guardian, years ago. Unfortunately, I don’t have that cutting anymore, so I don’t know the name of the person who sent it in. As you will see, the recipe is basically based around the number four, so once you get the amounts, then you will understand why I have misplaced the clipping.

Elderflower cordial is a great way to preserve the delicate taste of summer, and is the basis of many things, from refreshing drinks and summery cocktails, to use with other fruits and in many desserts.

I’m going to be writing about some of my elderflower cordial recipes in the coming months, but I’d really love to hear how you use it in your recipes, in the the comments.

Steeping elderflower cordial

Steeping to Success

Recipe: Elderflower Cordial

Ingredients

40 elderflower bracts

4 pints boiling water

4 lb (1.8 kg) sugar

2 lemons, sliced

4 tsp citric acid.

Method

I often only have raw cane sugar in the house, which makes the cordial slightly darker than you may be used to – it still tastes delicious, but most people use white sugar.

You can get citric acid from home-brew shops and possibly the chemist (in the UK). If you cannot find citric acid, then add the juice of another lemon. If you use this method, I would recommend freezing the cordial once bottled, to make sure that your cordial does not go mouldy.

Method

Steep the blooms in the boiling water in a large, non-corrosive container.

Add the sugar, lemons and citric acid, and stir until the sugar has all dissolved.

Cover with a tea towel, and leave in a place that you will walk past daily. Leave for four days at room temperature, stirring well twice a day.

Sterilise some bottles, and a funnel. You can use new ones, or old oil, vodka or screw-top wine bottles will also be fine. I find that bottles are much less likely to get thoroughly clean in a dish washer, so I clean mine by hand with a long bottle brush, then I sterilise them with campden tablets, which are also available from home-brew suppliers. This recipe makes a little over 4 l, so you will need an appropriate number, plus one for luck.

Strain the elderflower through muslin, then bottle and seal tightly.

This should keep for up to a year. Once it is opened, store the bottle in the fridge.

Then pour yourself a nice tall glass of diluted cordial, add mint and some ice, and think about what recipes you could use the cordial in.

13 Comments

Filed under Fermented, Found

Mulling it Over

No Mince Pie and Mulled Wine party would be complete without some mulled wine. This spiced wine is traditionally flavoured with the Christmassy flavours of nutmeg, cinnamon and cloves.

I think the practice of spicing and warming wine is pretty international, and many European countries have a version of it, calling it Glühwein, Glögg, or Vin fiert. In the UK, we are also quite prone to mulling cider in a similar way, which is fantastic after a day in the cold. One of my friends brought some cider too, so everyone got to try out the traditional taste of the West Country.

The recipe for red and white wine is essentially the same, and don’t let either of them boil.

Recipe: Mulled Wine

Ingredients

1 orange (mulled red wine)

½ Orange and ½ Lemon (mulled white wine)

Cloves

Cinnamon stick

Grated nutmeg

100 g lichte basterdsuiker or soft brown sugar per 2 bottles of wine

Method

Stud the citrus fruit with the cloves. If you are mulling red wine, then halve the orange before you do so.

Put all of the ingredients in a saucepan, and heat gently until the sugar has dissolved. Don’t let the wine boil.

If you have time (and no thirsty guests already) you can allow the spices to steep for a few hours, and reheat before serving. It will also be fine if you serve it warm, straight away.

Bay leaves are also an interesting addition to mulled white whine, so bung a couple of them in as you heat it.

3 Comments

Filed under Fermented