Tag Archives: Picnic Food

Super Calamansi-istic

Corn and Calamansi Salsa

Salsa Alidocious!

As you will have seen from my Philippine Tasting Plate, I brought back a few things to use in my home cooking. And what better way to celebrate the recent good weather we’ve been enjoying than to use tropical ingredients?

I got the idea for this dish from a corn salsa I ate at Tomatillo. As is often the way, restaurant food inspires my dishes. The Tomatillo salsa is nice, but I knew that I could twist it a bit to make it even better.

I was already thinking that it needed courgette. Then I remembered the calamansi that I had packed away so carefully, and that was now residing in my fridge. I knew that I had to try to make the dish that began a while ago, and had now taken root in my brain.

Calamansi

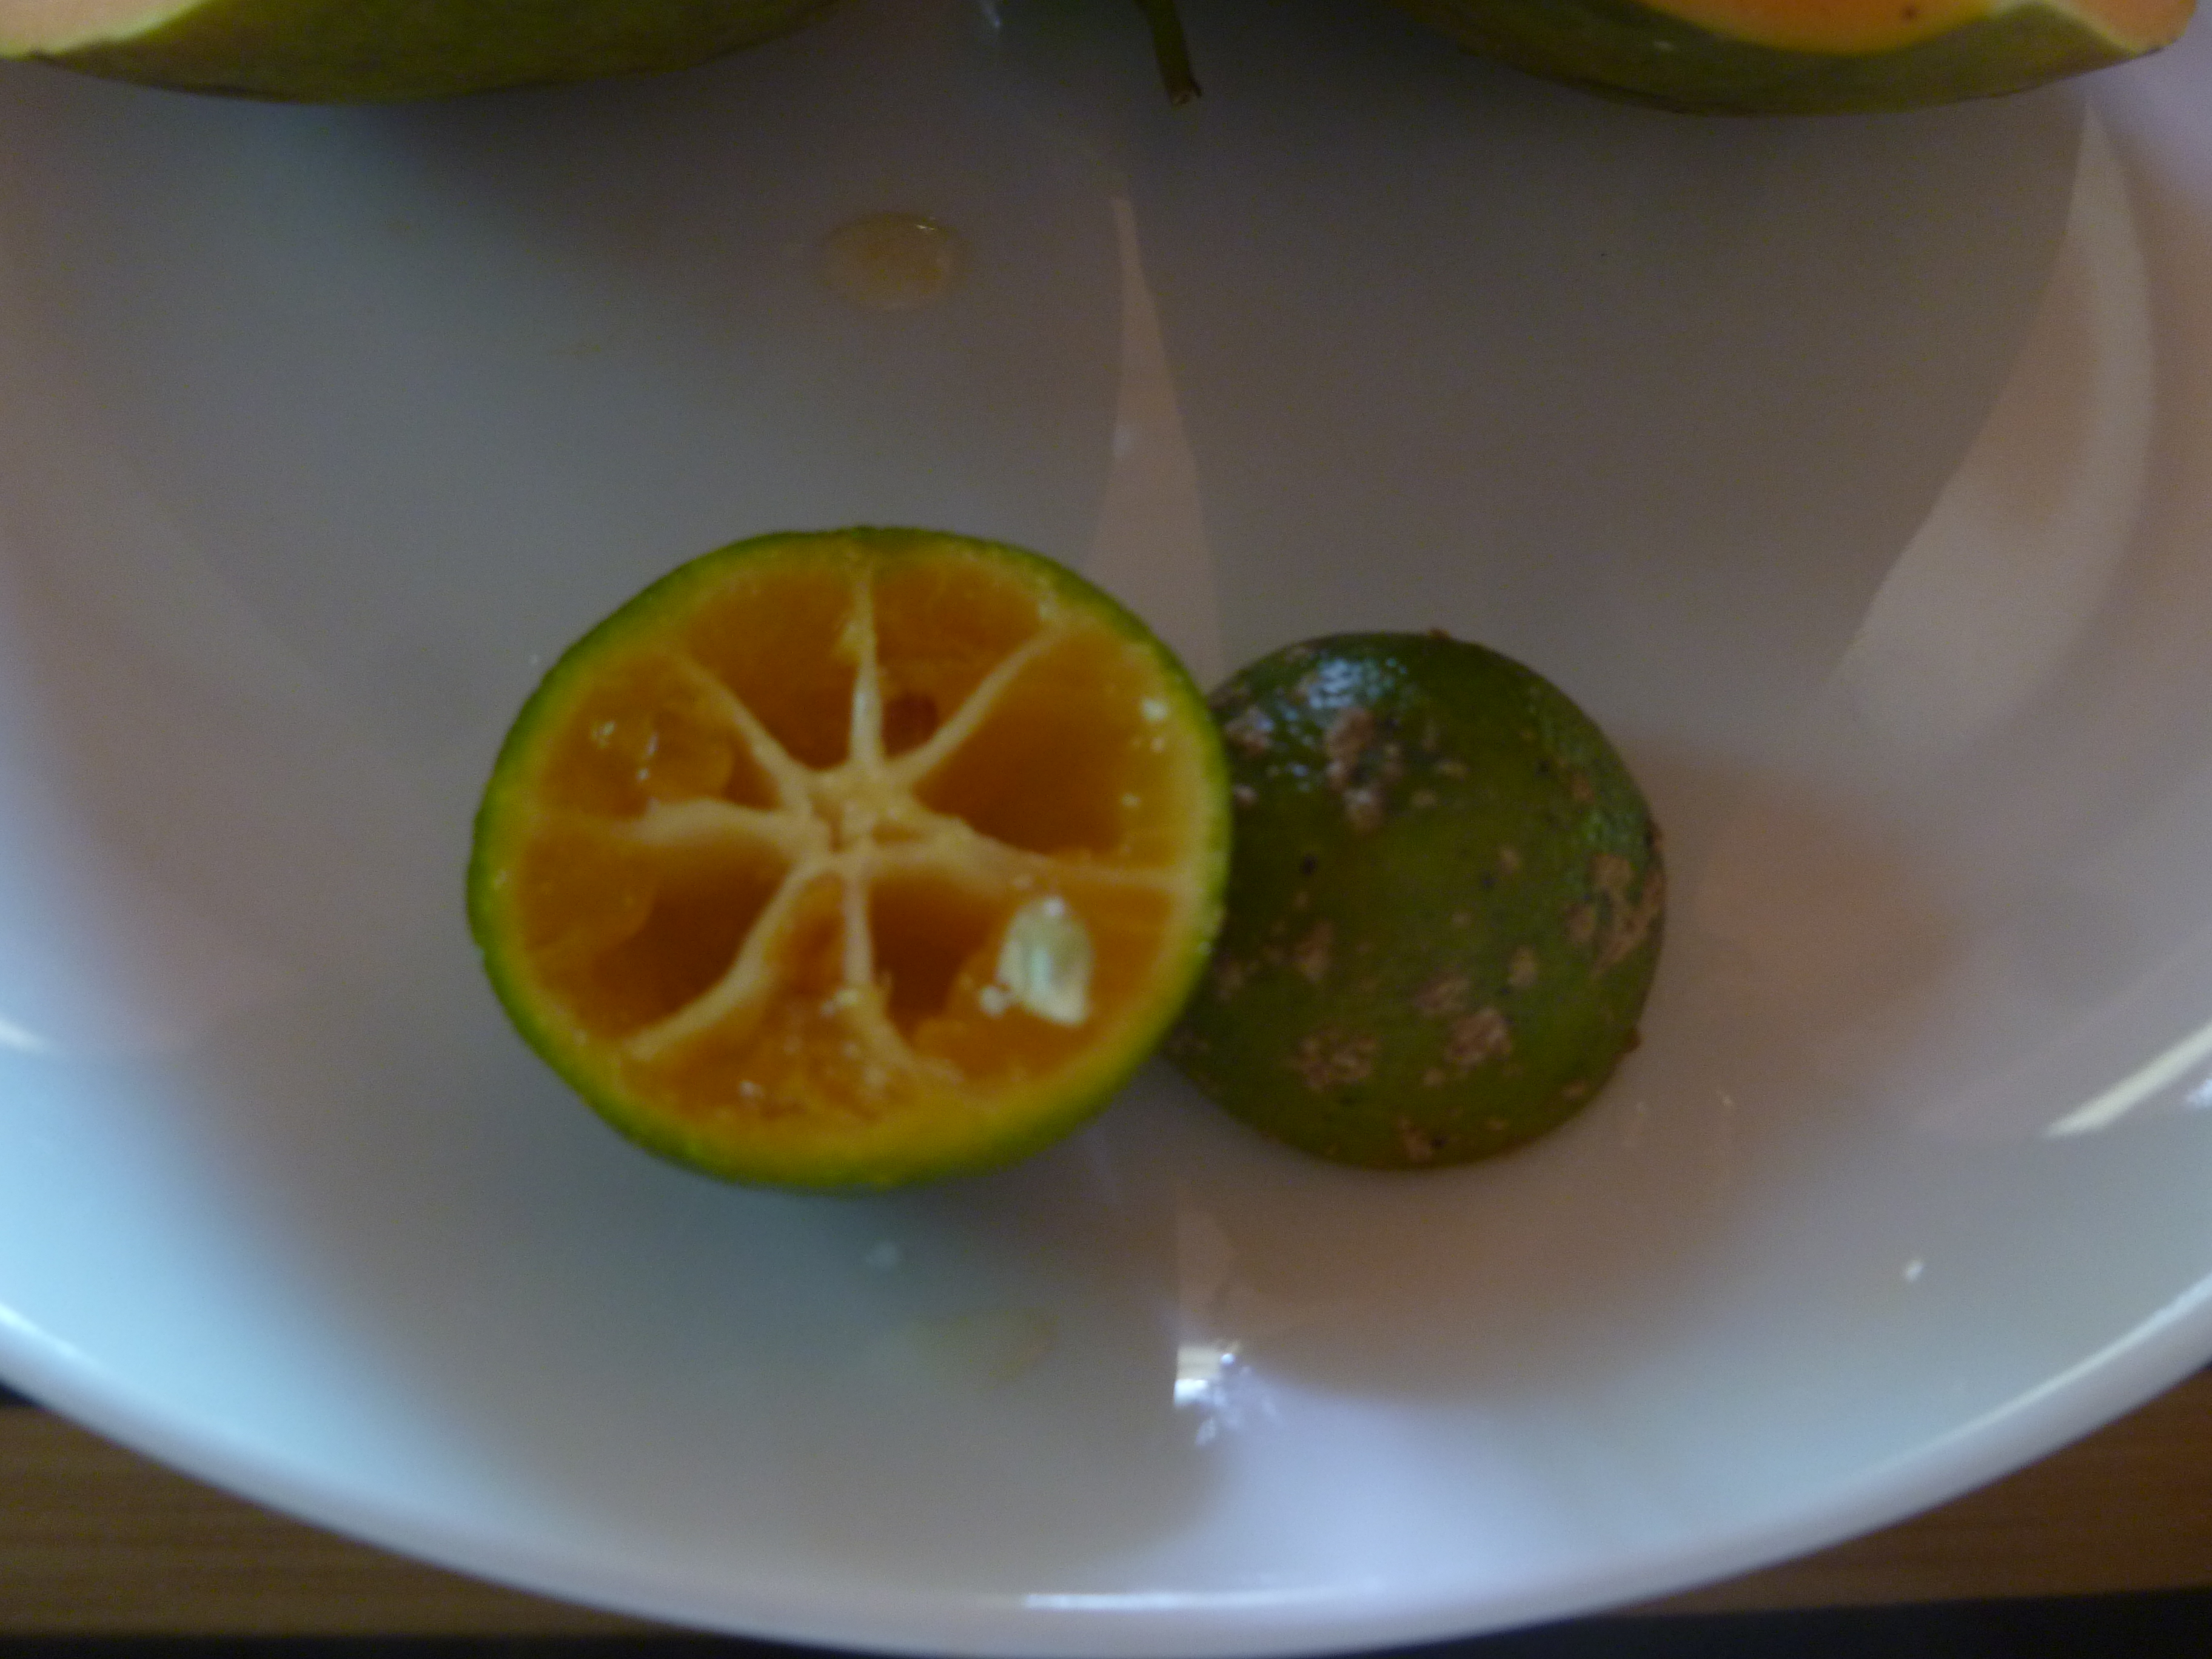
Calamansi – about the same diameter as a 10 p piece (or €2)

Calamansi is a small citrus fruit. You can use them like limes, in salads dressings and to season stocks etc, but they are also a popular drink in the Philippines, as well as being a key ingredient in sisig. They are both sweet and sour at the same time, and have a lot of flavour despite their diminutive size.

They also have a lot of pips. I was going to chance my arm and see what would happen if I planted a few, but I forgot to tell the Big Guy what I was doing, and they got thrown out. Ah well, I know that growing citrus from seed is notoriously unreliable, so I probably saved myself a fair bit of disappointment in any case.

I first made this salsa for a birthday canal boat picnic I held for the Big Guy. It was great as a dip with tortilla chips. I was a little nervous to present it as salsa to that crowd, amongst whom were some Americans who have an in-depth knowledge of all things Tex-mex. I have previously been taken to task for a guacamole, because I had put tomato in it, which apparently makes it pico de gallo, and not guacamole. I have also been told my (Mexican recipe) chile con carne is not a real Chile (but the consensus was that it was very tasty). I needn’t have worried, this went down a treat with everyone on the boat. And no-one objected to me calling it a salsa.

I have since served this at a barbecue, where it was similarly well received, and went equally well as a garnish with my home made burgers as it did with vegan enchiladas. I think it would be great as a salad as well.

I made this with tinned corn, but you could also use fresh a little later in the year, although I’d recommend grilling it in the husk first on either the barbecue or under a hot grill. Then shuck and add to the salsa.

Recipe: Corn and Calamansi Salsa

Ingredients

1 red onion, finely chopped

Juice and zest of 6-8 calamansi (or one lime)

½ courgette, finely diced

1  tin of sweetcorn, drained (or one whole corn cob, grilled and shucked)

1-2 red chilis, deseeded and finely chopped

Small bunch coriander, including stalks, finely chopped

Salt and pepper

Method

If, like me, you dislike raw onion then steep the chopped onion in the calamansi juice and zest for at least 10 minutes before you make the rest of the salsa. The amount of calamansi that you need will depend on the size of your onion. You should ave enough juice to just coat all of the onion. I have made this twice, and needed different amounts each time.

Raw courgette doesn’t taste of much, which puts many people off trying them twice. The secret to bringing out the flavour is to blanch them.  Because these are finely diced, they only need to be steeped in boiling water for about 30 seconds or so. If you like, you could squeeze a little more calamansi juice (or a couple of drops of lime) into the water. Drain immediately, and run under the cold tap to stop them cooking further. Allow to drain completely. The courgette will now taste of courgette, but will still have a bit of bite.

Mix together the onion, courgette, sweetcorn and chili. Season well, and set aside the salsa for about an hour to allow the flavours to meld. Taste, and add more chili, citrus juice or salt and pepper to taste. Stir through the chopped coriander and serve.

Advertisement

2 Comments

Filed under Feast

A Picnic on Public Transport

Asparagus and Potato Tart

Tarted Up Leftovers

The Big Guy and I are seasoned travellers. If you live in a different country from either of your families, you have to get used to the rhythm of packing, transport, and departure times. Where we can, we take the train; it has a much better rhythm – with a continuity of movement, both in terms of the motion of the carriages, and because there is no hanging about in a departure lounge, or being forced through an array of harshly lit shops. The train gets you where you need to be without fuss; you have space to sit comfortably and to move around.

One of the things that we haven’t got the rhythm of is taking our own food. Although, I do know exactly where all the best places to buy food along the journey are. We have recently returned from one such trip abroad, although this time, we had a leg of the journey on a coach. It was OK, but I will be glad if they ever sort out the troubles on trains run by a certain rail company, which has been unable to run for far too long now.

We decided that we should be better prepared for this journey. Since our usual rhythm was interrupted, I could not guarantee getting to my favourite pit stops. I also had a few ingredients in the fridge that wouldn’t last until we returned. So, the obvious choice was to make something to take with us. A picnic, of sorts.

I had a little of the salad, some cream and some eggs that needed using up from the dinner I made for friends, and a few last sprigs of chervil. As so often happens, the day before I was leaving I woke up and knew that these would be perfect in a tart, with some goat’s cheese. We could have some for dinner that evening, and then we could take the rest as a picnic for the coach the next day.

Like many of the best laid plans, the idea for a nice goat cheese went a bit awry. It was a bank holiday, and none of the usual shops were open, so I had to dispatch the Big Guy to the supermarket. Unfortunately, all they had in the way of goat cheese was some presliced stuff, that could have been any generic cheese. It certainly never has the tang of goat that I was looking for in this dish. Fortunately, he returned with some sharp, crumbly feta instead. This was a much better option, it needed to match the asparagus.

The tart was tasty, filling and survived the journey. So did the salad we had with it, because we dressed it en route from a small jar. This is my top tip for picnic salads – if you dress it before you travel, the salad will cook in the acid, and you will be left with a container full of flaccid disappointment.

Cheese Please blog badgeFour Seasons Food Challenge Chez Foti & Delicieux

I know I have entered my dishes into a lot of blog hops lately, but I couldn’t resist entering this recipe into the inaugural Cheese Please Challenge, hosted by Fromage Homage. Then I heard about the inaugural Four Seasons Food, dreamed up by Anneli at Delicieux and Louisa at Chez Foti. This dish is so apt for both.

This was my perfect public transport picnic, and I didn’t waste anything in my fridge. I’d love to hear what appears on your picnic blanket, or even coach seat when you make food for on the go.

Recipe: Asparagus and Potato Tart

Ingredients

For the Pastry: 

100 g plain flour

50 g cold salted butter

Really good grinding of black pepper

1 egg yolk

For the Filling:

100 ml cream

4 eggs

small bunch chervil, very finely chopped

100 g of leftover asparagus salad, or 3-4 small salad potatoes and 5 asparagus spears cooked until just tender, and cut into 5 cm chunks

2 spring onions, sliced finely

90 g feta cheese

Method

Season the flour. I wanted this pastry to taste peppery, the rest of the tart can hold its own. Don’t be afraid of adding  more pepper than you think.

Rub the cold butter (it needs to be fridge temperature) into the seasoned flour until you have a breadcrumb consistency. Add the egg yolk and bring together into a dough. If you need to, you can add a little bit of cold milk to make it all come together. Add a splash at a time.

Form a disc with the dough, and cover it with cling film or foil, and leave it to rest in the fridge for 20 minutes to an hour.

Heat the oven to 200°C. Roll the pastry out thinly on a floured surface. Carefully line a greased flan case with the pastry, and press into the sides or fluting with a small offcut of pastry in a ball, to avoid any tears or holes, you don’t want the filling to leak and burn on the bottom.

Prick the bottom of the pastry all over with a fork. Line the pastry with greaseproof paper, and add a good layer of blind bake – this can be ceramic beans, dried beans or rice – to give some weight help keep it flat and thin. Bake in the oven for 15-20 minutes, or until the pastry looks dry and is beginning to brown on the sides. Remove the blind bake, and put back in the oven to allow the pastry to cook all over to a light golden colour.

While the pastry is browning, whisk together the cream, eggs, and chervil.

Once the tart case is cooked, remove and turn the oven down to 180°C.

Pick the salad over to remove any leftover capers and cornichons. Scatter the rest over the tart case, so that you get pretty even cover. Then scatter over the spring onions and crumble the feta around, again, so that the coverage is quite even.

Pour the eggs and cream over the rest of the filling, shaking the case a little, to ensure even distribution. Return it to the oven and bake for a further 30-40 minutes, or until the centre is just set, but still has a little wobble if you shake it.

As with all quiches, this is great served hot or cold, but if you want to serve it warm, let it rest for about 10 minutes after it comes out of the oven, so that the filling does not ooze all over the plate.

9 Comments

Filed under Feast

The Queen of Tarts

Asparagus & Lancashire Cheese Tart

The Knave of Hearts, He Stole the Tart

When I got some Lancashire Cheese from my foodie penpal, I knew I had the start of a great dish. When the Big Guy brought home what was likely the last bunch of local asparagus that we will see this season, I knew exactly what that dish would be.

Lancashire cheese and asparagus are a marriage made in heaven. The sharp flavour of the cheese would be perfect to go with the chlorophyll hit that you get from seasonal asparagus. Add to this fresh herbs, and put it in a tart, and you really are onto a winner.

Maybe it’s my imagination, but as well as the negative environmental impact, I think that asparagus that has been flown across the world has lost a lot of it’s green flavour. For these reasons, I won’t buy it. Maybe it is also the anticipation of this short-lived season that makes it taste better,  who knows?

I made my own pastry for this. Any offcuts will freeze well, wrapped in greaseproof paper, or you can be economical with the oven, and make a few jam tarts, or even unseasonal mince pies with the offcuts. This is something that I learned from my mother. We would rarely have a pastry dish without her baking some little sweet treat to use it up.

I used chervil and parsley in this recipe, because I grow them both, and I love chervil. If you have difficulty finding chervil, then you can substitute them both for a good bunch of chopped dill.

This quiche was actually better cold, when the cheese really sang out against the asparagus. Making this dish great for a picnic. You know, for when the summer actually arrives…

Asparagus & Lancahshire Cheese Tart

Forget the Knave, Watch out for Teddy Bears…

Recipe: Asparagus and Lancashire Cheese Tart

Ingredients

For the Pastry: 

100 g plain flour

50 g cold butter

Pinch of salt (or just use salted butter)

Cold water, less than 30 ml

For the filling: 

1 bunch of asparagus

100 g shelled weight broad beans

8 eggs, beaten

100 ml cream (or milk)

Small bunch chervil, finely chopped

Small bunch parsley, finely chopped

Salt and pepper (to season egg mix)

100 g Lancashire cheese, grated

Method

Rub butter into flour, until it resembles breadcrumbs. Slowly add the water until it forms a dough. You may not need it all.  It must be cold, not tepid, so it’s best not to measure out the water and let it sit while you rub in the butter. When it has formed a dough, you don’t want to work this too hard, so just shape it into a ball.

Wrap the pastry in clingfilm, foil or a plastic bag, and put in the fridge to rest, for about an hour.

Arrange the asparagus. First, snap off the woody bit at the end of the stem. The point at which it breaks naturally will be where the tender, edible part of the stem starts. This will vary according to how long the asparagus has been cut. Don’t discard these  tough ends, they make a great soup.

Arranging the asparagus spears

Power Arrangement

Cut the asparagus stems to size so that you can arrange them in a wheel around your flan dish. Cook the asparagus spears in boiling salted water for about 3-6 minutes, depending in the width of the spears. Cook the offcuts of the asparagus with the broad beans, in boiling water for a maximum of 2 minutes, depending on the size of the pieces. Drain all of the cooked vegetables and run under cold water as soon as they are done. you want them slightly underdone for this dish, as they will cook a bit more in the tart later.

Double-pod the beans, which may seem like a pain, but will be worth it later.

Preheat the oven to 200°C.

Grease a flan dish. I have a silicone one, but you may prefer a metal one with a loose bottom, either are good.

Roll out the pastry evenly, to about 1mm thick. Carefully slip it over the rolling pin, and line the flan dish with it. Cut a bit of the excess pastry from over the edge of the dish, and form a ball with it. Use this to gently press the pastry into the corners, and any fluted edges that you may have on the flan dish. This is thin pastry, and  will be using a liquid filling, so you want to avoid  putting holes in it, or the filling will leak, and burn. Using the dough ball, and not your fingers (especially not the nails) will help prevent tears and holes.

You can either trim the pastry to the edge of your flan dish, or leave a bit of an overhang. Pastry will shrink when it cooks, so I prefer to leave an overhang, which I trim off after the blind bake.

I sometimes coat the warm pastry trimmings in a light dusting of icing sugar and serve as a sweet snack. I can’t bear to throw away any of the edible things!

If you choose to trim the pastry, then you will need to gently pinch it up between your thumb and forefinger, to raise it above the sides of the flan dish, thus compensating for shrinkage (difficult to accomplish if your pastry is thin enough).

Now you need to blind bake the pastry case. Gently prick all over the base with a fork, as evenly spaced as you  can, without going through the pastry. Cut some greaseproof paper so that it overlaps the pie dish by about 3 cm each side. Scrunch up the greaseproof, as if you were scrunching up a piece of paper that you were about to put in a wastepaper basket. This will help the paper to line the pastry case and get into the corners and fluting better. Put an even coating of blind baking materials in the pastry case, on top of the spread out grease proof paper. Both the pricking and the blind bake will help prevent the pastry from rising, during the initial baking process.

You can get special ceramic beads for your blind bake, but these are expensive. It is cheaper to use dried beans from your store cupboard,or at a push a thick layer of rice. Beans are better, because you can still cook with them after they have been used as blind bake, and  they are heavier than rice. Once the rice has been used as blind bake, it can’t be cooked, so re-use it as blind bake.

Put the tart shell, with the blind bake into the oven and allow to cook for at least 10 minutes, or until the pastry case is crisp, and does not have any “damp” patches. Remove the blind bake, and put the tart case back into the oven for about 5 minutes, or until it starts to brown.

If you need to, trim your pastry case at this point. Or leave it, if it doesn’t look too scruffy.

Pastry Case Sealed with Egg Wash

Glazed and Confused

Since you are using a liquid centre, it is a good idea to seal the pastry case, to help prevent leaks. To do this, brush the case with a little of the beaten egg that you are about to use for your filling. Put it back in the oven for a couple of minutes until the egg wash has given the tart case a shiny, browned finish.

Add the cream, chopped herbs and the cheese to the beaten egg, and mix well. Season with a little salt (because the cheese is also salty) and a good grind of pepper.

Sprinkle the beans and asparagus offcuts onto the base of the tart, then arrange your larger spears over the top in your desired design.

Pour over the filling, and give the tart a shake, to make sure that the filling is evenly distributed in the case.

Place back in the centre of the oven, cook for 10 minutes, then reduce the temperature to 160°C. Cook for a further 30 minutes, or until the filling is just cooked, but retains a little wobble.

2 Comments

Filed under Farmed