
A Persian Twist
Most Fridays, I go foraging with a small group of great people. You may remember that I met one of them back when I did the seed workshop. One of them, Jennie is a herbalist, and we are learning a lot about the medicinal and culinary uses of wild plants from each other, and we all share good spots to find useful ‘weeds’.
On the last forage of last year, we hit gold, despite the cold. We found a huge stash of Japanese quince, or Chaelenomeles Japonica fruit. The Japonica is usually grown for its beautiful flowers, as many people have no idea that the fruits are so delicious, or so beautifully scented. At this time of the year, the fruit are pretty obvious, although I used to assume that they were ordinary bushes that some kindly person had studded with apples for the benefit of the birds in winter.
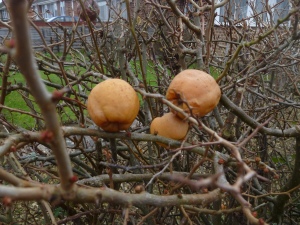
Hedge Decoration
Of course, this is a valuable winter fruit for the birds too, so if you do come across some yourself, then make sure you don’t take them all, as the birds will appreciate them, especially after they have bletted well. In fact, you will also think that they are better for a good bletting. Like their rosaceous namesakes, they are not at all good when you eat them raw, but they are delicious when cooked in pies, baked or as preserves, and they are really high in pectin, so great for this purpose.
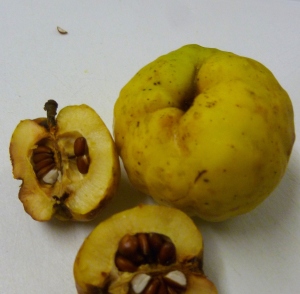
Seedy!
The Japanese quince is thin skinned, and has a lot of small seeds. I removed all of the seeds, and put half in a muslin bag for two types of jam, for the pectin. The other half I kept, and some of these may well find itself wending its way around in the next round of Seedy Penpals, which will be coming up shortly.
The fruits are also beautifully scented, and they have been brought into homes to simply sit in a room and lend it a lovely, delicate fragrance. As I cycled around, my foraged fruit was filling my nostrils, and my living room smelled lovely for a few days before I was off to spend Christmas at my parents, when they were unceremoniously stuffed into a bag, so we could make things with them.
Both quinces and Japanese quinces are used extensively in Persian and Moroccan cookery, and although I knew I was going to make jelly and jam, I wanted this to influence what I paired with them. Inspired by this recipe, I decided that I was going to make a quince jelly with tarragon, and then I could use the fruit pulp to make a different jam. I always try to use up the pulp from making jelly, and quinces make it really easy, due to the pectin.
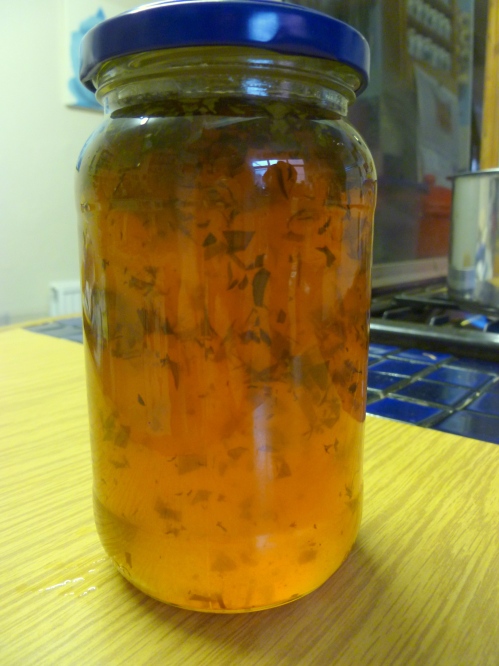
I’m pretty pleased with this jelly; it is tasty and unusual on toast or yoghurt in the morning, as well as being good with meat. This year, Christmas dinner was a gammon, which was prepared in the same way as this baked ham. I added a tablespoonful of this jelly to the gravy, which made it rich and unusual, bringing a slight taste of the Middle East to a Western meal.
Recipe: Quince and Tarragon Jelly
Ingredients
3 jam jars
750 g Japanese quince
Water to cover
3 large stalks of tarragon, plus another 3 sprigs for chopping
Caster Sugar (400 g per 600 ml juice)
Wax discs
Method
Sterilise your jam jars and lids, by running them through a cycle in the dishwasher, cleaning them in hot soapy water and placing them in a low oven, or by steaming them in a pressure cooker.
Quarter the quince, and remove the seeds. Take about half of the seeds and wrap them in muslin for cooking with. Place the fruit and seeds in a large pan, and cover with water. Bring the fruit to a boil, then simmer them until the fruit is tender, and the perfume fills your kitchen. This will be between 40 minutes to an hour and a half, depending on how well bletted they were when you started.
Drain off the water through a piece of muslin, but keep the cooking liquid, as this will form your jelly. Set aside the fruit pulp, because this will be the basis of your jam. Measure out the liquid, as this will determine how much sugar you will need. For making jelly, you take 400 g sugar for every 600 ml juice. My fruits yielded 1.3 l, so I used 860 g sugar.
In a large, clean pan, add the liquid, sugar, tarragon stalks and the rinsed off muslin with the seeds in it. Heat gently, stirring while the sugar dissolves. Once the sugar has dissolved completely, bring the jelly up to a rolling boil. Don’t stir it after this. It needs to reach 104.5°C to set. You can measure this with a jam thermometer, or you can do the fridge test. I often do both.
Meanwhile, chop the rest of the tarragon finely, and set aside for later. Once the jam has reached setting point, take it off the heat; remove the muslin with the seeds, and the tarragon stalks. Don’t throw the seeds away, they are useful for more jam making later. Add the chopped tarragon, and leave the jam to cool for 10-15 minutes, so that the tarragon will be more evenly distributed through the jam in the jar.
Meanwhile sterilise any jugs, ladles and jam funnels that you will need to transfer the jelly into the jam jars, by covering them with boiling water. You’ll need to dry them off before use.
Pour the jelly into the sterilised jars, making sure that the jam is within a couple of mm from the top of the jar. Put the wax discs on the top, wax side down. Put the lids on and tighten them well while the jam is still hot.


