Tag Archives: Simple

Dressing Up Your Dinner With Rhubarb

Tilapia Fillet and Rhubarb Vinaigrette

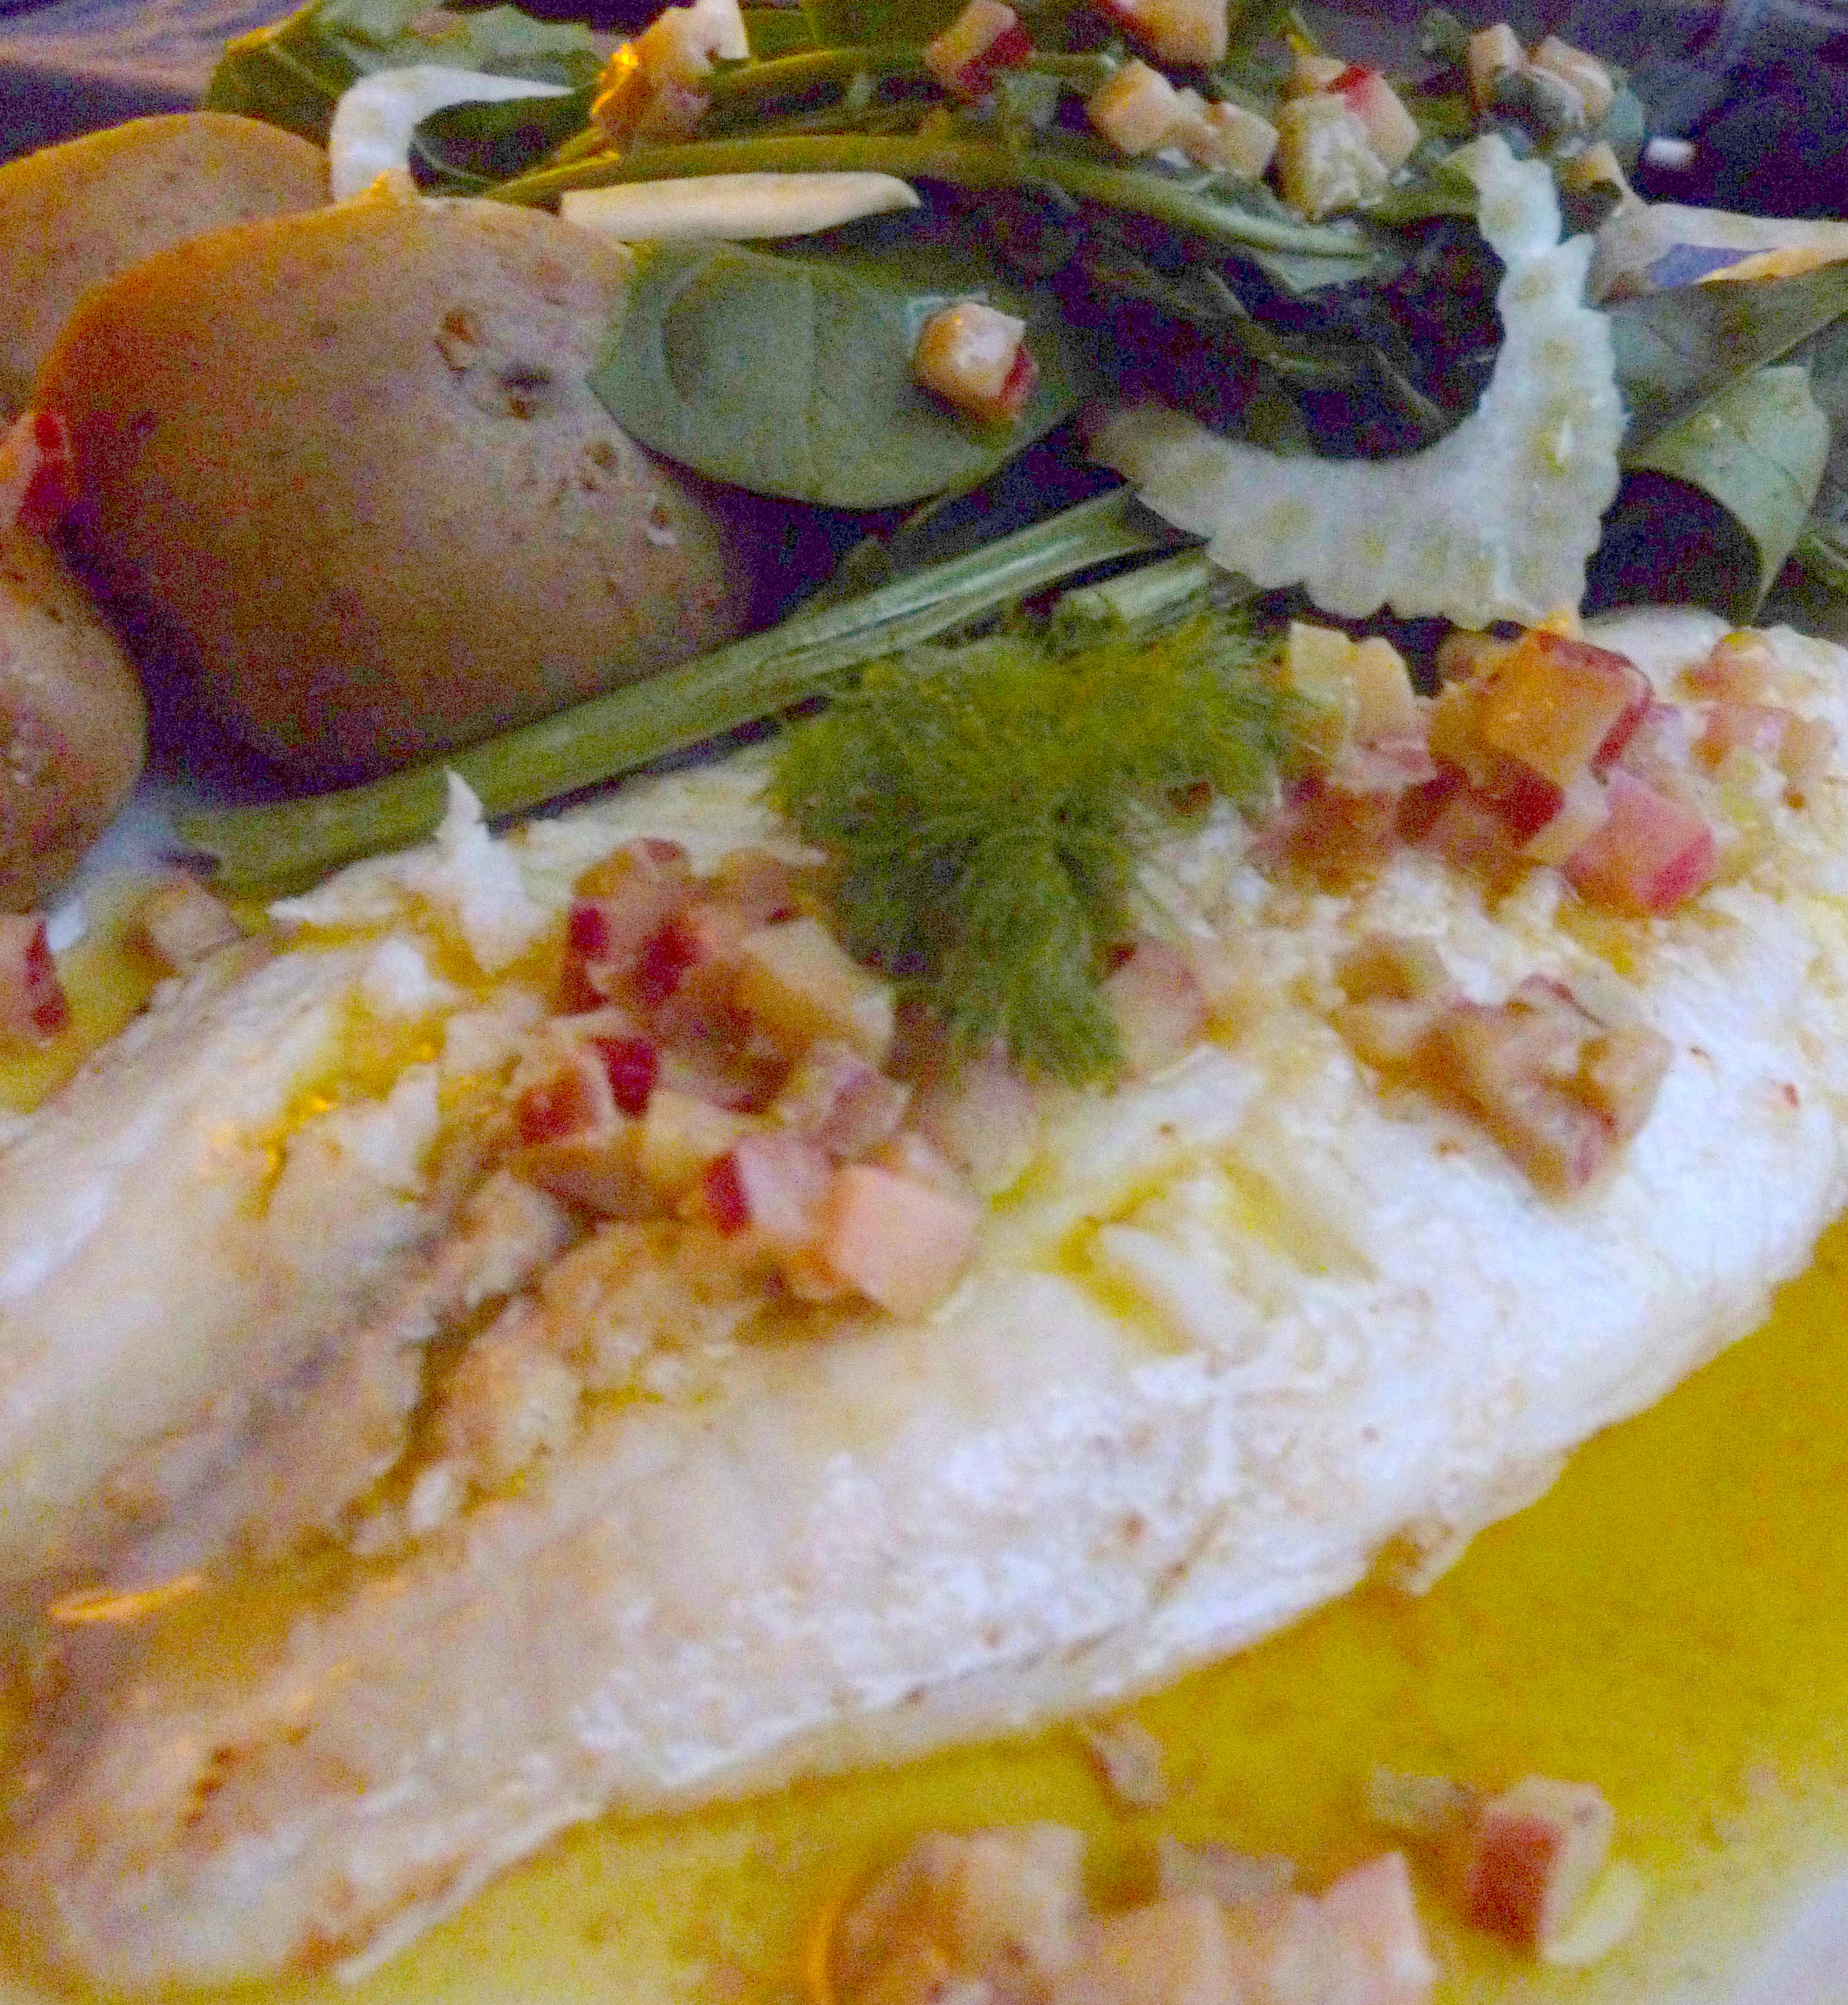
Best Dressed Fish This Season

Following on from my inspiration to pair rhubarb with fennel, I have been doing a few more experiments with rhubarb. I have lifted today’s idea almost wholesale from the Mister Kitchen rhubarb tasting menu. They served a sea bass with spinach and a rhubarb vinaigrette. It was great. Of course, I had to come home and fiddle about with it.

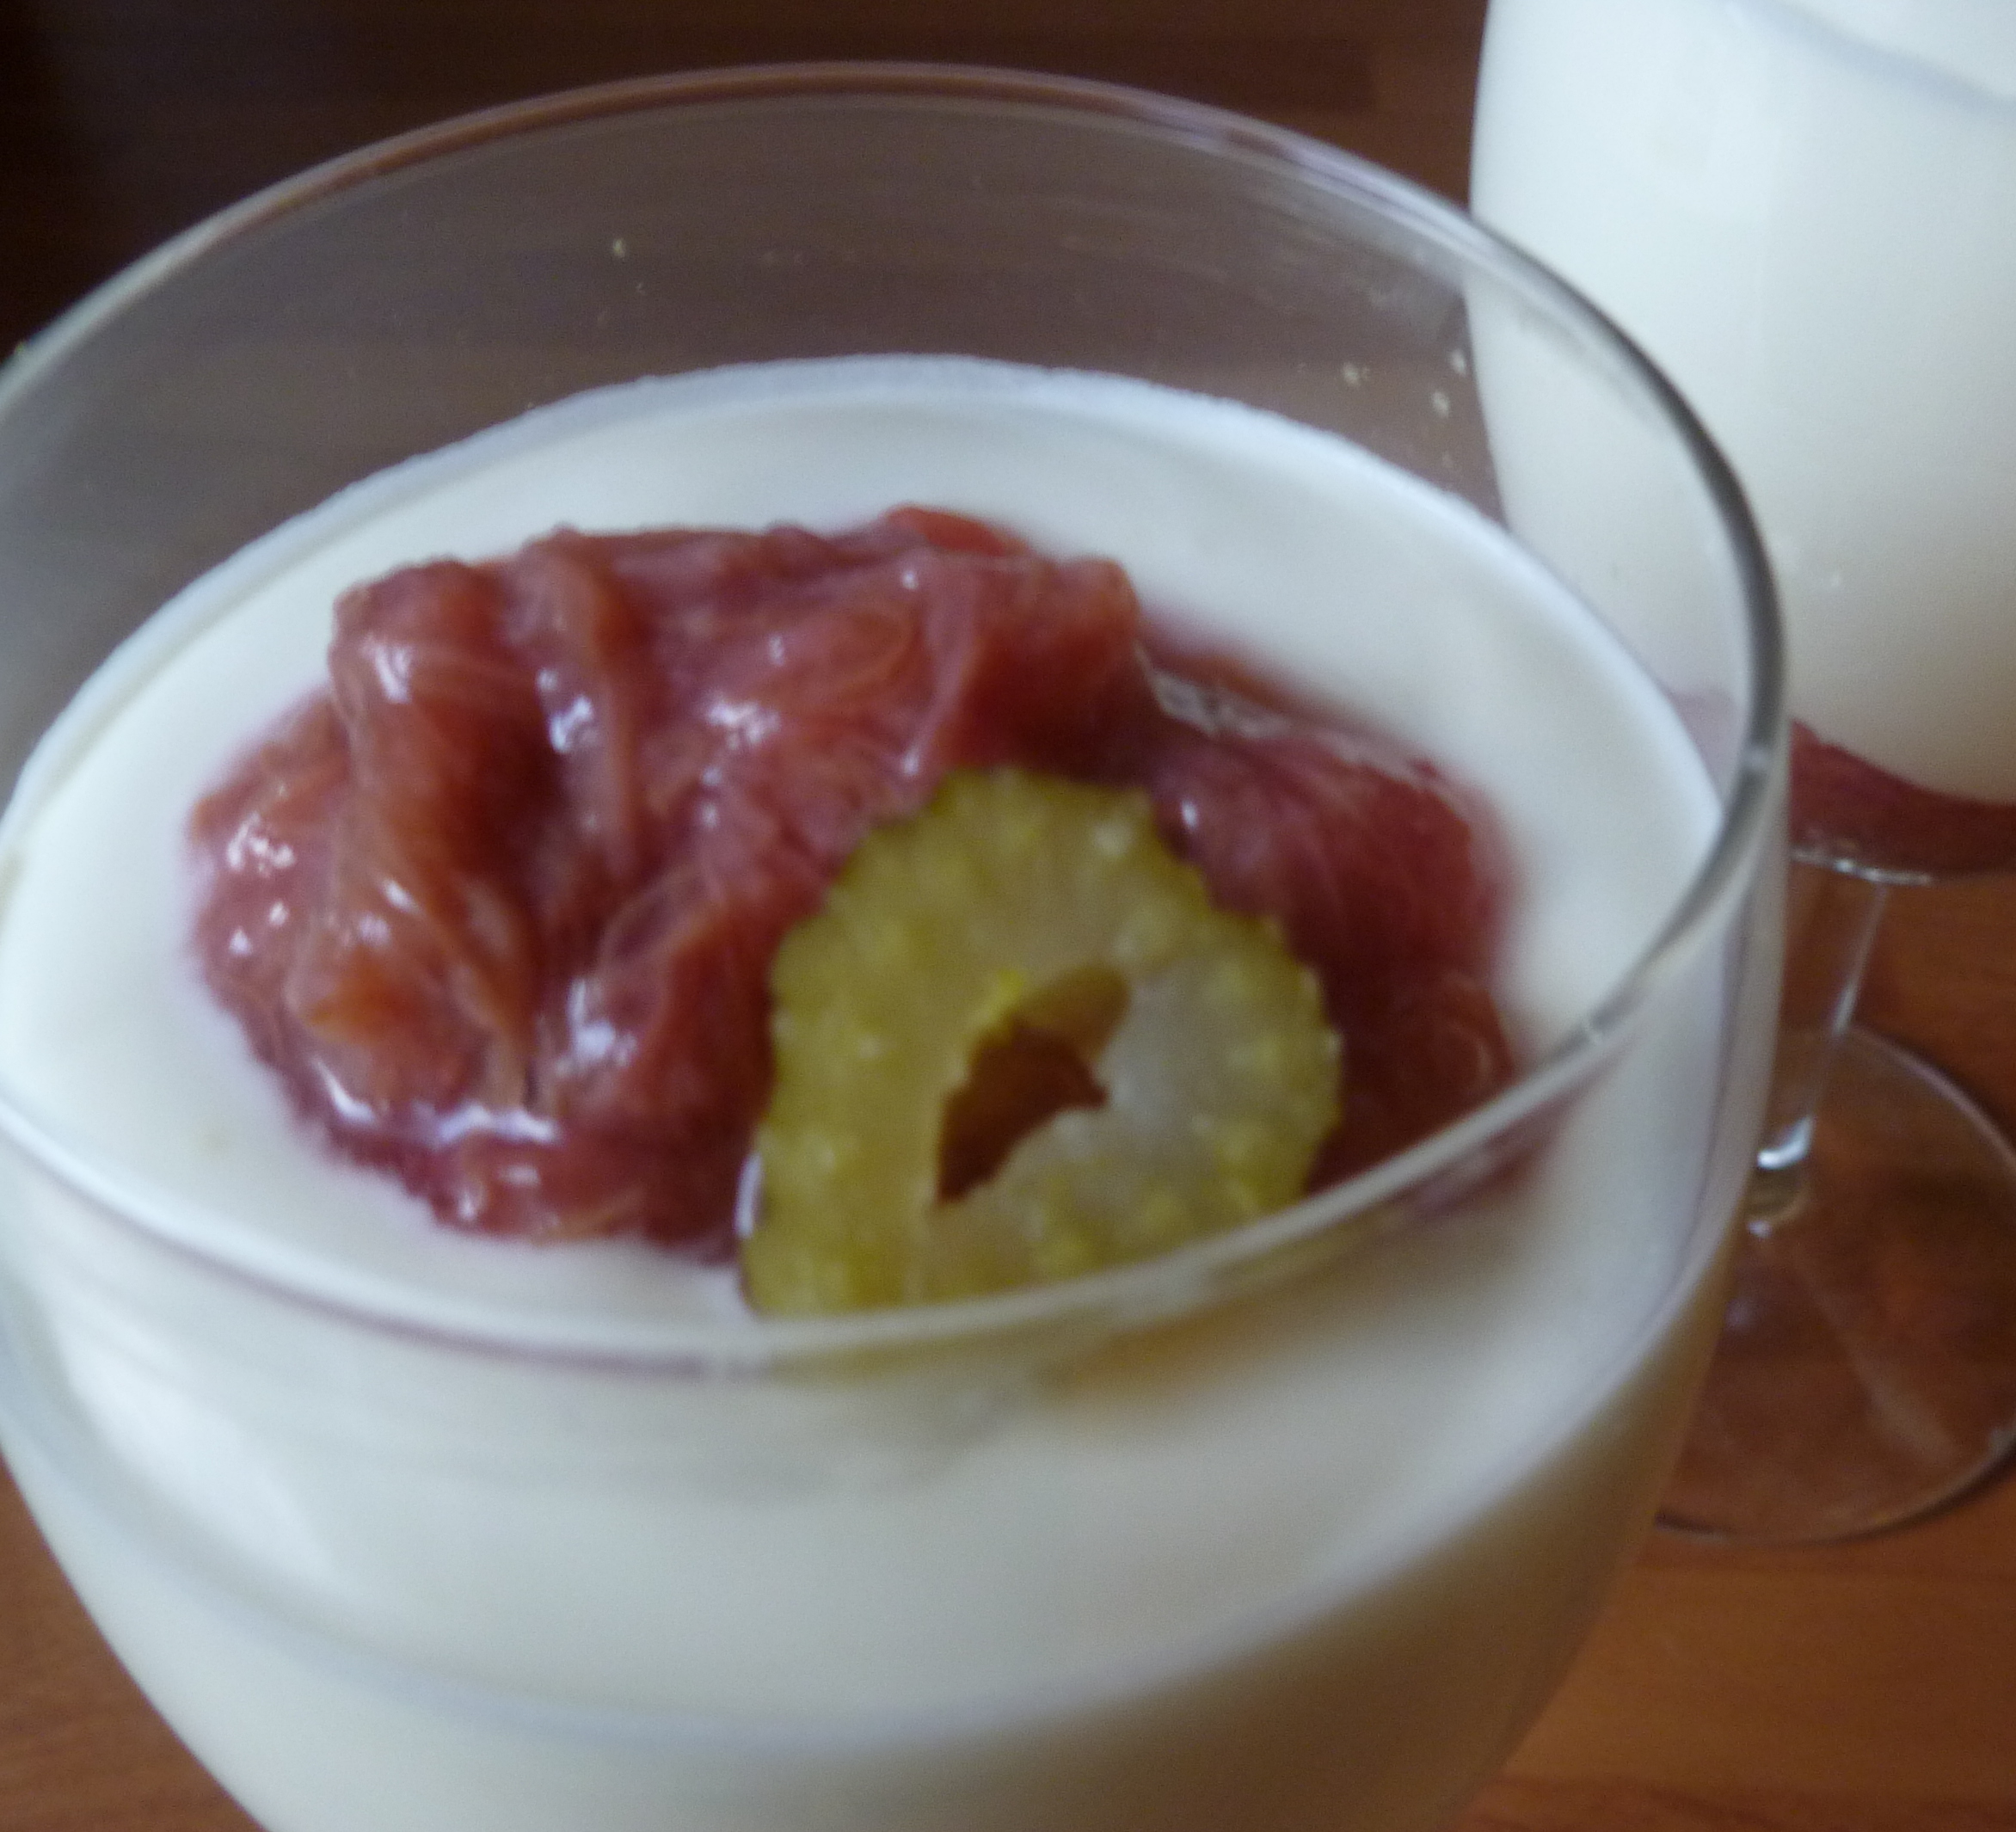
Rhubarb is most frequently eaten as dessert, and I am certainly partial to desserts and cakes with it in. People forget that it is actually a vegetable. It is seldom seen in savoury dishes, although I do know that a few bloggers have been experimenting with salads and as savoury compotes lately, so maybe there is a resurgence of rhubarb as a side dish in the offing. Who knows?

I certainly have a few more ideas that I want to try before my plant goes over this year, or I rest it in preparation for winter. Of course, once I am happy with each of the dishes, I will be sharing them here with you.

The version that I ate at Mr Kitchen had a mild olive oil, finely diced rhubarb and kalamata olives, with the stones pushed out, and the flesh torn into chunks. It was rustic and very simple. And it was delicious with the fish and the greens.

I spent quite a while messing about with various things, including shallots, herbs, black pepper, chillies, and so on. I have come to the conclusion that simple really is best. Shallots and rhubarb are both very astringent, so makes for a very sharp dressing, although that might be because I also acidulated the shallots in lemon juice first to take the rawness out of them. This combination as really an ingredient too far for me, so I ditched the shallots in favour of paring everything down

Raw rhubarb is crunchy and subtle. If you decide to follow my lead and make up a vinaigrette yourself, make sure whatever you use does not over power it. I stuck with very simple flavours for this vinaigrette – in fact it is a classic French dressing, with the addition of rhubarb. It works quite well with a pinch of chilli flakes, and with tarragon or chervil, instead of the mustard. I personally think that it is better with the more grassy olive oils, not the really punchy ones, but you may disagree.

Simple and in Season Blog Badge


Since there is nothing simpler than a vinaigrette, and rhubarb is at the peak of the season, I thought that I’d be a bot cheeky and have two entries to this month’s Simple and in Season, hosted by Ren Behan.

I do recommend that you give a rhubarb dressing a go. This one was lovely with salad and great with fish (I served it with tilapia fillet). I bet it would also be perfect with pork or chicken too.

What classic dressings do you know that might benefit from a little rhubarb?

Recipe: Rhubarb Vinaigrette

Ingredients

About 1/2 stalk very finely diced raw rhubarb

2-3 tbsp Grassy extra virgin olive oil

1 tsp Dijon mustard

Zest of half a lemon, pared

Lemon juice to taste

Method

Once the rhubarb is prepared, Whisk together the mustard, zest and olive oil.

I used lemon with this dressing, because I wanted it to go with fish. You could also team the dressing with orange. Grapefruit works as well, although you will need much less than half the grapefruit zest. Which one you choose is entirely up to you, and you can change it to match your dish.

Add the rhubarb, and season. You will need to taste it at this stage. I found that adding a little lemon juice really lifted this into a great dressing, but the amount that you will need will depend on which citrus you are using, and how sharp your rhubarb is; which will vary with age, size and how long ago it was harvested.

Serve immediately if you can, on fish, a salad, or anything you like really. It does keep for a couple of days in the fridge, but it is better fresh, because the rhubarb will lose its crunch. So simple, there’s no excuse not to give this a go!

6 Comments

Filed under Farmed

First in, Best Dressed

Asparagus Salad, Chervil Dressing and Asparagus Mousse-Stuffed Chicken Ballotine

Made for Each Other

I may have already mentioned how inspired I was by the Rollende Keukens (only once or twice…). I ate so many good things there, that I am now experimenting with.

Nestled in amongst the stalls, was the Bar d’Asperge, which sold all manner of brilliant dishes with asparagus; from the Dutch classic – white asparagus with ham, egg and a bechamel sauce, to grilled green asparagus, pasta salad and all manner of other things. I was in search of something on the healthier side to counterbalance all the barbecued goodies that the Big Guy was queueing for. We were both also hungry, so I wanted something substantial, too.

Asparagus Salad with a Delicious sour cream & chervil dressing

A Healthy Option – Fresh Asparagus Salad

I came across this lovely salad, which contained potatoes, white and green asparagus, mushrooms, capers and cornichons. As the lady served it to me, she smothered it in a dressing, casually mentioning it was home-made. It was good – creamy, rich and spiked with chervil. Asparagus and chervil: if ever a herb were meant to go with a vegetable, it would have to be these two.

I tried many things at the Rollende Keukens, but to be honest, I don’t remember much else from the first day that I went there. This salad, and this sauce have consumed the rest of my memories. I knew I had to recreate it, and I knew that I would need to do a bit of research first. A lot of the sauces I looked at were stock based, and thickened with cream. This dressing certainly had sour cream, but was sharper and fresher than that.

I thought that you would need the thickness of a mayonnaise to give the sauce its consistency. I also knew that a shop-bought mayonnaise would make it too claggy. Then I remembered that it was perfectly possible to make mayonnaise yourself, and I could make it at the thickness that I felt appropriate. And so, a homemade mayonnaise with a neutral-tasting oil was my starting point, and it went really well from there.

This salad, and the sauce went perfectly with the chicken ballotines that I stuffed with asparagus mousse. I am not a fan of white asparagus, so I left it out. The original salad also had silverskin onions in. I am not a huge fan of these, either, as I prefer the sharp tang of a home-made pickled onion to the sweetness of these tiny alliums.

I hope that you have a go at this sauce, I know a lot of people are put off by making a mayonnaise, but with this amount of oil, there shouldn’t be a problem, as long as you add the oil in very small amounts, and whisk it well in between so that it all of the oil is incorporated into the emulsion before you add the next lot.

Herbs on Saturday Blog Badge

As this dish makes use of one of my favourite herbs, I’m entering it into Herbs on Saturday, by Karen at Lavender and Lovage, which is being hosted this month by Anneli at Delicieux. You probably won’t come across chervil in the supermarkets, so look out for it at markets and farm shops. Or, even better, get hold of some seeds; it is one of the easiest of all of the herbs to grow from seed, the flavour is more intense, it has beautiful white flowers that are also tasty and will seed itself quite happily – if you don’t eat all the flowers first.

Asparagus Salad and Chervil Dressing

This recipe serves 4 people

For the Dressing:

1 egg yolk

1 tsp Dijon mustard

Lemon juice to taste

100 ml sunflower oil

100 g sour cream

15 g chervil, finely chopped

salt

For the Salad:

The proportions that I mention here are approximate. You can also adjust or add to your taste, things such as silverskin onions, hard-boiled egg, different mushrooms (Morels would be great if you can find them), spring onions, and probably many other things.

250 g small salad potatoes

100 g chestnut mushrooms

400 g asparagus (white, green or both)

2 tbsp capers

50 g cornichons

Chervil leaves to garnish

First make the dressing. Start with an egg yolk in a mixing bowl. Add the Dijon mustard, a pinch of salt and a good squeeze of lemon juice, and whisk together well. I did this by hand, because the heat from a food processor or stick blender is enough to scramble one egg yolk. You need a little lemon juice, because the you are essentially making an emulsion, and the acid helps to stabilise it, and stop it splitting. Don’t worry if you don’t think it is enough, you can add more later.

Then slowly add the oil, a little at a time. Make sure that it is well incorporated into the egg before you add more. Keep doing this until the oil is finished, or you think that you have a fairly thick mayonnaise. The exact amount that you’ll need will depend on the size and the age of the yolk.

Once you have a thick mayonnaise, whisk in the sour cream. Stir in the chervil. Season with salt, and taste to see if it is sharp enough for your tastes. If it isn’t, squeeze some more lemon juice into the mix. Set aside to allow the flavour to develop.

Boil the potatoes until they are just tender. Drain and set aside to cool.

Cut the mushrooms into quarters, grind over some black pepper and salt, and fry in a little oil or butter until the mushrooms have given up their moisture.

Break off the woody ends from the asparagus, and cut into 5 cm chunks. Blanche in boiling water for no more than 3 minutes, you want the asparagus to retain some bite. Refresh in iced water, or by running the pieces under a cold tap. Drain, and add to a salad bowl.

Cut the potatoes in half. I did mine on the diagonal for interestingly shaped salad. Add to the salad bowl, along with the mushrooms, capers and asparagus. If the cornichons are really tiny, add them whole. If they are slightly larger cut them in half lengthways, or into large chunks. Stir well.

Serve garnished with chervil leaves and with a generous helping of the dressing.

5 Comments

Filed under Feast

Young and Foolish

Fennel Rhubarb Foolish

Going Foolish Over Spiced Rhubarb

Today’s inspiration has come from two places. During the rhubarb tasting menu at Mister Kitchen at the Rollende Keukens, I had a bit of a revelation. As part of the main, they had roasted a few chunks of rhubarb and served them with pork, and a slice of their very good sausage. The sausage had fennel seed in it, and I tried this with a bit of the rhubarb, and the combination is incredible.

I came back from the tasting with a head full of experiments with rhubarb, both sweet and savoury, and if they work, you’ll see some of them on edible things soon.

But, I knew I needed to do something with the fennel and rhubarb as soon as possible. I am still playing with this, but one of the first things that I did was to stew some up with a few fennel seeds. This really is amazing. And surprisingly, the fennel seems to sweeten the rhubarb, so you need a lot less sugar. I had this with some plain yoghurt for breakfast.

swallow-recipes-for-life

Then, I saw this Month’s Recipe for Life, held by Vanesther over at Bangers and Mash. This is in aid of Swallows, a charity that supports adults with learning difficulties. Vanesther is much more eloquent than I could be on the subject, so please do check out her site to read more about it.

This month, she has chosen rhubarb, spice and lemon as the three key ingredients this month, and I knew this was the challenge for me. It will be good to share the brilliant combination of rhubarb and fennel as, really, more people should know about this.

I deliberated for a few days as to how I could best bring some lemon into the mix. Then I got invited round to a friend’s with some other fabulous ladies, and it prompted me to come up with the dish I am entering. The dish needed to be simple, mobile (because I was going to take it round to my friend’s) and most of all the lemon needed to balance with the subtle fennel.

The obvious choice would have been a classic rhubarb fool. Fools are pretty nice, but there is also something to be said for a syllabub, which is essentially cream and alcohol, and what’s not to like about that? Some kind souls had left a bottle of Pernod, and one of Limoncello following a party sometime, and then I had the basis for a few experiments in syllabub. Turns out that both of these are pretty good, but the Limoncello just about had the edge.

Whilst thinking about this, I decided to try to add some texture with some candied fennel, which I’ve also been thinking of having a go at for a while. It really does add interest and an additional subtle fennel taste, but it would also work without it. And now you know what the suspense was all about from my last post.

So, here is the recipe for my Fennel Rhubarb Foolish. Not quite a fool, and not quite a syllabub, and there’s not a lot that’s foolish about that.

Fennel Rhubarb Foolish

Not Fool, Not Foolish

Recipe: Fennel Rhubarb Foolish 

This recipe is enough for 5 people if you serve it from a wine glass

Ingredients

300 g rhubarb, chopped into chunks

1/2 tsp fennel seed

Juice of half a lemon

splash water

2 tbsp sugar

250 ml cream

50 g sugar

250 ml greek yoghurt

25 ml Limoncello

Grated zest of 1 lemon

Juice of half a lemon

Candied Fennel

Method

Firstly, lightly stew the rhubarb with the fennel seed, lemon juice, and sugar. Add a splash of water, to prevent the rhubarb from burning as you apply the heat, but be aware that it will give off liquid itself, so don’t add too much, you don’t want it swimming. As I said, the fennel takes the sharpness off the fruit, so don’t add too much sugar, you can always add more towards the end of the cooking process if you need to. Cover the pan, and stew it on a low heat until the fruit just starts to break down. Taste for sweetness and fennel, and add more sugar or fennel seeds (not a lot) if necessary.

If there is a lot of liquid, strain it off. Don’t throw it away, it is great to macerate strawberries and raspberries in, or to use instead of a simple syrup in some cocktails.

Set the stewed rhubarb aside to cool. Meanwhile, whip up the cream, sugar and lemon zest until the cream forms soft peaks. Add in the yoghurt, and fold it through. A classic syllabub is usually just cream and wine, but I wanted this to be slightly more substantial, hence the yoghurt.

Once the cream and yoghurt is well combined, add the lemon juice and the limoncello. Taste to make sure it tastes lemony enough for you, but not so lemony that your face puckers like a disapproving octogenarian. Add more lemon juice or limoncello to taste.

Finally, layer up in wine glasses, with rhubarb, candied fennel, the syllabub, a dollop more rhubarb and the candied fennel stalk to finish. Then bore your friends while you take photos and they wait hungrily for a lovely tagine (that was made by my friend, not me at our dinner party).

7 Comments

Filed under Feast

I Want (Fennel) Candy

Candied Fennel

Sweet and Fresh

Having been inspired to start blogging again, I have been making the most of recent inspiration for the next few Feast posts. The cooking and recipes, as always, are my own, but credit for the dishes are definitely due elsewhere. I take a magpie approach to food, often finding shiny little pieces here and there. Maybe one day I’ll enter the 21st century and get myself a smart phone, but for now, I forage for ideas, as well as edibles, and record them all in a series of notebooks, which I have to go digging through in order to remember the inspirations. Does anyone else do this? Please tell me that I am not the only one scribbling things down furtively in restaurants, shops and even the street. For me, it is like foraging and farming in note form, and as much of an obsession as they are for me in real life.

I’m sure we are all familiar with candied peel, and even crystalised angelica, if you are fond of cake decoration. These days , it seems that candied vegetables of all nature are appearing on both sweet and savoury dishes in restaurants and pop ups up and down the country. One of the first, and the one that instantly caught my magpie eye was candied fennel. I have also seen candied celery and beets (especially chioggia beets) among other things on menus, although I find the idea of them much less appealing.

Fennel is one of my favourite vegetables, and I love it in risotto, soup, and salad, braised, roasted and raw. This is a great way to use the tougher outer leaves and stalky bits if you are not keeping them for stock, too.

This version is really simple, despite my fears that it may require multiple exposures to sugar syrups of varying strengths, it isn’t the case. I kept mine plain, but they are also good served as sweets, and sprinkled with sugar.

Today’s recipe was inspired by Simon Rogan, who is a far better forager and cook than I could ever hope to be. I can’t remember where I first heard about it, but I suspect it was on a cookery programme, because  I have written down “candied fennel, Rogan. V. interesting, possibly for strawberry tarts? Experiment”. I finally got round to making this, as part of an even wider experiment, that does not involve strawberries or tarts of any kind, but you’ll have to wait until my next Feast post to find out more about what I wanted them for. This cliffhanger is not quite of Eastenders Duff Duff proportions, but hopefully, you’ll want to keep reading.

Recipe: Candied fennel

Ingredients

50 g sugar

50 ml water

1 tbsp lemon juice

Half a fennel bulb diced

Method

Make a simple sugar with the water, sugar and lemon juice. Heat gently until the sugar has dissolved.

Add the fennel. Bring to the boil then reduce to a simmer until the fennel is translucent, but retains some texture. It took me about 15 minutes, but it depends on the size of the dice,  and how much bite you want them to have.

Remove from the heat, and strain off the cooking syrup. Don’t discard this, it is perfectly good for other uses, and you know it’s a shame to waste such a tasty sauce.

Put some greaseproof paper, wax side up on a baking tray, and spread the fennel dice out into a single layer. Allow to cool on the tray, then store in an airtight container before use.

Enjoy them on their own, with sugar or as part of something delicious.

2 Comments

Filed under Feast

A Fruity Little Snifter

Japanese quince brandy

There’s Brandy in the Jar – Oh!

As you will probably have gathered if you have read more than this post, I do like to get the maximum use from my produce, especially if I have grown or gathered it myself. In this, the last of my Japanese quince posts, I am getting even more out of my harvest. I’m also starting right in on my resolutions, by blogging about booze. And I assure you, this one couldn’t be easier.

I have read a lot about quince liqueurs with vodka and honey. I have also read a fair bit about quince brandy, which sounded a lot better to me. Especially after I was given a copy of Salt, Sugar, Smoke by Diana Henry for Christmas, and she gives some really tempting takes on Kir Royale using quince brandy and either French cider or English sparkling white wine. I am also thinking of taking the best of both ideas and making something with the brandy and this very special cider from Sussex, Gospel Green Champagne Method Cider (look out for them, they are from West Sussex, but don’t have a website. This is truly remarkable “bubbly” style cider) if I can get hold of some.

Fruit brandies of this kind, and those distilled from scratch used to be pretty popular. You may know them as eau de vie, rakia, or brandywine, and they are still popular across Europe, but especially in the Eastern countries – Bulgaria, Serbia, Macedonia, and as far down as Turkey.

Of course, these are meant for quince or Cydonia oblonga, but I see no reason why they shouldn’t translate into Japanese quinces too. I selected some of the nicest fruit, and set them aside.

Then the next dilemma was whether or not to go with sugar.  For advice on this, I turned to Twitter. Luckily for me, preserving queen, Vivien Lloyd and beekeeper extroadinaire, Zoë Lynch were listening, and they both said sugar was wise, so sugar it was. Thank you both, if you are reading, although I didn’t go with that much, because I figured that I can always add sugar, but I can’t take it away if the brandy is too sweet.

The brandy needs to steep  for anything up to a year, so I haven’t tried this yet, but when I do, I’ll let you know how it goes.

Recipe: Japanese Quince Brandy

Ingredients

5-6 Japanese Quince

50 g muscuvado sugar

2 star anise

Brandy

Sterilised jar wide enough to get the fruit into

Method

Slice the quince, but leave the seeds in. Layer the quince into the jar, and sprinkle the sugar and the star anise between the layers.

Top the jar up with brandy. The fruit will be fine in here, as long as the jar is full, and the fruit doesn’t get exposed to air. I used a 700 ml jar, so needed a fair bit of brandy.

Leave it in a cool, dark place for up to 12 months, taking it out to shake it when you remember.

Strain off the brandy, and pour into a sterilised bottle, where it will keep until you have tracked down some of that excellent cider. Top up with more brandy, if necessary.

Oh, and I’m also thinking that there will be a good use for the fruit, possibly added to apples. I’m sure I’ll think of something tasty to do with them.

6 Comments

Filed under Fermented

Jam and Japonica

Japanese Quince and Tarragon Jelly

A Persian Twist

Most Fridays, I go foraging with a small group of great people. You may remember that I met one of them back when I did the seed workshop. One of them, Jennie is a herbalist, and we are learning a lot about the medicinal and culinary uses of wild plants from each other, and we all share good spots to find useful ‘weeds’.

On the last forage of last year, we hit gold, despite the cold. We found a huge stash of Japanese quince, or Chaelenomeles Japonica fruit. The Japonica is usually grown for its beautiful flowers, as many people have no idea that the fruits are so delicious, or so beautifully scented.  At this time of the year, the fruit are pretty obvious, although I used to assume that they were ordinary bushes that some kindly person had studded with apples for the benefit of the birds in winter.

Japanese Quince on the bush

Hedge Decoration

Of course, this is a valuable winter fruit for the birds too, so if you do come across some yourself, then make sure you don’t take them all, as the birds will appreciate them, especially after they have bletted well. In fact, you will also think that they are better for a good bletting. Like their rosaceous namesakes, they are not at all good when you eat them raw, but they are delicious when cooked in pies, baked or as preserves, and they are really high in pectin, so great for this purpose.

Japanese quince , halved

Seedy!

The Japanese quince is thin skinned, and has a lot of small seeds. I removed all of the seeds, and put half in a muslin bag for two types of jam, for the pectin. The other half I kept, and some of these may well find itself wending its way around in the next round of Seedy Penpals, which will be coming up shortly.

The fruits are also beautifully scented, and they have been brought into homes to simply sit in a room and lend it a lovely, delicate fragrance. As I cycled around, my foraged fruit was filling my nostrils, and my living room smelled lovely for a few days before I was off to spend Christmas at my parents, when they were unceremoniously stuffed into a bag, so we could make things with them.

Both quinces and Japanese quinces are used extensively in Persian and Moroccan cookery, and although I knew I was going to make jelly and jam, I wanted this to influence what I paired with them. Inspired by this recipe, I decided that I was going to make a quince jelly with tarragon, and then I could use the fruit pulp to make a different jam. I always try to use up the pulp from making jelly, and quinces make it really easy, due to the pectin.

I’m pretty pleased with this jelly; it is tasty and unusual on toast or yoghurt in the morning, as well as being good with meat. This year, Christmas dinner was a gammon, which was prepared in the same way as this baked ham. I added a tablespoonful of this jelly to the gravy, which made it rich and unusual, bringing a slight taste of the Middle East to a Western meal.

Recipe: Quince and Tarragon Jelly

Ingredients

3 jam jars

750 g Japanese quince

Water to cover

3 large stalks of tarragon, plus another 3 sprigs for chopping

Caster Sugar (400 g per 600 ml juice)

Wax discs

Method

Sterilise your jam jars and lids, by running them through a cycle in the dishwasher, cleaning them in hot soapy water and placing them in a low oven, or by steaming them in a pressure cooker.

Quarter the quince, and remove the seeds. Take about half of the seeds and wrap them in muslin for cooking with. Place the fruit and seeds in a large pan, and cover with water. Bring the fruit to a boil, then simmer them until the fruit is tender, and the perfume fills your kitchen. This will be between 40 minutes to an hour and a half, depending on how well bletted they were when you started.

Drain off the water through a piece of muslin, but keep the cooking liquid, as this will form your jelly. Set aside the fruit pulp, because this will be the basis of your jam. Measure out the liquid, as this will determine how much sugar you will need. For making jelly, you take 400 g sugar for every 600 ml juice. My fruits yielded 1.3 l, so I used 860 g sugar.

In a large, clean pan, add the liquid, sugar, tarragon stalks and the rinsed off muslin with the seeds in it. Heat gently, stirring while the sugar dissolves. Once the sugar has dissolved completely, bring the jelly up to a rolling boil. Don’t stir it after this. It needs to reach 104.5°C to set. You can measure this with a jam thermometer, or you can do the fridge test. I often do both.

Meanwhile, chop the rest of the tarragon finely, and set aside for later. Once the jam has reached setting point, take it off the heat; remove the muslin with the seeds, and the tarragon stalks. Don’t throw the seeds away, they are useful for more jam making later. Add the chopped tarragon, and leave the jam to cool for 10-15 minutes, so that the tarragon will be more evenly distributed through the jam in the jar.

Meanwhile sterilise any jugs, ladles and jam funnels that you will need to transfer the jelly into the jam jars, by covering them with boiling water. You’ll need to dry them off before use.

Pour the jelly into the sterilised jars, making sure that the jam is within a couple of mm from the top of the jar. Put the wax discs on the top, wax side down. Put the lids on and tighten them well while the jam is still hot.

12 Comments

Filed under Found

Acceptable Ways With Sprouts

A Stalk of Sprouts

From Bleurgh to Bogies

“What’s the difference between Brussels sprouts and bogies?”, goes the old joke, (You can’t get kids to eat Brussels sprouts!), and for many years these particular little green balls have divided households, especially during the festive season.

In my house, tradition called for sprouts on the plate, even if the kids left them there. Every other year it was the subject of a running battle between  my grandmother and me. As a small child, I would absolutely refuse to eat them; boiled, as they were back then, with the mystifying cross cut in the base. A bit like I do now, my Gran abhorred food waste, and loathed the fact that the sprouts would sit, untouched, on my plate. Unlike me, Gran did not do creative things with leftovers. She would threaten to give me those emerald cannon balls for the next meal, and the next, thinking that I would capitulate at some point and eat them. I was made of much stubboner stuff, and we would grumble and mutter at each other, while the sprouts festered somewhere (usually in the dog).

Nowadays, boiling sprouts is no longer compulsory. I am still not going to plant these in favour of kale, cavalo nero, or purple sprouting broccoli; but if I am presented with a stalk, I will no longer stamp my feet and dig in my heels in a resolve not to get them down my gullet more steadfast than that shown by Gandalf when he faced down the Balrog.

Instead, I have learned that sprouts are better if they see minimal water during the cooking process, and that they should definitely never be allowed to boil in water for any length of time. Indeed, unless you are making a soup of leftovers (of which more later), it is probably best to keep them out of water altogether, after they’ve been washed.

Sprouts are actually delicious, delicate and tender when eaten raw, so they make lovely salads and coleslaws. I think I got this from Nigel Slater, but pomegranate and sprouts are a lovely match in a salad. The sprout tops are also great for this, as they are tender and not as powerful as their smaller, tighter offspring down the stalk.

Cooking them in fat – bacon fat or duck fat is always a winner. I have done a sort of confit with halved sprouts cooked slowly in duck fat, and plenty of  thyme, which is pretty good, but not for those looking after their cholesterol.

I also like covering halved sprouts with a cartouche and letting them steam in a cm or so of stock in the bottom of a pan, until the liquid is absorbed. Again, meat stock is better, I often use chicken or ham stock, but vegetable stock is also good for this, if you are a vegetarian. This will take about 5-10 minutes on a medium heat, providing the stock is at simmering point when you add it to the sprouts.

The recipe that I’m about to share is an obvious combination, but  it works so well. And you can make a great soup with the leftovers (which I’ll be sharing here soon).

I hope that you have a go with some of these ways to eat Brussels Sprouts. I hope that together we can banish emerald green christmas bombs forever and move towards many more acceptable ways. The only question is, how do you eat yours?

Stir Fried Sprouts

More Than Acceptable

Recipe: Stir Fried Sprouts

Ingredients

10 sweet chestnuts

100 g streaky bacon cut into lardons

400 g Brussels sprouts

A splash of water

Method

If you are using fresh chestnuts, then you will need to peel them, and take off the hairy coating. This is the best method that I have found for peeling them. Once they are peeled, chop them roughly.

In a large frying pan, gently fry the bacon on a low heat, to render off some of the fat, and until the lardons are crispy. Remove to a piece of kitchen towel. Unless your bacon has given off more fat than a duck might, try to retain as much of the fat as you can.

Meanwhile, halve the sprouts, then shred them thinly.

Fry off the chopped chestnuts, until they start to brown. Add the shredded sprouts, and stir until the green brightens a little. Do not let them catch, burnt cabbage is not pleasant. Add a splash of water, and allow it to steam off.

Return the bacon to the pan, and mix well. Serve immediately with a big roast. This year we had a gammon. Don’t worry about the leftovers; soup is always a post Christmas winner.

2 Comments

Filed under Feast

Of Seeds, Stories,Swapping, and Soup

Zaad Ruilen

On Your Marks, Get Set, Swap

(c) A. Doherty 2012

Well, what a week it’s been. I have been busy with a lot of networking, about which I hope to be able to bring you more later. Today, I am on my way to the Food Guerrilla event in Rotterdam, which I

The week started (or last week ended, depending on your viewpoint) with the Seedy Penpals, Cityplot and Mediamatic Zaadruilen (Seed exchange) on Sunday. The day started out bright and crisp, a great day for a seed swap. We headed over to the Mediamatic Fabriek with bags full of seeds, and the hope that there would be enough variety to share.

Unfortunately for us, the heavens opened just before 2.00, when the swap was due to start. Although I was inside, and couldn’t see out, I knew from the sound that it was raining cats, dogs, and probably a few farm animals as well. I am sure that this put many people off, as the mediamatic events are usually very well attended. Nevertheless, quite a few intrepid people did make it, and brought a lot of seed to boot. It was great to make connections wit more people who want to grow and share seed, and to find out about all the initiatives that there are in town, or that people want to get off the ground.

ASEED were also there. They brought seeds, and they also gave a workshop on seed saving, and the importance of maintaining plant varieties that are being lost as we see more and more of our plants (particularly food) being grown from fewer varieties that are bred to look good or last well on our supermarket shelves, or be resistant to pesticides etc.

This issue is becoming increasingly more important as we see more and more laws passed globally that try to restrict the distribution of seeds, and concentrate it in the hands of a few companies, instead of using traditional methods of saving a portion of the harvest to grow the following year. This weekend in Vienna,  a group of NGOs are getting together to discuss proposed legislation in the EU that would become even more restrictive on the sharing and saving of seeds, and the issue of owning “intellectual property” of seed varieties and genetic strains. I think that it is important to push back about this, for many reasons, and look forward to being able to do a small part in the push to amend this legislation, and make it possible to continue to grow, save and share my own seed.

People came with their own seeds, some that they had bought, but many that they had saved themselves. I took a lot of seeds, but my favourite was the runner beans that I have grown from seeds that my Dad gave me. I love to share that story, and many people were interested, and took some for themselves. I also learned a few of the stories that other people told along with their seeds too.

Making the Rangoli

Seeds of Something Beautiful

As we were doing the event along with Mediamatic, we also included an artistic element. We made a beautiful rangoli from pulses. A rangoli are colourful Indian artworks usually made from seeds, coloured flour, rice or sand traditionally made by Hindu women to use as decorations at festivals. I also learned that the form has been used to plot out a farm and the rotation system, so that you had a visual representation of what should be planted where, that is easy to follow, even if you may not read. I think that is a lovely idea.

Rangoli made with pulses

Edible Art

Since they were edibles, we thought that we would share them with the people who came to swap seeds, so we made a Souper Seed Mix. We gave packages with beans or lentils, that we used in the rangoli, plus a spice mix. Obviously, there was no way that I was going to waste all that good seed. I figured that people could then choose to plant them, or eat them.

I tested this recipie first, using home grown Harlequin potatoes, but you could use any firm-fleshed potato. It turned out that the potato was the only seed of all of the ingredients that I used that did not appear at the swap, but I expect that this was more due to the time of year.

So, here is my Rangoli Soup. A few people from the swap have already tried this, and the reports have been good so far. It seems it id good, with or without the art!

Rangoli Soup

Seeds to Form a Souper Mix

Recipe: Rangoli Soup

Ingredients:

100 g dried beans, split peas or lentils

1 tsp cumin seeds

1 tsp coriander seeds

½ tsp mustard seed

½ tsp nigella seed

1 tsp turmeric

1 tbsp tomato puree

Pinch chilli powder

1 clove garlic, grated

3cm piece root ginger, grated

1 tbsp vegetable oil

1 onion, chopped

2 bay leaves

2 sticks celery, diced

350 g potatoes, diced

2 carrots, sliced

250 g pumpkin, diced

300 ml vegetable stock

1 tin crushed tomatoes

Salt and pepper

Chopped parsley or coriander

Method:

Soak the beans in cold water overnight. If you have lentils or split peas, you skip the soaking stage. In fresh, cold water, bring the beans up to the boil and then simmer until tender. This may take between 40 minutes and an hour, depending on the type of bean. Once they are cooked, drain the water off, and set aside.

In a dry pan, toast the spice seed mix, until they brown, and the mustard seeds start to pop. Grind them to a powder.

Make a paste with the seed powder, turmeric, chilli powder, garlic, ginger and tomato purée.

Gently fry the onion,celery and bay leaves in the oil, until they are translucent.

Add the paste and cook for 2 minutes, stirring well so that the spices don’t burn.

Add the carrot, potato, pumpkin, the cooked beans,  stock and tomatoes, and cook until the vegetables are tender – about 10 minutes.

Add salt and pepper to taste.

Serve with some chopped coriander or parsley sprinkled over the top.

6 Comments

Filed under Farmed

Green Bean Chutney: A Taste of My Childhood

Runner Beans, Unknown var

From One Generation to the Next

Every year I grow runner beans in my garden. I don’t know what variety they are, they were originally given to me by my father from seed that he saved from his garden. I have never bought runner beans, and subsequent generations of dad’s seeds have grown successfully across four different gardens/climates and in two different countries.

We always had runner beans, fresh from the garden, throughout the summer and early autumn months. I used to take them for granted, since they always came, no matter what the weather or growing conditions that year.

After I moved out of home, I only really got runner beans if I was visiting my parents. Back then, I tended to shop in supermarkets, and runner beans were not a popular supermarket choice, maybe because it is hard to get them to be completely uniform, like the Stepford style apples and tomatoes that they prefer to sell.

When I first started to get a veg box, I got some runners, to my delight. Just like Mum used to, I settled in to string and slice them. I was jolted by a powerful memory of Mum doing this, often in front of Last of the Summer Wine on a Sunday evening.

When large amounts of beans were being prepared, I always got a bit excited, because I knew that the next day she would make Green Bean Chutney.

Just as my Dad always grew our vegetables, Mum always made a lot of our food from scratch. Chutneys, pickles and jams were no exception. In fact, I didn’t have factory produced jam until I left home; and frankly, I found it wanting.

I have always loved Green Bean Chutney. I used to have it every day at school, and all of the other kids would say stuff like “eurgh, that’s gross” and “Why do you always have that yellow stuff in your sandwiches?”. I would smile at them, safe in the knowledge that they didn’t know what they were missing, and if they didn’t want to try any, then Mum would be less tempted to give some away.

Jars of Green Bean Chutney

Sandwich Filler

Now I am older, I make Green Bean Chutney for myself. The Big Guy is a total convert as well.

As you may have seen, I am a bit of a preserving addict, so I am always giving them as gifts to friends and relatives. Despite the fact that we grow extra runner beans, so that we can make this chutney, the Big Guy still severely rations the Green Bean, in order to keep more for himself.

If I am honest, I am a little loathe to give it away, too!

So, I thought that I would share the recipe for Green Bean Chutney with you, in the hope that you can make it for yourselves, and I get to keep all of the jars that I make!

So, here is my Mum’s Green Bean Chutney. She gave it to me, but I am not really sure where she got it from originally. Maybe she can let you know, by leaving her first ever blog comment – over to you Mum?

You can  also use French Beans in this recipe, or a mixture of both French and Runners. Next year, thanks to my Seedy Penpal, Charlotte, I am going to grow a few yard long beans too, so I shall be experimenting with those as well.

My bean harvest was a little late getting going this year, but hopefully you will still be able to find some beans to try it yourself.

Do  you have any food that evokes such strong childhood memories? I’d love to hear about them.

Green Bean Chutney, Cheese and Crackers

Super Match

Recipe: Green Bean Chutney

Ingredients

I have converted this recipe from imperial to metric

3-4 jam jars

700 g runner beans (or French or other green beans, or a mixture)

1 kg  onions

Cold water to cover

1 dstsp salt

350 g demerara sugar

600 ml malt vinegar (I can;t get malt vinegar over here, so I use 500 ml white wine vinegar and 100 ml balsamic)

1 dstsp turmeric

1 dstsp powdered English mustard

1 tbsp cornflour

Method

Sterilise the jam jars in a dishwasher, or wash them in hot water, dry them and leave them in a low oven while you make the chutney. Either way, they will need to be hot when you put the chutney in it.

String and slice the beans (or use a stringless variety), making sure that they are roughly the same size – this is especially important if you use a mix of bean varieties.

Peel and thinly slice the onions. Add them to a preserving pan (or a heavy-bottomed stainless steel pan) with the beans, cover them in water, and add the salt. Cook for about 10 minutes, or until tender.

Strain the water, and return the vegetables to the pan. Add half of the vinegar and the sugar. Cook for a further 10 minutes.

Mix together the cornflour, spices and the rest of the vinegar, and mix to make sure there are no lumps. Pour this into the pan, with the vegetables.

Bring the chutney back up to the boil, and hold it there for a few minutes, until the mixture thickens. You need some liquid though, because this will stop it drying out in the jars.

Fill the hot jars with the chutney. Then distribute the liquid between the jars, so that they are full to about 3 mm from the top.

Put a wax disc, wax side down, over the chutney, and seal it with cellophane. Don’t use a lid, the vinegar will corrode the metal, and may leave you exposed to some nasty microbial activity.

Don’t discard any excess liquid, it is great in salad dressings.

You need to leave the chutney for a week to allow it to meld and mellow.

This is a brilliant accompaniment to cheese, cold meats, salads, and is a particular marvel with jacket potatoes, and bubble and squeak.

UPDATE: In a very timely way, I found out that Susan at A Little Bit of Heaven on A Plate is running a Home Made and Well Preserved competition. So I thought that I would share my lovely childhood chutney there too, and maybe win some spices (fingers crossed).

37 Comments

Filed under Farmed

I Don’t Know Who Jansson Was, But This Sure Is Tempting

Jansson's Frestelse

Jansson’s Frestelse

The weather is changeable again, and is blowing hot and cold. You can expect to see a much more eclectic mix on the blog of salads and more autumnal fare, while we wait for the season to make its mind up.

It has also shown me that the lighting in my living room lends my photographs an odd yellow tinge, now that it is getting darker earlier. Until I can be organised enough to make all my food in the day, I am going to have to try not to take photos in here.

Yesterday was a cooler day, and thoughts turned to comfort food for other reasons too. I have been thinking pretty hard about potatoes and cream. This means one thing, a traditional Swedish dish, called Jansson’s Frestelse, or Jansson’s Temptation. This is a lovely gratin of potato and cream, with the surprising, but brilliant addition of a little anchovy.

Swedes actually call a sweet preserved sprat ‘ansjovis’, so the Temptation will be slightly different. I haven’t found them outside of Sweden, so I use ordinary common or garden anchovy, preserved in oil.  And actually, the salty little things add a really unctuous quality, I think they are worth it.

You can make the gratin vegetarian by omitting the anchovy, but only do this for the vegetarians in your life. If you are one of these people who insist thy don’t like anchovy, and will remove them from pizza, I promise you will not notice them, as they will melt into the dish, but they add so much in the way of flavour.

I road tested this once, at one of the International dinners. I made two versions of the dish, one with anchovies and one without. The one with went quickly; we were eating the one without for the next few days.

I served it with some garden beans, and a lamb chop that had been rubbed with  Ras el Hanout, and pan fried to medium rare. It was an amazing meal, for little effort.

This is a very simple dish, and so good in colder weather. It is also an amazing alternative to mash. Give it a try.

Recipe: Jansson’s Frestelse (Temptation)

Ingredients

800 g waxy potatoes

1 onion

150 ml cream

150 ml milk

8-10 anchovy fillets

1/2 tbsp anchovy oil

Salt and pepper

Some breadcrumbs for scattering (optional)

Method

Preheat the oven to 180°C.

Cut the potato into thin matchsticks. It is easiest to use a mandoline, or you can get an attachment for some food processors. If you have neither, cut the matchsticks with a knife. This will give a larger surface area, and produce brilliant crunchy and soft textures, which improves the dish, so do take the time, even though it is a pain. This should be the spur for you to buy a mandoline. They aren’t all that expensive, and this is the second recipe in a week in which I’ve used one. As long as you keep your fingers clear, they are great, and this is coming from the woman who hates gadgets!

Slice the onion into thin half moons, and chop up the anchovy fillets.

Butter an oven proof dish, or roasting tin. Then you need to layer the dish. Start with a thin layer of onion, and season with salt and pepper. Next add a thick layer of potato, then a little anchovy. Continue to layer up in this order, but make sure that you finish with a layer of potato. Give it one last season with some salt and pepper.

Mix the cream, milk and anchovy oil in a jug. Pour half over the potato in the baking dish, and sprinkle over the breadcrumbs, if you are using some. They should be scant, they don’t need to cover the dish.

Put it in the oven for half an hour, then add the rest of the cream and  oil. Cook for a further 15 minutes, until the top is crunchy, and the potatoes are cooked through.

This is great the first day, and amazing reheated for leftovers. If you have enough left to reheat, you might want to cover it with some foil as it heats up, so that the lovely crust doesn’t burn.

2 Comments

Filed under Feast