Tag Archives: No Oven Required

Goodness Gracious! Great Balls of Smoke?

Smoked Mozzarella

Holy Smokes!

Having made my own mozzarella, I got a little bolder with my cheese, and decided that I should smoke it. I was given a hot smoker for my birthday and I was going to use it. A quick scour of the internet later, and again mostly inspired by The Barefoot Kitchen Witch, I realised that all of the smoking is done in a cold smoker, which I don’t have. Not one to be put off by such things, I thought that I could rig something up with the hot smoker, to do just as well. So the Big Guy and I put our heads together and decided upon what I still think is a very good bodge job.

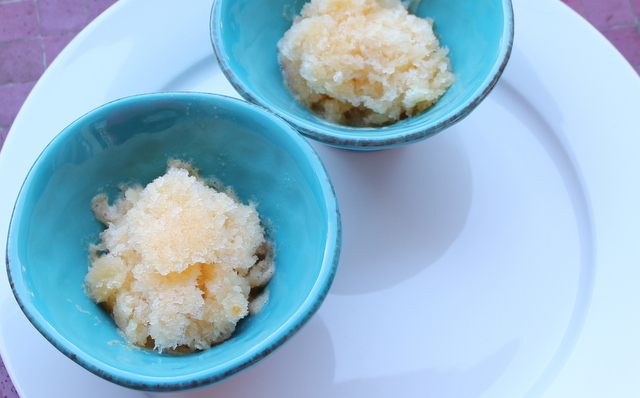
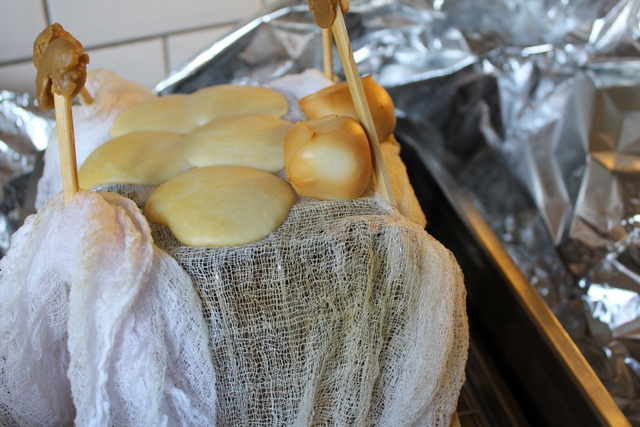
As you can see from the photo above, I didn’t quite manage it, but I am onto something, and think with a few more goes I could get it right. The lovely round balls on the right here are scamorza that I bought from the market to try to determine what wood they use for the smoke. I managed to make great discs of smoke, rather than the balls I’d hoped would be there.However, the smoke flavour was very good, and so I was happy enough with the result.

So, in case you are ever mad enough to try hot smoking cheese yourself, this is how I did it.

Improvising a cold smoker from a hot one

Smoking Rig

Firstly, I knew I had to elevate the cheese as far away from the flame as I could, while still being within the realm that I could feasibly wrap in foil, which I would need to seal in the smoke, because the lid would not allow me to elevate the cheese. I have a small shopping basket thing that I was given one Christmas. It’s supposed to be a kitchen or bathroom tidy, but was metal and grill shaped, so perfect for my needs. You could also use the racks you find in combi microwaves, or invent your own bodge job.

Alder and Oak chips for smoking mozzarella

Smoking Mix

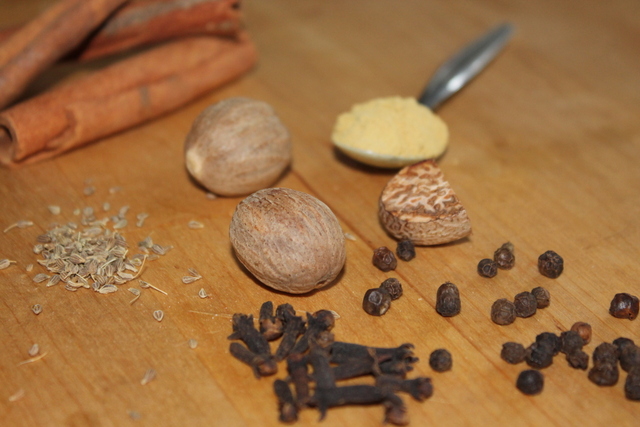
For the smoking mix, I thought that I’d chance my arm with a mix of alder and oak chips. I wanted all oak smoke, which is stronger, but I also needed something to have enough size to keep smoking when I turned off the heat source – because the cheese really would not hold up to continuous heat. As you can see from the photo, the oak chips on the top are really small, and I couldn’t be sure that they would continue to smoke without help, so I added the alder in an attempt to keep it smoking for longer.

Concertinering foil to make a larger smoker

Concertina Action

We tried to wrap the foil using the lip around the smoker, but could not get a good enough seal, so we decided that we would have to wrap the whole smoker up in a parcel. To seal the seams, we had to concertina long strips of foil, large enough to encase the smoker. We needed four widths, so it is a lot more foil than you think you will need.

A Frame for the cheese to rest on

A is for Almost an A Frame

Then I rigged up the cheese platform. I draped a simple piece of cheesecloth over the kitchen tidy, butI didn’t want the foil to fall in on the cheese, in case it conducted heat straight onto it.  So, I rigged up a kind of A-frame with some chopsticks, and I placed some pastry dough scraps I had leftover from cooking an apple pie over the top to prevent them piercing the foil.

Foil wrapped smoker

Fumer en Papillote

Then I wrapped the whole thing in foil, and sealed it tightly by scrunching up the edges. I put it on the smallest hob on my stove, and heated gently to make the smoke start. When the smell of smoke was pretty strong, I would turn off the heat, and just allow the cheese to sit in the smoke that was created. When I could no longer smell the smoke, about every 10-15 minutes, I would turn the heat on again, for a few minutes, and then let the cheese sit in the smoke again. I did this for 2 hours.

After an hour, I checked the cheese by opening a little of one seam and shining a torch into the gap. They were definitely still whole and plump and round then. I think that the problem was that in the second hour, I got distracted by cutting up toppings for the pizzas, and the heat may have stayed on a little longer than I had hoped for a couple of the times. I think if I make sure that I am not distracted, and leave the heat on for no more than two minutes each time, then I will be more successful.

Cheese Please blog badge

I was very pleased with the smoke, and I would use the smoke mix again. The flavour was rich, but not overwhelming. And I still believe that the gentle heat and then allowing the cheese to sit will work, maybe I need to experiment with the total time that the cheeses smoke for. However, I want to enter this to Cheese, Please! hosted by Fromage Homage, and so I have posted these very tasty smoke discs, in order to qualify in time.

Advertisement

13 Comments

Filed under Feast

Speculoos Ice Cream; Get Some Special Lotus in Your Life

Speculaas Ice Cream

Lotus Paste Without the Postage

When I used to do Foodie Penpals, many people would yearn for a jar of Speculoos (or Biscoff) paste in their parcel, and would covet jars sent to others. Since I live in the Netherlands, I have ready access to a supply from Lotus (original and best), if I should want any, which I mostly don’t. But, posting jars is expensive, especially since the smallest size they make is 400 g, so I decided to make my own. People make their own nut butters and choc-nut butters, so it couldn’t be that hard, right?  So I thought, until I actually looked at the ingredients.

It is mostly oil – palm, and rapeseed; sugar of one kind or another; rice and soya flours; and stabilisers. I won’t buy palm oil, so I  would really struggle to get the consistency right.

Last summer, I happened to read this recipe for Specunana Brownies. I won’t be making these, because I can’t eat bananas. But, Camilla’s photo with the brownies and ice cream really inspired me. I knew then that the best way to give speculoos to others without having to pay excess postage would be to make a speculoos ice cream, and write down the recipe for you all to enjoy.

I have entire notebooks (and a draft blog post) where I scribble down ideas that I have. If I live to be a million, I won’t live long enough to make them all, but it doesn’t stop me. Every so often, I go back over them, and I came across this one again recently. I had some egg yolks going spare, so I decided to give speculoos ice cream a go.

Speculaas Spices: cinnamon, nutmeg, ground ginger, aniseeds, cloves, peppercorns

Speculaas Spices

David Lebovitz makes a cinnamon ice cream using whole spices. I like this approach, and so I based my own recipe on as much whole spice as I could, whilst remaining true to the speculaas spice. As David suggests, you also have the option of adding more ground speculaas spice mix before you freeze it. If you aren’t near the Netherlands around the beginning of December, then you can always make up the spice mix I have used for my Kruidnoten. I found that with the amounts I used, I didn’t need it, but the strength of spice can vary hugely. I waited only until the custard had cooled, because I was happy with the taste – anything eaten cold will lose flavour, so the original base must have real depth. You can leave it overnight to be sure, if you prefer. If you do need to add some ground spice, add half a teaspoon at a time, mix well (there may be lumps), and taste before adding more.

Another main ingredient in the Lotus speculoos spread is brown sugar. I knew it would give the ice cream its classic colour, but I didn’t want it to be the dominant flavour. So I settled for a couple of tablespoons, which worked perfectly.

I don’t have an ice cream machine, so I made mine by hand. It will be quicker, but just as good if you use a machine, I’m sure.

This ice cream is a smooth and as tasty as the original spread,  just colder. So, instead of having Speculoos/ Biscoff envy, why not make your own?

Spice Trail Blog Badge

And since there is plenty of ginger in this recipe, I’m going to enter it for the Bangers and Mash Spice Trail.

Recipe: Speculoos Ice Cream

Ingredients

500 ml double cream
700 ml milk
5 cinnamon sticks
About 1/4 whole nutmeg, grated
1 tsp ground ginger
10 cloves
1/4 tsp aniseed
1/2 tsp whole black peppercorns
100 g caster sugar
2 tbsp dark muscovado sugar
6 egg yolks

Method

I made a handmade ice cream before, with pictures. The ice cream may be a different colour, but the steps are the same.

Break up the cinnamon sticks slightly into big chunks with a pestle. Then place the milk, cream and all of the spices into a saucepan. Heat to just below boiling point. Remove from the heat, and set aside for at least half an hour to steep. Once the spices have worked their magic, strain through a fine sieve.

Bring the milk back up to just under boiling point. Whisk together the egg yolks and both sugars until they are light and creamy. You’ll be making a custard base for the ice cream.

Put the bowl containing the eggs and sugar onto a damp cloth, so you can pour and whisk without the custard going everywhere. Very slowly, add the warm milk to the eggs and sugar, whisking all of the time. You must take your time with this stage, or the egg will scramble.

Once all of the milk and egg are combined, return it to the pan. Heat gently, stirring constantly to stop the milk from catching on the bottom. Do not allow the milk to boil; again, you’ll get spicy, scrambled eggs. When the custard has thickened so that  it leaves a line when you run a finger down the back of the spoon you are stirring with, it is done. Return it to the bowl you used to beat the eggs and sugar in.

Now you need to cool it down quickly. Run a sink full of the coldest water you can manage. You need enough water to come most of the way up the bowl that you are using, but the water must not get into the custard, or it won’t thicken. Place the bowl of custard in the sink and stir while it cools.

Taste the custard. If the flavour is already really deep, then you can proceed to freezing. If you are at all unsure, then refrigerate the custard overnight, and see how it tastes when it is much colder. If you don’t think there is enough flavour, then by all means add some ground speculaas spice. If you need to add ground spice, then you will need to give the custard a really good whisk, to avoid lumps of spice in the mix.

Pour into freezable containers with a lid on. I use recycled ice cream containers, which are perfect for the job.  Put the lids on, and freeze for an hour.

I always make custard with a balloon whisk, because it gives me more control, and doesn’t make the custard froth too much, which will give a weird consistency. However, I always churn the ice cream with an electric whisk, to really make smooth ice cream. Remove the ice cream into a mixing bowl, using a spatula to make sure there are no crystals left around the edges. Churn the ice cream until smooth, using the electric whisk. Return to the container, and refreeze. Repeat churning and refreezing until you have a thick, but smooth ice cream, then leave to freeze completely overnight.

Remove from the freezer about 10 minutes before serving.

15 Comments

Filed under Feast

From Milk to Mozzarella

Home made Mozarella balls

Milk Solids

This month, I have got quite a few cheese posts on the way, inspired by the Cheese, Please! Challenge over at Fromage Homage. As soon as she announced that the challenge this month was to be fresh cheese, I knew I wanted to play. My mind was racing over the possibilities (of which, more to come), but I have a birthday party coming up and I want to let the kids make pizzas (with ingredients made from scratch, of course!). The obvious place to start on my fresh cheese odyssey is with mozzarella. I’m probably going to enter all of my recipes in one larger round-up post at the end of the month, but I am going to share the individual recipes that I make with all the fresh cheeses too.

So, we’ll start at the very beginning; a very good place to start; mozzarella, a fresh cheese with bounce!

I looked around online, and decided that mozzarella from scratch can’t be that hard, can it? I quickly found a few nice recipes, which I cobbled together to come up with my techniques I share here. Most of the recipes include using a microwave, which I don’t have. Instead I have been most inspired by the Barefoot Kitchen Witch and the techniques used in this post from the New England Cheese Supply Company.

Cheese Please blog badge

Making one’s own mozzarella counts as a fresh cheese recipe, doesn’t it? So I think it will be a great entry for Cheese, Please! And even if it is really only precursor for the actual recipes, it doesn’t matter, it was pretty simple, I had a lot of fun, and I have the softest hands I have had in ages, so that’s an added bonus!

Recipe: Home Made Mozzarella

Ingredients

2 l milk – you can use whole, semi skimmed, pastuerised or whatever you like really. The only milk that doesn’t work is UHT.
¾ tsp citric acid, dissolved in 60 ml blood temp water
2 drops vegetarian rennet in 30 ml cold water
Salt to taste

If you do not have a measuring jug that allows you to measure such small amounts of liquid, remember that 1 ml of water =1 g, so you might find it a lot easier to simply weigh the water.

In the Netherlands, rennet is called stremsel, which I personally think sounds a lot nicer. The great news, whatever you call it, is that vegetarian and original rennet are widely available. My regular online brewshop stocks all varieties, as well as citric acid, which is great for me!

In addition to the ingredients, it is a good idea to gather together the equipment you will need before you start.

Equipment

Large saucepan
Thermometer, preferably one that can measure low temps
Cheesecloth or muslin, sterilised by boiling
Sieve
Slotted spoon
At least four large bowls
Boiling water
Ice

Method

Curds after citric acid and gentle heat

Lemon/ Curd

Add the milk to your saucepan, with the dissolved citric acid. Heat gently until it gets to 32ºC. If, like me, your thermometer will not measure that low (I used my jam thermometer, which starts at 60ºC), heat very gently until your curds look like the photo above. When you stick a (clean) finger in it, it will feel cooler than you, but not that much.

Curds after adding rennet and heating

Rennet Ready

Add the rennet water, and heat a little bit more to 37-38 degrees. Again, if your thermometer doesn’t go that low, then use the photo above. You will not feel a temperature difference if you stick your finger in this liquid.

Curds after rennet and with rest

Curd Wayhey!

Take the curds from the heat, then allow to sit for 5 minutes or so. You will clearly see the separation of the curds and the whey, which will look more watery. Cut the curds crossways with a sharp knife.

Fresh Curds

Fresh Curds

Line your sieve with a cheesecloth, or muslin square, and place over one of the bowls. With a slotted spoon, remove the curds from the pan, and put them in the sieve. They will look quite wet, like above. Cut and fold them over with the slotted spoon, to get rid of some more of the whey.

Curds, after most of the whey has run off

Whey Less!

The curds will go from watery to looking much drier, and will lose quite a lot of volume. Don’t throw away the whey, it has a lot of uses, and keeps for a long time in the fridge.

Curds, after initial kneading

Curd Need

Remove the curds to a separate bowl, and knead for a little bit, until it looks a lot less lumpy. Boil enough water to allow you to sit your sieve on a third bowl, so that the sievey bit is submerged. Get a different bowl of iced water ready as well.

Place the curds in the sieve in the hot water, and allow them to pour, stretch and fold off the slotted spoon. I’m sorry, I didn’t get a good picture of this, because it’s pretty hard to do this and photograph yourself, and the Big Guy was at work. Anyway, it will start to get more stretchy and smoother as you go on.

Curds getting smoother and sretchier

Come Together

As the water cools, the cheese will stop stretching. Once this happens, boil a kettle again. While it is boiling, remove the curds to the bowl and knead some more. At this stage, add some salt to taste, and knead to mix well.

Stretchy Cheese

Nearly There

Repeat submerging in the boiled water, stretching and then kneading until you have a stretchy, pliable cheese. You can either shape this as one large ball, or divide it into smaller balls if you prefer.

Shaped Mozzarella ball

Cheese Balls

I found it easier to use the hot water for one final shaping. I used the sieve and the slotted spoon to roll the cheese around in the hot water to make a ball shape.

Once you have shaped the cheese, submerge in iced water. Mozzarella should be used fresh, but can be stored in briney water the fridge for up to 4 days.

19 Comments

Filed under Feast

Simple, Cleansing Pork Pho

Pork Pho

A Fantasticaly Fresh TV Dinner

I have eaten rather well lately: at new lunch spots with my ladies; a rich lamb tagine, cooked for me by my friend from the Morning Claret; and a veritable feast of dim sum that I cooked up last Sunday, for the lunar new year. I had great fun doing it, but I did learn that it is probably OK to make some things in advance and heat them through on the day. There are so many intricate little dishes to make for a proper dim sum feast. I made char sui pork, with which I then made sticky rice and char sui bao (as well as chicken and mushroom hom bao). I made crispy seaweed (with curly kale), pak choi in garlic, and braised aubergine. I also made these excellent vegetarian shumai that Petra from Food Eat Love posted the other day. They were delicious, and gave me the courage to try other dumplings too. I’ve never quite understood how to tuck up the dumplings, but Petra’s clear instructions just clicked with me, and so I gave them a go. Unfortunately, I need a bit more practice before they look lovely, so there are no photos.

Encouraged by the success of the shumai, I decided to go all out, and have a go at xiao long bao, or the special pork dumplings, that are filled with mince and pork. Mine were loosely based on the Serious Eats Soup Dumplings. Nothing like a good bit of over-reaching to really show your skill. Or the limitations of it, in any case. More practice needed there, too, I think.

Don’t get me wrong, they were delicious, but not that soupy, as I managed to put slightly too much meat in the filling, and so the thin and delicate pastry broke. I’m not going to be put off, however. I was very pleased with them, and I will get better, I’m sure.

I made the Serious Eats stock for the bao, but I deviated a bit from the filling. For one thing, I don’t eat prawns, because I can’t really find any that could be said to be produced sustainably. Instead, I grated in ginger and garlic, and I put coriander through the pork mince.

After all that eating, today I was in search of something cleaner, and simpler. The Big Guy was out for dinner tonight with work, so as well as clean flavours, I wanted something simple, but that was comforting enough to settle in on the sofa with to catch up on some TV.

Having feasted so well at the weekend, I was not without leftovers, particularly the very good stock, and some of the xiao long bao filling. Despite needing the practice, I wasn’t in the mood for more dumplings, so I ventured further south for tonight’s dinner. Just like I deviated a bit from the Serious Eats filling, I have deviated a bit from a traditional Vietnamese Pho, but the resulting soup was just as fresh and comforting as I’d imagined it would be.

Cooking-with-Herbs-300x252

Since this dish contains herbs (and if I’d have had Vietnamese mint, I’d have added that too), and is Chinese/Vietnamese inspired, I have also decided that it is perfect for this month’s Cooking with Herbs, run by Karen at Lavender and Lovage. She is also hoping for recipes inspired by romance for this month, in light of it being Valentine’s day soon. I’m not so sure about all the romance, but I do know this soup is a great way to show yourself some love if you have over-indulged, or if you have a night to yourself.

Recipe: Pork Pho

The amounts given here are enough for one person.

Ingredients

For the Meatballs:

100 g minced pork

½ tsp soy sauce

1½ tsp rice wine

A pinch of sugar

A small clove of garlic, finely grated

A 1 cm piece of ginger, finely grated

Small bunch of coriander, finely chopped

For the Pho

400 ml good stock – I used chicken and pork from Serious Eats. Just chicken stock is also fine, but please don’t use stock cubes

½ tbsp fish sauce

½ carrot, cut into thin batons

1 garlic clove, thinly sliced

2 cm ginger, cut into thin batons

40 g rice noodles

2 spring onions, sliced on the diagonal

20 g mange tout, sliced on the diagonal

1 chilli, seeds in or out, whichever you prefer, sliced thinly on the diagonal

3-4 sprigs of coriander, leaves whole and the stalks finely chopped

Pinch of salt

Juice of about a quarter of a lime

Method

First, mix all of the meatball ingredients together, then roll them into small balls. You want them to be about marble size. Refrigerate for at least half an hour to help them to keep their shape.

Cook the stock with the fish sauce, garlic, ginger and carrots. Add the pork balls, cover and simmer gently for 10 minutes, until the meatballs are cooked through.

Meanwhile, cook the rice noodles. When cooked, drain, and add them and the vegetables to a deep bowl. Sprinkle  the herbs on the top.

Season the soup with salt, as required. Pour the soup over the noodles and the vegetables in the bowl, and squeeze in lime juice to taste.

Serve immediately, in front of the TV, and enjoy in peace.

9 Comments

Filed under Feast

A Summer Soup for Winter, Mostly From a Cupboard

Winter Vegetable Soupe au Pistou

A Staples Stand-By

The Big Guy has been worrying about our plants. More specifically, he has been fretting over a rather leggy basil plant, that really was on its last legs. After the third day of him agonising, I decided that we should use up the whole plant. Whilst mulling over winter uses of basil, I kept coming back to the thought of soupe au pistou; the Provençal summer soup.

Try as I might, I kept returning to the pistou, which is like pesto, but without the pine nuts. In fact, I couldn’t really think of anything else, so I gave in. Instead of courgettes and peas, it had to be about what I had knocking about. Between the fridge and the garden, I knew that I could come up with the goods.

Despite the name, the original recipe is more like a summer vegetable stew;  thick with beans, squash, tomatoes and alliums, as well as vermicelli. I could easily substitute most of these for suitable winter vegetables, so I went on a domestic forage.  As well as the basil, I grew thyme, garlic, carrots and cavalo nero (amongst other things), so these were definitely going in. The fridge yielded half a butternut squash, some aging tomatoes and a leek. If I didn’t have fresh tomatoes, I would have substituted these for half a tin of chopped tomatoes. That’s the brilliant thing about store cupboard soups – you use what you have.

I was also excited to experiment with cooking dried beans in my new pressure cooker. I’m dying to test the assertion that you can cook dried beans without a pre-soak, which will be amazing for someone who can forget to do the little things, like me. However, when I went to look, the cupboard was bare of dried beans, apart from some kidney beans I have, which wouldn’t have tasted right in this soup. I am still reluctant to forego the pre-soak for these beans, due to the toxins they contain. With a sigh, I added dried beans to my shopping list and went for tinned instead. I generally prefer dried beans for taste and texture, but I always have a tin or two on stand-by, because I am also a realist about my lack of foresight. Since this was a root-around, use-up, make-d0 type of soup, I wasn’t going to go shopping for beans, so I made use of what I had.

The classic soupe au pistou always contains starch. I used vermicelli, because I had some. Other pasta shapes (especially the small ones, such as ditolini, risoni, or stellini) are fine – or you could break up spaghetti into small bits and use those. You could add rice to this soup, in case you don’t have any pasta, or you can’t eat wheat. If you use rice you’ll need to add it much earlier than I suggest adding the pasta, or use pre-cooked rice.

This soup may be a winter version of a summer classic, but the intense smell as you mash the pistou is like a shot of glorious summer in a winter kitchen.

Since this is a winter warmer, and definitely comforting, I’m entering it into this month’s Cheese Please, over at Fromage Homage. There are some really great recipes there this month, so do come over and have a look.

Cheese Please blog badge

Recipe: Soupe au Pistou du Placard

Ingredients

For the Pistou:

1 fat garlic clove

A good pinch of salt

30 g basil leaves

About 60 ml extra virgin olive oil

About 40 g parmesan cheese, finely grated (or mature vegetarian cheddar, since parmesan is not vegetarian)

1 tomato, peeled and de-seeded (optional)

For the soup:

1 leek, washed and sliced

2 carrots, diced

1 bay leaf

1 tbsp olive oil

3 cloves garlic, minced

1 tsp fresh thyme leaves, or ½ tsp dried thyme

1.5 l vegetable stock

400 g butternut squash, or pumpkin, diced

100 g cavalo nero

400 g can of cannellini beans, drained and rinsed

2 medium tomatoes, diced; or half a tin of chopped tomatoes

100 g vermicelli noodles, rice or any other small pasta shape

Method

Make the pistou. I like to use a pestle and mortar, but you can also use a small food processor. If you are using the food processor, either mince the garlic first with a chef’s knife and the salt, or grate it on a microplaner before adding it to the processor.

Whichever method you are using to make the pistou, add and blend the ingredients in this order: garlic and salt, basil, some of the oil and cheese. Be sparing with the both the oil and the cheese. You must taste as you add these, because all basil will vary. You want  fairly thick pesto, but it still needs to be flavoursome. Once the pistou is to your liking, stop adding things.

Make a concasse of the tomato and stir it through the pistou. Traditionally soupe au pistou has tomato flesh gently crushed into the pistou with a pestle and mortar, which you can also do if you prefer. If you are using tinned tomatoes, omit the tomato from the pistou, or you risk diluting it too much.

Prepare all of the vegetables for the soup. I decided to cook the cavalo nero stalks separate to the leafy greens. So, I stripped the greens from the stalks, and sliced both. Slice the stalks into 1cm chunks, like the rest of the vegetables. Slice the greens thinly, and keep them separate.

Sweat  the leek, carrot and the bay leaf in the olive oil in a deep pan, until the leek turns a vibrant green. Add the garlic and thyme and sweat off for another minute or so.

Add the stock, and simmer for a few minutes, or none at all, if you prefer your carrots crunchy. Taste for seasoning and add salt and pepper as necessary.

Add the pumpkin and cook until you can just pierce it with the point of your knife. The time required will depend on the size of your dice. It took me about 5 minutes, based on 1cm dice.

Chuck in the beans, chopped tomatoes, and cavalo nero stalks, and allow them to simmer for five minutes, before adding the vermicelli and the greens.

Allow the soupe to cook until the pasta is al dente. Check for seasoning, and serve in deep bowls, topped with a large dollop of the pistou.

16 Comments

Filed under Farmed

From the Last Food of Christmas

Easy, handmade mandarin and dill sorbet

Edible Things Gave to Me
A Sorbet From the Mandarin Tree

I bet a few of you still have some things knocking about after the Christmas holidays. Especially mandarins.

As you may have noticed, last year was the year that I discovered the joys of combining desserts with herbs. People have been putting things like mint, basil and lemon balm in desserts forever. Last year, I mostly branched out into fennel, with my Rhubarb Foolish and Fennel and Strawberry Tarts. This year, I see no reason to stop experimenting.

I got inspiration for this dish from taking a quick break from the Christmas prep and sneaking off for five minutes with a mandarin. I must have still had some dill on my hands from the Gravad Lax. What I ended up with was inspiration. This is a great combination, as if they were made to go together. The dill is actually pretty subtle in this, it somehow seems to enhance the mandarin flavour, making it really sing on your tongue.

Easy way to juice mandarins

Top Tip!

Mandarins can be a little bit hard to juice by hand. Well, hard on the hands anyway, as I found out last year when making marmalade. Their skins are so soft and thin, that if you have any number to juice, it becomes uncomfortable very quickly.

If you have a fancy juicer, all well and good. If not, and you ever have to juice a few mandarins, this tip will save you from feeling that you have juiced more of your hand than you did the fruit. Peel them, then bung them in a jug and juice them with a stick blender. Pour the resulting juice through a square of muslin. You can either leave it to drip through for a few hours, if you want a very clear juice; or you can squeeze it through straight away if you don’t mind a cloudier juice.

Tips for using clumped sugar

Rock Sugar

In fact, I’m full of top tips today. When cleaning out the cupboards recently, I came across half a bag of badly-stored sugar, that had got a little damp at some point. As you know, I hate to waste food, so I kept this, knowing that I would find something that it would be suitable for. This recipe is just the thing, because it requires a simple syrup. I just put it in a ziplock bag, wrapped it in a couple of tea towels, and bashed out the lump with a hammer. It wasn’t fine sugar, but I could get the right amount out to melt gently into a syrup. Obviously, it would have been better not to abandon it to its fate in the first place, but I feel good that it didn’t go to waste.

And talking of not wasting food, this recipe also uses another the things that I always have knocking around in my fridge or in the freezer – egg whites. I absolutely love sweet and savoury egg-based sauces, and make all manner of custards, hollandaise and fresh mayonnaises on a regular basis. I am always in need of recipes for egg whites. If you have more suggestions, please do share.

As well as using up all the leftovers, this clean, bright and refreshing sorbet is the perfect antidote for the heavy and rich Christmas foods we have been eating recently. It is also a really easy recipe, to make, even if you don’t have a ice cream maker (which I don’t).

Cooking-with-Herbs-300x252

Coincidentally, this recipe really fits the brief for this month’s Cooking with Herbs, run by Karen at Lavender and Lovage, so I’ve entered it on her blog. There are always so many great recipes there, so hop over with me at the end of the month to have a look.

Recipe: Mandarin and Dill Sorbet

Ingredients

8 mandarins, preferably unwaxed

200 g granulated sugar

300 ml water (and maybe a little more)

about 25 g dill

1 egg white

Method

Wash and zest six of the mandarins, and juice all of them, using the handy method I outline above.

Put the zest, sugar, water and dill in a saucepan. On a gentle heat, melt the sugar, and then bring to a boil. Once it is boiling, cook the syrup for a further five minutes, then leave to cool for ten minutes.

Taste the syrup. At this point, you should be able to taste the dill quite well, but it does come after the less-subtle mandarin punch. If the dill is enough for you, set the syrup aside to go cold. If you are having trouble tasting the dill, add a few more sprigs to the syrup, before you set it aside.

Once the syrup is completely cold, strain it through a fine sieve, add the juice, and make it up to a total of 600 ml with cold water, if it falls short.

Pour the entire mix into a shallow container with a lid. An old ice cream tub is ideal. Freeze it for about 4 hours, until the sorbet is thick and syrupy.

Whisk the egg white to form soft peaks. Put the sorbet mixture into a mixing bowl, and whisk it thoroughly to break up the ice crystals.

Add a little of the sorbet to the egg white, and mix it in thoroughly. Fold the rest of the sorbet to into the egg white.

Return to the container and freeze again. Check it after a couple of hours to see if the egg white has separated a little. If it has, re-whisk it.

The sorbet will be ready after seven hours from when you added the egg white, but stores well for longer. Remove from the freezer 10 minutes before serving.

This should be easy enough to make in an ice cream maker, too. I guess you will need to churn it for a bit, then add the whisked egg white, then churn again. Just follow the manufacturer’s directions for the rest.

17 Comments

Filed under Feast

Pytt i Panna – Swedish Ways With Leftovers

Pytt I Panna

Leftover? Not Any More

Happy New Year to you all, I wish that you’ll get what you need this year.

I rang in the New Year with friends old and new, and some fantastic food made for me by my friend who writes the Morning Claret. As you might expect, this was accompanied by some excellent wines.

I usually start the year with a few resolutions. As the road to hell is paved with good intentions, and I didn’t have the best year in terms of regular blogging last year, I decided that this year, I would settle for simply committing to at least one blog post a week for the next 52 weeks. I already have a few that I want to share with you, and I have some great ideas for recipes that I am going to be testing for you in the near future.

If I get this done this year (with some much improved photography this year, thanks to my new camera the Big Guy bought me), then I will consider this a resolution well met. However, if you made any resolutions, I’d love to hear about some of yours.

Regular readers will know how much I love leftovers. To me they are ingredients to make delicious new dishes from. Pretty much everything can go to making new edible things. I use scraps in my stock, make trifle when life hands me leftover panetone, and even make ice cream from leftover mincemeat (which I think is an idea I got from Nigel Slater, so I won’t be blogging about that). If all other inspiration fails, there is always soup, which is often the best when you tinker about to use up the contents of your fridge.

There is always one dish that you can rely on to use up all the bits and bobs left over from a large meal. For Brits, it is Bubble and Squeak. The Chinese might fall back on a fried rice dish. If you are Swedish, you make Pytt i Panna – literally translated as “pieces in the pan”.

Since many of their meals rely on meat, vegetables and potatoes, this staple is as versatile as bubble and squeak. If you can fry it, it will go in. You can use up leftover cooked veg, or you can use up those sad old specimens that you’d intended to make something with, or the knobbly ones from the veg box that you have run out of inspiration for. You can also use a mix of both, if that is what you have. I would personally not recommend that you use tomatoes in this dish, but they would be rather good, well-grilled and served on the side.You should always have the onion for real pytt i panna, sweating it until it starts to colour, the caramelised bits are what makes this dish so good.

This time, I used up the last of the Christmas ham, made from a wild boar, again because that is what I had. I’ve also made this with beef, pork, leftover sausages, chicken, and a pretty excellent vegetarian version with a nut roast I’d made. I’m sure it would be equally good with turkey, and especially with goose, if that was your Christmas dinner of choice – especially cooked up with the rest of the bits and pieces in some of the lovely goose fat.

As you can probably tell from the description above, the following recipe does not need to be adhered to strictly, it is more of a guideline, based on what I had available on the day. The only two essential ingredients are the potato (sweet potato also works here, as would Jerusalem artichoke and celariac), and the onion, and you must allow both of them to colour, but apart from that just put pieces in a pan, as the name suggests.

This dish is lovely with a fried or poached egg on top. I had it with a side of slow-cooked red cabbage, which was also great.

I hope you made the most of your Christmas leftovers, let me know what you did in the comments.

Recipe: Pytt i Panna

Ingredients

5 medium potatoes or leftover boiled potatoes
About a quarter of a cauliflower that was past its best
2 onions, roughly chopped Leftover Christmas ham – I had about 150 g
1 tbsp cooking oil
Knob of butter
Salt and pepper to taste
A small bunch of dill that needed using up

Method

Dice everything into roughly 1 cm sized pieces. Break the cauliflower into small florets and dice the stalks.

If you are using raw potatoes, parboil them until they just allow a knife tip. Blanche the cauliflower in a separate bowl, and drain after 3-4 minutes.

In a large frying pan, cook the onions in the oil until they are starting to colour. Add the potatoes, again, cooking until they have some colour all over.

Add the knob of butter, ham and the cauliflower to the pan, then cook through. If the cauliflower also takes on a little colour,  so much the better.

Season well, and sprinkle with dill before serving.

5 Comments

Filed under Feast

Gravad Lax: Buried Treasure

Gravad Lax with creamy dill sauce

A Christmas Cracker

I love trying food from different cultures, especially as a different take on Christmas food, such as our Aussie Christmas dinner. I guess that by now, Swedish food isn’t so different for me, but I thought I’d share a favourite recipe of mine.

A traditional Swedish julbord, or “Christmas table” is a pretty meat-heavy affair, eaten at 4pm on Christmas eve, after the nation has sprung to life again following their Disney favourite; “Kalle Anka och hans vänner önskar God Jul” or “Donald Duck And His Friends Wish You Happy Christmas”. It is always the same clips, and this is one Christmas tradition I’m not overkeen on, but when in Stockholm…

Anyway, back to the julbord; it groans under a ham, which for me this year was a wild boar one, because the out-laws know I don’t like to eat factory farmed meat; various kinds of inglagd sill ; cold cuts; sausages; lutfisk; spare ribs; and Janssons Frestelse.

In my family, we also often have gravad lax. Also known as gravlax, gravlaks, graavilohi, or graflax depending on where you are in Scandinavia. In any country, it means buried salmon. In times before refrigeration, especially in northern European countries where snow covered the ground for a good part of the year, curing and burying meat was a great way to preserve it. Originally, people would use spruce or pine needles in the cure, but the balance needs to be perfect if your fish is not to end up tasting of a certain kind of disinfectant.

These days, everyone can make this easy recipe; you don’t even need a spade! In fact, you still have time to make it in time for a new year’s gathering, if you are having one. It looks impressive, for relatively little effort, and it is a big hit.

Organic Farmed Salmon

Organic Farmed Salmon

One thing I must urge you is to source your fish well. The increase in popularity of salmon in the last decade or so is concurrent with fish farming, most of which causes horrible environmental damage, due to over feeding and routine, excessive use of antibiotics. At the same time wild stocks are seriously dwindling, due to overfishing, ocean acidification and habitat destruction. In my opinion, salmon should be a treat, eaten very occasionally, so that we can afford to eat the best organically farmed salmon we can, meaning there is no unnecessary antibiotic use, and better care is taken to ensure that the fish are not over fed. This cure also works well for other types of fish, so you could still enjoy the recipe with cheap and plentiful fish, such as mackerel, or herring, so do feel free to experiment.

I made this amount of salmon for a large party, so you can also reduce the amounts of fish you use, but you must have enough cure to really cover the fish, so make a little more of that than you think you might need for the amount of fish that you have.

Recipe: Gravad Lax With A Creamy Mustard Sauce

Ingredients

For the Salmon:
100 g demerera sugar

75 g sea salt

100 g dill

1 tbsp juniper berries crushed

1.5 kg salmon fillet, halved

3 tbsp brandy

3-4 bay leaves

For the Sauce:
250 ml crème fraîche

2-3 tbsp finely chopped dill, depending on how much you like it

2 tbsp wholegrain mustard

1 tbsp runny honey

Salt and pepper to taste

Method

Gravad Lax mix

A Fitting Salmon Send Off

Mix together the salt and sugar until really well combined. Remove the stalks from the dill and chop the rest finely. Mix into the cure with the juniper berries. The cure needs to look pretty green and herby, because you want to get a lot of flavour in there.

In a shallow dish, get some cling film or a cheesecloth, and coat with about a quarter of the cure. Press one half of the fish down well into the cure, skin side down. Rub the cure into the skin, and leave skin side down on the wrapping.

Then you need to load the flesh with the cure. Do this by brushing the flesh with half the brandy and laying about another quarter of the cure over the flesh. Lay a few bay leaves over the fish.

Repeat the brandy and cure on the flesh of the second fillet. Once it is well covered, then lay it on the first fillet, so they are flesh to flesh. If the cure falls out, tuck it back between the fillets.

Rub the last of the cure into the skin of the second fillet. Wrap the fillets tightly together. If you are using cheesecloth, bind it with a series of butcher’s knots, as tight as you can get. The fish will lose liquid as it cures, so it is best to keep it in the shallow dish, unless you really like cleaning the contents of your fridge.

Weigh down the fish, by piling a load of tins on top of a baking sheet on top of the fillets, and placing the whole lot into the fridge. Leave it to cure for 3 days, turning once each day. Rinse off and pat dry with kitchen towel before serving.

What Gravad Lax Should Look Like

The Finished Product

To make the sauce, simply mix together the crème fraîche, dill, mustard and the honey. Season to taste.

Serve with the thinly sliced gravad lax on bread, melba toast or knäckebröd, as a delicious starter or hors d’oeuvre.

11 Comments

Filed under Feast

Asian Flavoured Beans: Not Just For The French


Asian Flavoured Beans

Beans and Buns – Getting Out Of A Glut Rut

Defrosting the freezer is often a boring, and much put-off task (although you should do it fairly regularly, to keep it running efficiently). I was forced into doing mine today. It was getting difficult to open the top drawer, and it had been jamming accusingly every time I went in there. There was definitely a sulky kind of Huh! noise when I tried to shove it back in. So I finally gave in to the nagging.

You may be wondering why I am boring you with all of this domestic drudgery (you never see Nigel Slater having to give that fridge with the camera in the back a good clean do you?).  Well, I found some hom bao lurking in there, and knew I had found lunch. These little buns freeze so well, and they really keep. Well worth making a batch when next the baking bug hits you, and freezing those that you can’t manage on the day.

As I wanted lunch to contain at least one of my five a day, I also wanted a suitable vegetable side dish. A quick ferret around in the fridge revealed a lot of unsuitable veg, and many of my home-grown runner beans, which are still coming thick and fast at the moment. I didn’t really fancy a stir fry of carrots, tomatoes and lettuce, so beans it was.

It’s funny how you can get a bit stuck into one or two ways to cook a particular vegetable. For me, runner beans are always about my ever-popular green bean chutney, or gently steamed and served with butter and black pepper. If I have to combine them with something, I go down the Lebanese route, and stew them in a garlicky tomato sauce (also very highly recommended). Something that I have never previously done with them is combine them with Asian flavours.

There are many Asian dishes that have beans in them, although they more commonly use french or yard-long beans. There is no reason that runners cannot shine just as well, especially if they are garden fresh. I wanted to stick with a vaguely Chinese style for these, since they were to accompany the Hom Bao.

This dish would also be great with a tablespoon of toasted sesame seeds sprinkled over the top at the end. As it was a cleaning-out-the-cupboards kind of meal, and I didn’t have any sesame seeds, I just left them out. You can choose which one you prefer.

I was very happy with these beans, which took on the salt and spice brilliantly. It just goes to show that a lot of new possibilities can open up for you if you go a very small way outside your usual recipes. I’m very happy to have another way to use a seasonal glut of runner beans (although it really is never a problem, I love them).

Do you have a favourite runner bean recipe? I’d love to hear about it in the comments.

Recipe: Chinese-Style Runner Beans

Ingredients

About 400 g runner beans

1 tbsp sunflower oil

2 garlic cloves, crushed to a paste

½ cm fresh ginger, finely grated

2 tbsp soy sauce

½ tsp sesame oil

Method:

String the beans (or grow a stringless variety, and save yourself a bit of time). Slice them diagonally into 1 cm thick slices. Add to boiling water on the stove, and cook over a medium heat until the water comes back to the boil again. Do not salt the water,  it will make the beans grey and there will be plenty of salt from the soy in the finished dish.

Once the beans have come back up to the boil, drain them and set aside.

Heat the sunflower oil in a frying pan or wok. Add the garlic and the ginger and cook until the fragrance of the ginger hits you. Add the beans and the soy sauce, and cook until the soy has thickened slightly.

Remove from the heat, and stir through the sesame oil and the seeds, if you are using them. Serve immediately.

5 Comments

Filed under Farmed

Super Calamansi-istic

Corn and Calamansi Salsa

Salsa Alidocious!

As you will have seen from my Philippine Tasting Plate, I brought back a few things to use in my home cooking. And what better way to celebrate the recent good weather we’ve been enjoying than to use tropical ingredients?

I got the idea for this dish from a corn salsa I ate at Tomatillo. As is often the way, restaurant food inspires my dishes. The Tomatillo salsa is nice, but I knew that I could twist it a bit to make it even better.

I was already thinking that it needed courgette. Then I remembered the calamansi that I had packed away so carefully, and that was now residing in my fridge. I knew that I had to try to make the dish that began a while ago, and had now taken root in my brain.

Calamansi

Calamansi – about the same diameter as a 10 p piece (or €2)

Calamansi is a small citrus fruit. You can use them like limes, in salads dressings and to season stocks etc, but they are also a popular drink in the Philippines, as well as being a key ingredient in sisig. They are both sweet and sour at the same time, and have a lot of flavour despite their diminutive size.

They also have a lot of pips. I was going to chance my arm and see what would happen if I planted a few, but I forgot to tell the Big Guy what I was doing, and they got thrown out. Ah well, I know that growing citrus from seed is notoriously unreliable, so I probably saved myself a fair bit of disappointment in any case.

I first made this salsa for a birthday canal boat picnic I held for the Big Guy. It was great as a dip with tortilla chips. I was a little nervous to present it as salsa to that crowd, amongst whom were some Americans who have an in-depth knowledge of all things Tex-mex. I have previously been taken to task for a guacamole, because I had put tomato in it, which apparently makes it pico de gallo, and not guacamole. I have also been told my (Mexican recipe) chile con carne is not a real Chile (but the consensus was that it was very tasty). I needn’t have worried, this went down a treat with everyone on the boat. And no-one objected to me calling it a salsa.

I have since served this at a barbecue, where it was similarly well received, and went equally well as a garnish with my home made burgers as it did with vegan enchiladas. I think it would be great as a salad as well.

I made this with tinned corn, but you could also use fresh a little later in the year, although I’d recommend grilling it in the husk first on either the barbecue or under a hot grill. Then shuck and add to the salsa.

Recipe: Corn and Calamansi Salsa

Ingredients

1 red onion, finely chopped

Juice and zest of 6-8 calamansi (or one lime)

½ courgette, finely diced

1  tin of sweetcorn, drained (or one whole corn cob, grilled and shucked)

1-2 red chilis, deseeded and finely chopped

Small bunch coriander, including stalks, finely chopped

Salt and pepper

Method

If, like me, you dislike raw onion then steep the chopped onion in the calamansi juice and zest for at least 10 minutes before you make the rest of the salsa. The amount of calamansi that you need will depend on the size of your onion. You should ave enough juice to just coat all of the onion. I have made this twice, and needed different amounts each time.

Raw courgette doesn’t taste of much, which puts many people off trying them twice. The secret to bringing out the flavour is to blanch them.  Because these are finely diced, they only need to be steeped in boiling water for about 30 seconds or so. If you like, you could squeeze a little more calamansi juice (or a couple of drops of lime) into the water. Drain immediately, and run under the cold tap to stop them cooking further. Allow to drain completely. The courgette will now taste of courgette, but will still have a bit of bite.

Mix together the onion, courgette, sweetcorn and chili. Season well, and set aside the salsa for about an hour to allow the flavours to meld. Taste, and add more chili, citrus juice or salt and pepper to taste. Stir through the chopped coriander and serve.

2 Comments

Filed under Feast